


DIY Vertical Laptop Stand With Wood Scraps

Got some scrap wood lying around? Solve the WFH problem of having dual computers with this DIY vertical stand/laptop dock!
Find the detailed step-by-step here!
Check out the quick video tutorial! 👆
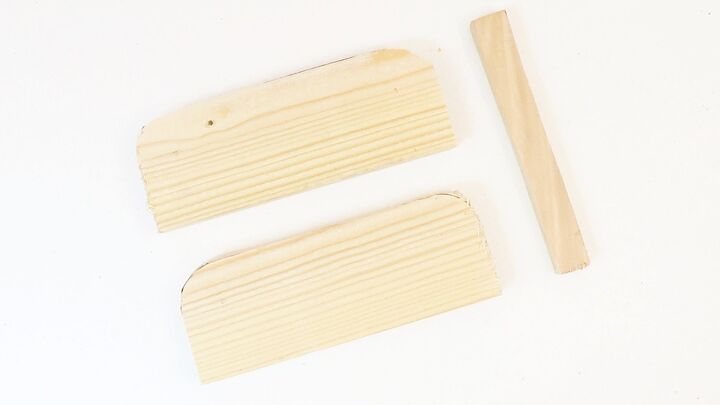
To start, cut two 2 1/2 x 6 1/2″ (6.3 x 16.5cm) rectangles with rounded corners in a 3/4″ (2cm) thick piece of wood.
Using the thinner wooden board (at least 1/2″ (1.3cm) thick) cut a 6 1/2″ (16.5cm) long rectangle. The width depends on your laptop so measure or check the specs online for your model to find out how thick your laptop is. Add 2mm to this to give a little wiggle room when you slide your laptop in the dock.
Sand all your wooden pieces with medium to fine sandpaper.
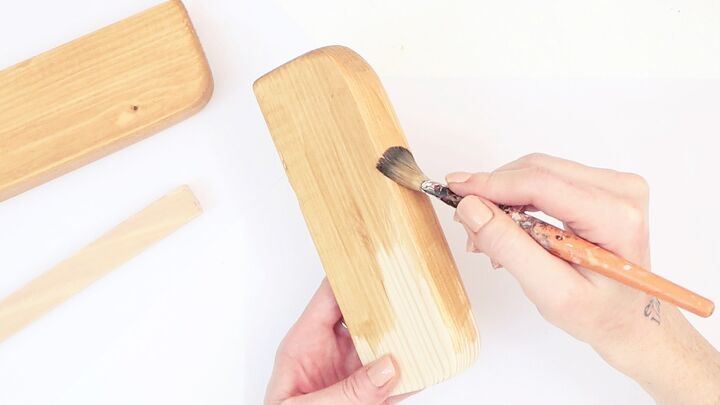
This step is optional but you can stain the laptop stand pieces with your favorite wood stain.
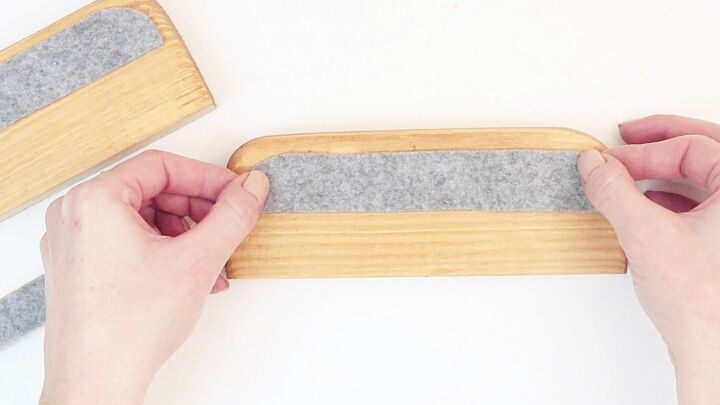
Cut two 5 1/2 x 1″ (14 x 2.5cm) strips in thin felt fabric. Cut another felt strip to fit the central piece adjusted to the width of your laptop.
Cover the felt with glue and press on the 2 sides pieces and on the central piece. Let it dry fully.

To assemble the DIY vertical laptop stand, apply wood glue to the sides of the central piece and fit it snuggly in between the 2 sides pieces.
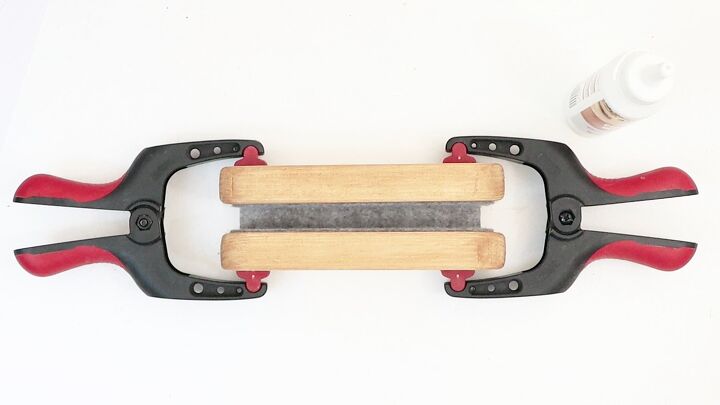
Use wood clamps to tighten all the pieces while they dry.

And voila! You’ve reclaimed some much-needed desk real estate. Happy productivity!

Find me on Pinterest for more easy DIY ideas!
Resources for this project:
See all materials


Comments
Join the conversation
-
Going to have my talented oldest son make this for me. Can’t wait! He is so good working with wood!
-
What a great idea and it can be used for more than just laptops! Bravo with the simplicity!


Frequently asked questions
Have a question about this project?