


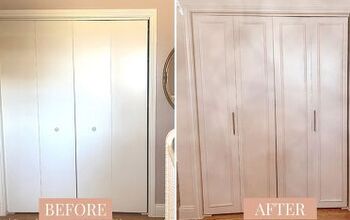
Closet Door Makeover: How to Upgrade a Door With Panels & Paint

Are you looking for a closet door makeover? In this tutorial, I'll guide you through the step-by-step process of transforming your plain closet door into a chic focal point using panels and paint.
By the end of this project, you'll have a beautifully revamped closet door that adds character and charm to your space. Let's get started!
Tools and materials
- Tape measure
- Closet door panels (pre-cut to size)
- Paint and primer
- Paintbrushes and paint rollers
- Liquid nails or strong adhesive
- Brad nailer and nails
- Trim pieces (for added detail)
- Wood filler
- Caulk gun and caulk
- Sandpaper (medium and fine grit)
- Clear polyurethane coat
- Drop cloths or old sheets
- Safety goggles and gloves
- Dust mask
- Screwdriver
Steps
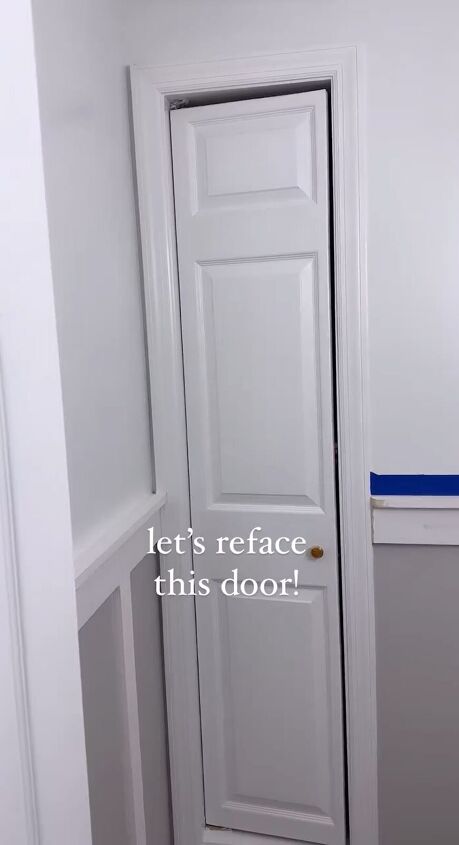
Step 1: Measure and Prep
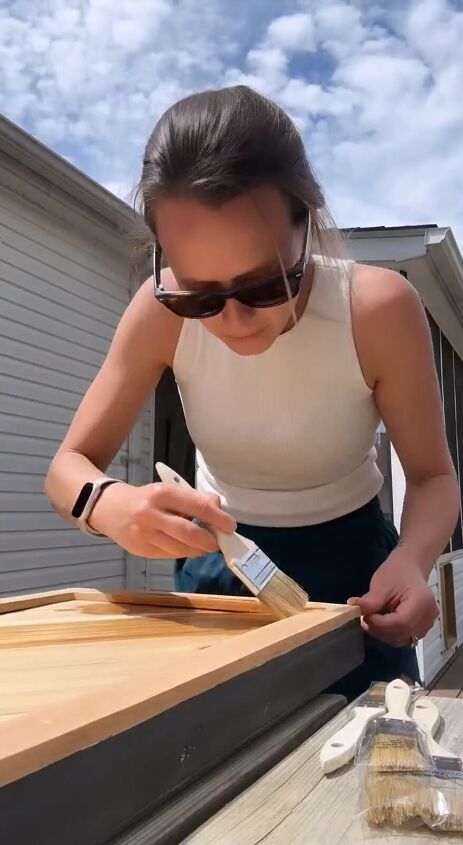
Begin by measuring your closet door frame to ensure that the panels you have chosen will fit perfectly. Remove the door from its hinges using a screwdriver, and place it on a stable work surface covered with drop cloths or old sheets to catch any drips or spills.
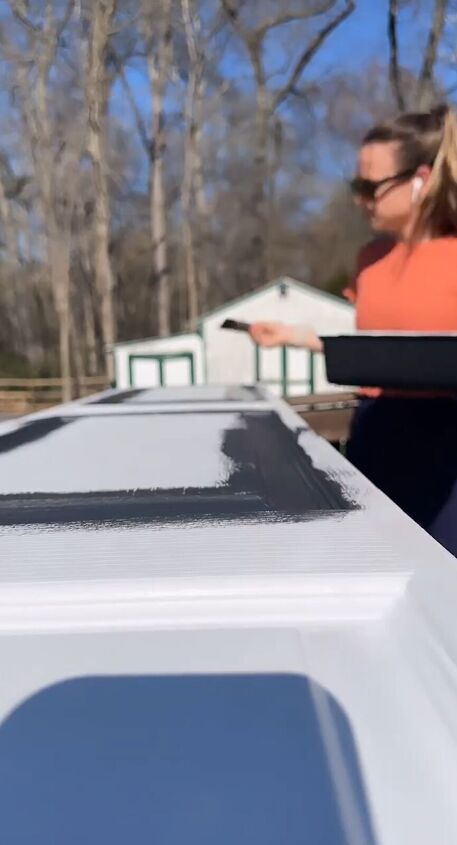
Step 2: Paint the Door
Apply a coat of primer to the entire door surface, allowing it to dry as per the manufacturer's instructions. Once the primer is dry, apply your chosen paint color evenly using a paintbrush or roller. Allow the paint to dry completely before moving on to the next step.
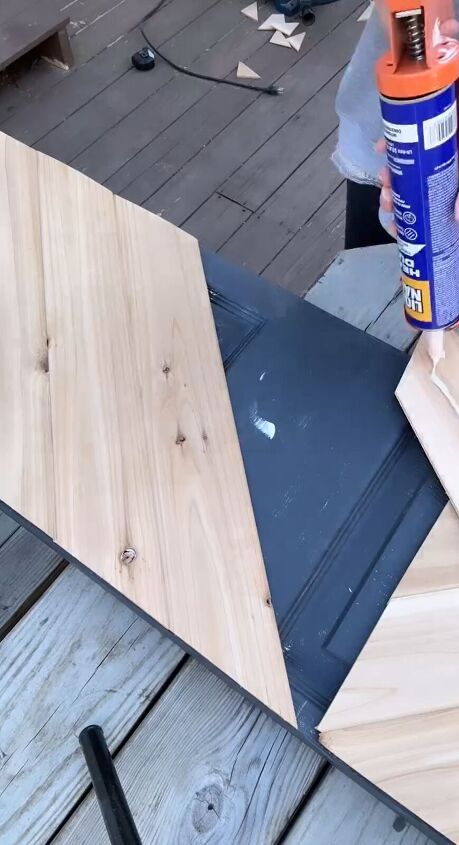
Step 3: Attach the Panels
Using liquid nails or a strong adhesive, apply a generous amount to the back of each panel. Carefully position the panels on the door, ensuring they are centered and aligned. Press down firmly to secure the panels in place.

Step 4: Add Trim for Detail
To enhance the visual appeal of your door, use a brad nailer to attach trim pieces around the edges of the panels. This will create a framed effect and give your door a polished look. Make sure the trim pieces are securely fastened.
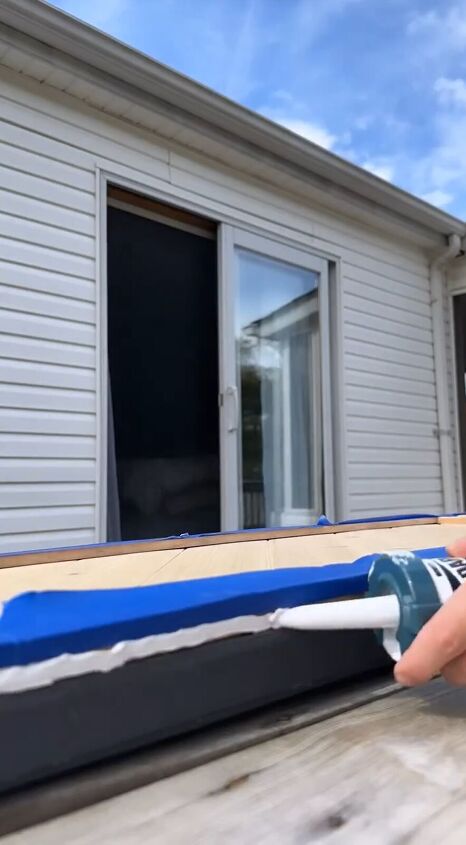
Step 5: Fill Holes and Caulk Gaps
Inspect the door for any gaps or nail holes. Use wood filler to fill in holes and gaps, and allow it to dry. Once dry, sand the surface with medium-grit sandpaper to achieve a smooth finish. Use a caulk gun and caulk to fill any remaining gaps between the trim and panels.
Step 6: Paint Touch-Ups
Give the door a final once-over, touching up any areas that may need additional paint. This is also a good time to paint the sides of the door that might not have been painted initially.
Step 7: Apply a Clear Coat
To protect your newly painted and paneled door, apply a clear coat of polyurethane. This will give the door a durable finish that's resistant to wear and tear. Follow the manufacturer's instructions for applying the polyurethane and allow it to dry completely.
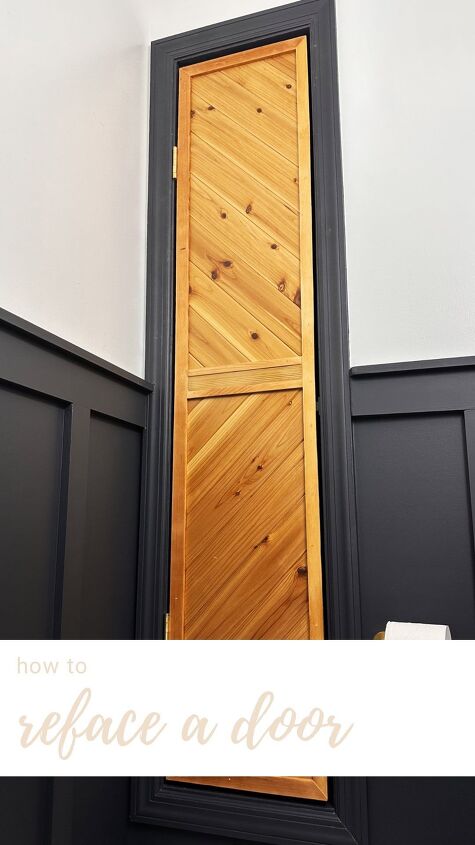
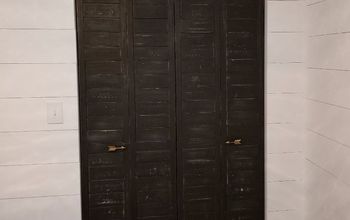
Closet door makeover
Congratulations! You've successfully completed your closet door makeover. By following these steps, you've turned a plain door into a stylish focal point that adds character to your space.
The combination of panels, paint, and trim has given your closet door a whole new look that you can be proud of. Enjoy your revamped closet space and the sense of accomplishment that comes with a DIY project well done!
Follow @well_shetried on Instagram for more DIY ideas.


Frequently asked questions
Have a question about this project?