


How to Do a Simple Desk Makeover: From Old to New

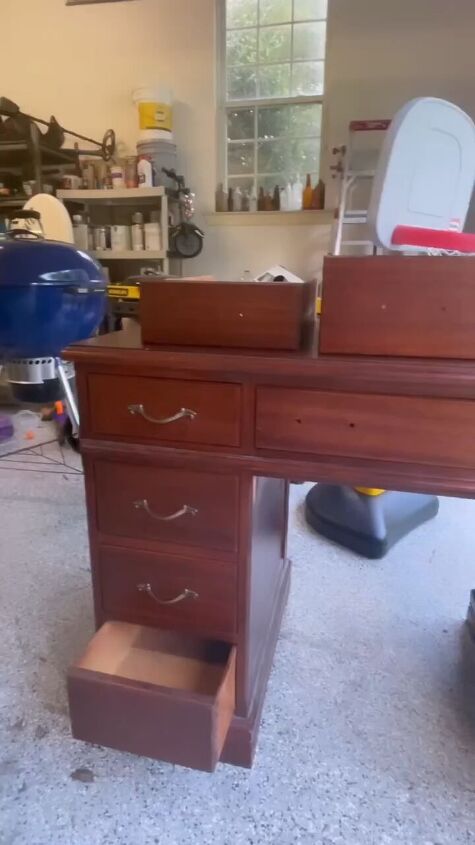
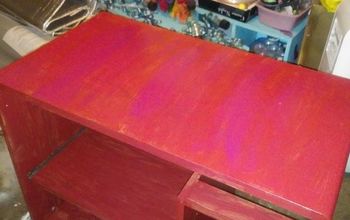
I'm excited to share with you my old desk makeover with before and after photos. This dark desk was too red for our guestroom so we transformed it into a beautifully restored piece of furniture for our guest room.
It may sound like a lot of work, but trust me, the end result is totally worth it! Let's get started and I’ll show you what I used to achieve this look so you can follow along.
Tools and materials
- Old desk
- Easy-Off oven cleaner
- Chlorine bleach
- Drop cloth or plastic sheet
- Sandpaper (medium and fine grit)
- Tack cloth
- Weathered oak stain
- Early American stain of your choice
- Paintbrush or foam brush
- Rags or old cloths
- Can of whitewash
- Flat, matte topcoat
- Screwdriver (for hardware)
- Ventilation mask
- Rubber gloves
- Safety goggles
Steps
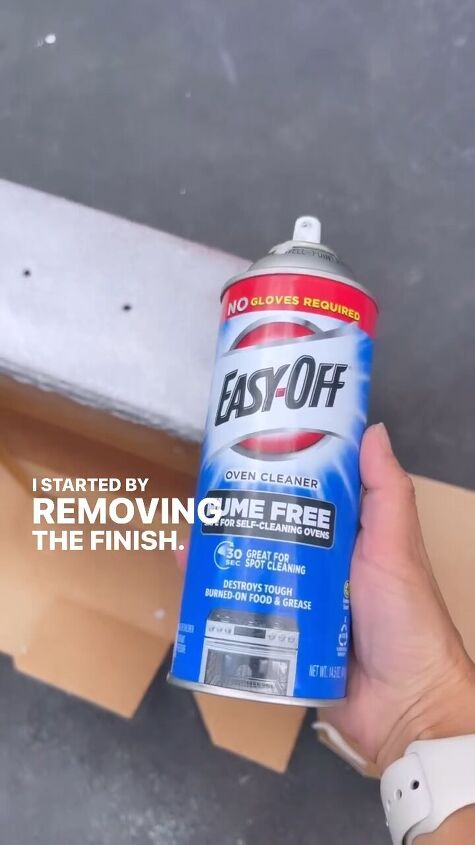
Step 1: Strip the finish
Place the desk on a drop cloth or plastic sheet in a well-ventilated area.
Put on rubber gloves and safety goggles for protection. Spray Easy-Off oven cleaner generously over the entire surface of the desk. Let it sit for about 15 to 20 minutes to allow the finish to soften.
Use a scraper or a putty knife to gently scrape off the softened finish.

Step 2: Bleach the wood
After removing the finish, rinse the desk thoroughly with water to remove any residue from the Easy-Off cleaner.
Put on rubber gloves and safety goggles again. Mix a solution of bleach and water (about 50/50) in a well-ventilated area. Apply the bleach solution to the wood surface using a brush or a rag.
Let it sit for a few hours or until the wood reaches the desired lightness. You may need to repeat this process to achieve the desired effect.
Rinse the desk thoroughly with water and let it dry completely.

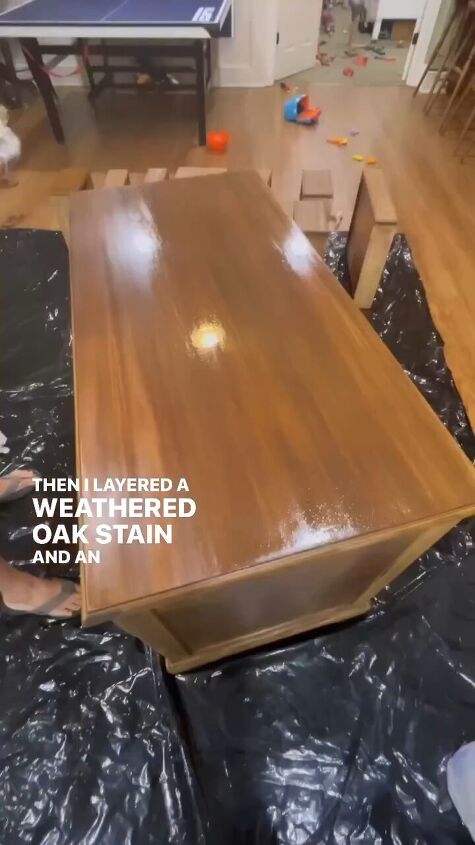
Step 3: Layer the stains
Sand the bleached wood lightly with medium-grit sandpaper, then go over it with fine-grit sandpaper to smooth the surface. Wipe the desk clean with a tack cloth to remove any dust.
Apply a weathered oak stain to the desk's surface using a brush or foam brush. Follow the manufacturer's instructions for drying times.
Once the weathered oak stain is dry, apply your choice of an Early American stain over it to achieve the desired depth of color. Allow it to dry thoroughly.

Step 4: Apply the whitewash
After the stains are dry, mix the whitewash solution per the can’s label. Apply the whitewash to the desk with a brush or rag, focusing on the areas you want to distress. Wipe off excess whitewash with a rag to achieve a weathered look if desired.

Step 5: Apply a top coat
Once the whitewash is dry, apply a flat, matte top coat to protect the finish and give it a smooth appearance. Let the top coat dry completely according to the manufacturer's instructions.
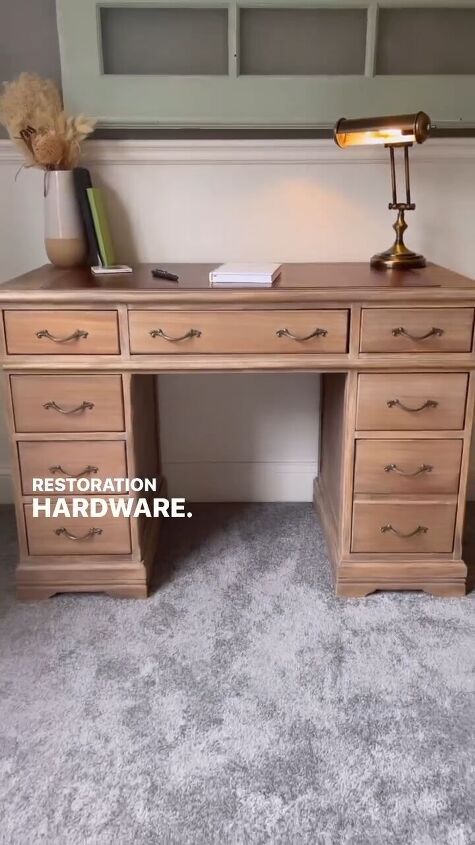
Step 6: Reattach hardware
Clean and restore the hardware and reattach. It turned out beautifully as you can see in this “after” shot.
Desk makeover
The process may have been a bit time-consuming, but the end result of this desk makeover was undoubtedly worth the effort. This desk now adds a lot of character to our guest room.
Let me know in the comments if you’ve ever refurbished a desk like this and how it turned out. Let me know if you have ever bleached a piece of wood furniture, too!
Follow @well_shetried on Instagram for more DIY ideas.


Frequently asked questions
Have a question about this project?