


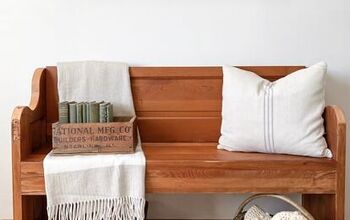
How to Make a Cute DIY Flip-Top Bench For a Hallway Nook

Today, I'm going to show you how I made a functional and stylish hallway bench with a flip top. This project involves woodworking and basic carpentry skills, as well as the use of various tools and materials. Follow along to create a practical and attractive piece of furniture for your home.
Tools and materials
- 2x4 lumber (for bench frame)
- Corner brackets
- ½-inch plywood (for bench front and faux doors)
- ¾-inch plywood (for bench top)
- ⅓-inch MDF (for Shaker sides of faux doors)
- 3-inch trim board
- Wood glue
- Brad nails and pin nailer
- Wood filler
- Hinges for flip top
- Edge banding
- Paint
- Cabinet hardware
- Pole wrap or other textured material
- Leather handles
- Saw
- Drill
- Screwdriver
- Paintbrushes
- Measuring tape
- Sandpaper
Steps
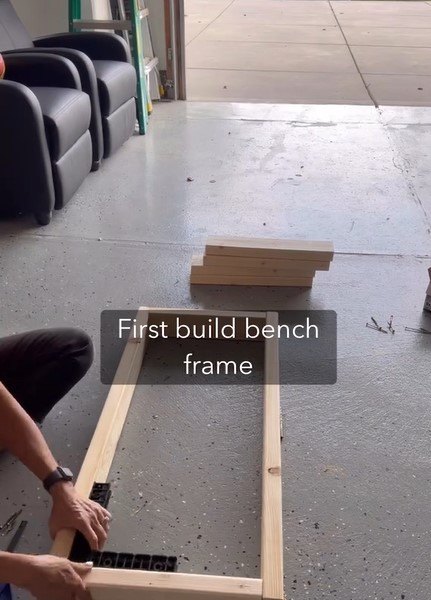
1. Build the bench frame
Cut the 2x4 lumber to the desired dimensions for the bench frame, then assemble the bench frame using corner brackets to ensure the corners are square.
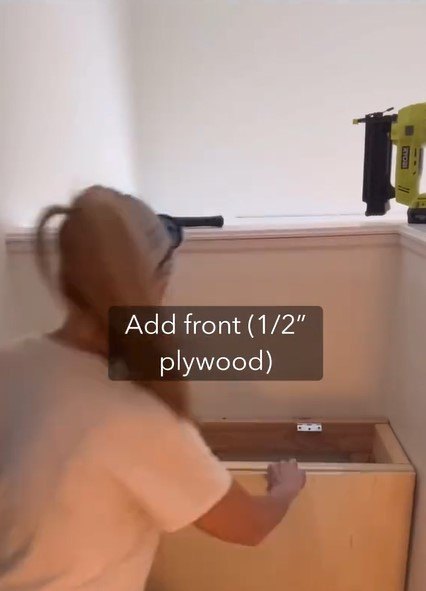
2. Attach front plywood and trim
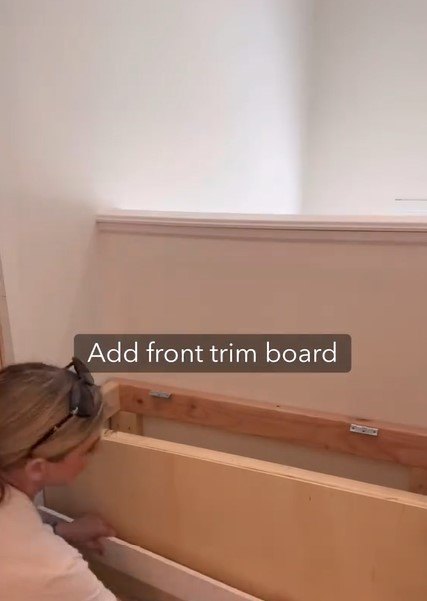
Cut a piece of 1/2-inch plywood to the dimensions of the bench front. Next, apply wood glue to the back of the plywood and attach it to the front of the bench frame.
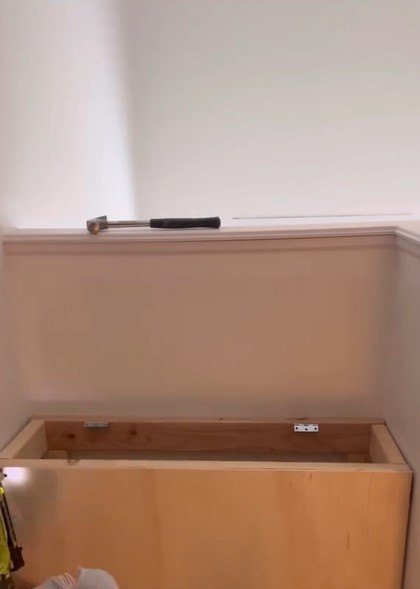
Secure the plywood in place using brad nails, then attach the 3-inch trim board to the front of the plywood using wood glue and brad nails.
3. Add hinges for flip top
Determine the placement of the flip top and attach hinges to the bench frame and the top piece. Carefully align the hinges to ensure smooth operation of the flip top.
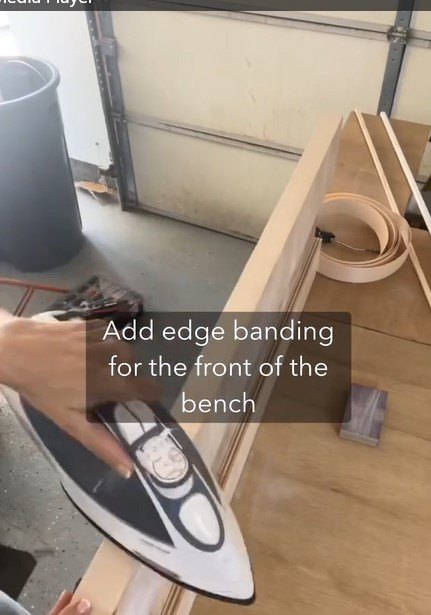
4. Add edge banding
Apply edge banding to the exposed edges of the bench front for a finished look.
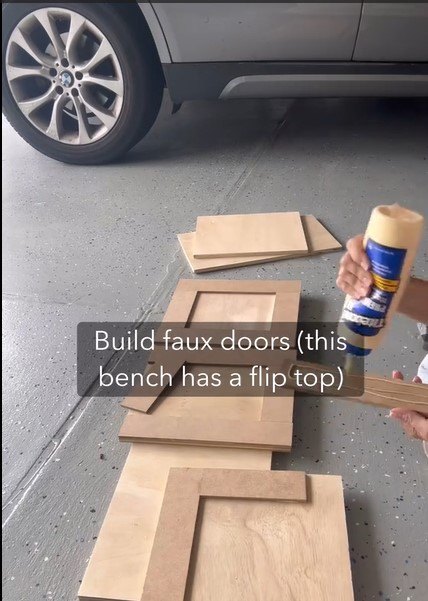
5. Build faux doors
Cut two pieces of 1/2-inch plywood to the dimensions of the faux doors and two pieces of 1/3-inch MDF for the shaker-style sides of the doors.
Attach the MDF pieces to the plywood using wood glue and a pin nailer, then fill any gaps or seams with wood filler and sand them smooth.
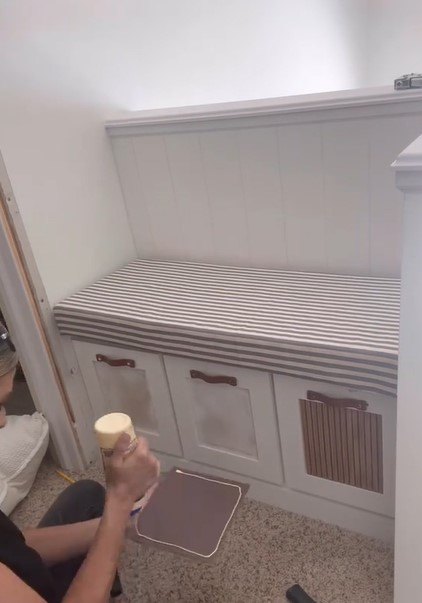
Paint the bench doors, front, and any other visible surfaces. Allow sufficient drying time between coats.
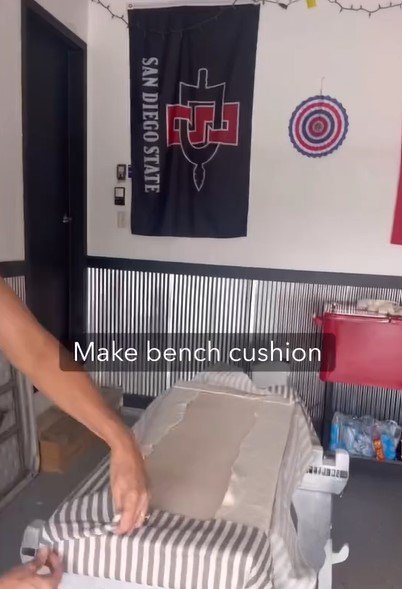
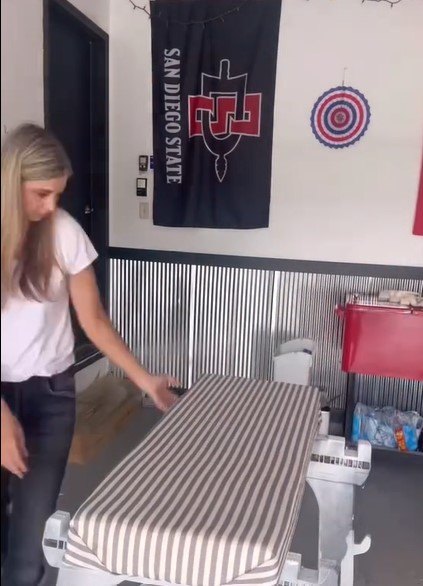
6. Make a bench cushion
Cut foam or padding to fit the bench top dimensions. Cover the foam with fabric and secure it to the bench top using staples or adhesive.

7. Add wood slats and hardware
Attach wood slats to the bench frame for support and a finished look. Then, install the chosen cabinet hardware on the faux doors.
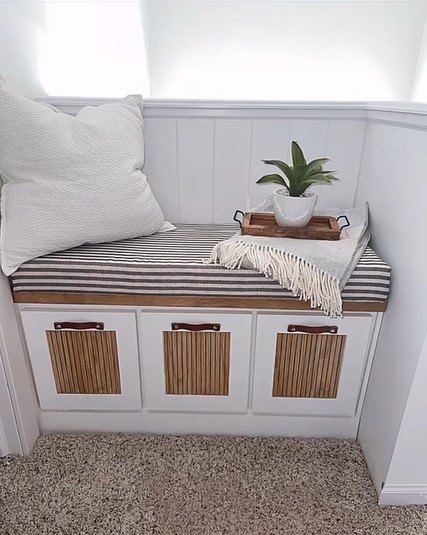
DIY flip-top bench
Congratulations! You've successfully created a stylish hallway bench with a flip top with faux doors. This versatile piece of furniture will not only provide extra seating but also offer convenient storage space thanks to the flip top cover. Customize the colors, textures, and hardware to match your home's decor.
Let me know in the comments how it turned out!
Follow @a_bit_unexpected on TikTok for more DIY ideas.


Frequently asked questions
Have a question about this project?