


How to Build a Cute Breakfast Nook With an Easy DIY Bench
In this tutorial, I'm excited to walk you through the process of creating a cute breakfast nook with a built-in bench, complete with a black velvet backing. The backing will be made from pool noodles and fabric, similar to the pool noodle headboards I've seen on Pinterest and elsewhere.
We'll also give a stylish update to the light fixture and add some personal flair with a gallery wall. Let's get started!
Tools and materials
- 2x4 boards
- 3-inch wood screws
- Speed square
- Pocket hole jig (Kreg jig)
- 2.5-inch Kreg jig screws
- Spackle or wood filler
- Trim pieces
- Wood glue
- Nails
- Paint and paintbrush
- Pool noodles
- Bread knife
- Thin wood piece
- Loctite spray adhesive
- Fabric (black velvet)
- Staple gun
- Ruler
- Hanging light fixture
- Ceiling hook
- 1-inch foam cushion
- Batting
- Iron-on hem tape
- Frames
- Art prints
Steps
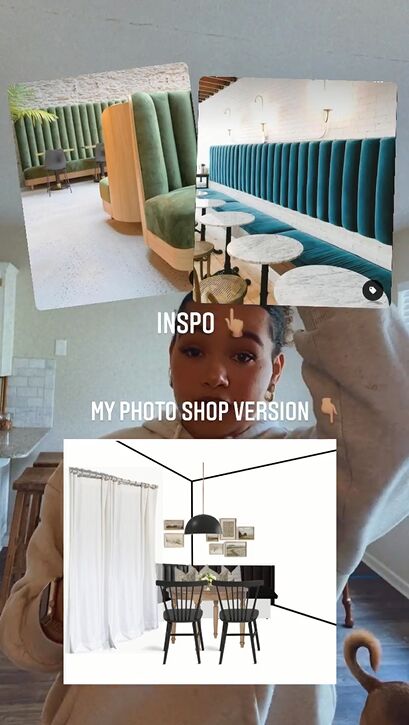
Here’s the inspiration for my breakfast nook and a mockup I made in Photoshop.
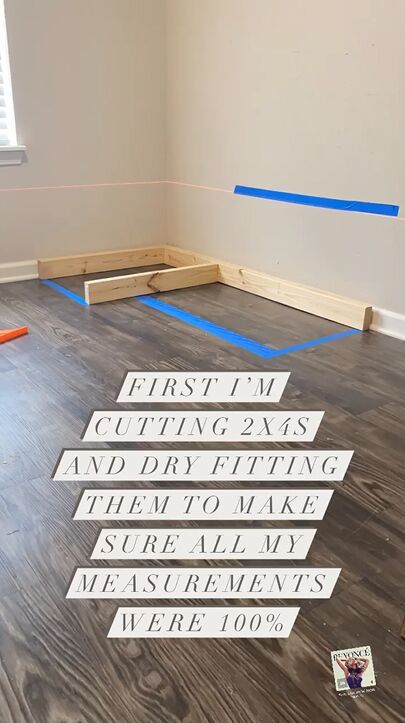
1. Cut and fit 2x4s
Begin by cutting your 2x4s to the desired lengths for the bench. Dry fit them to ensure precise measurements and a snug fit.
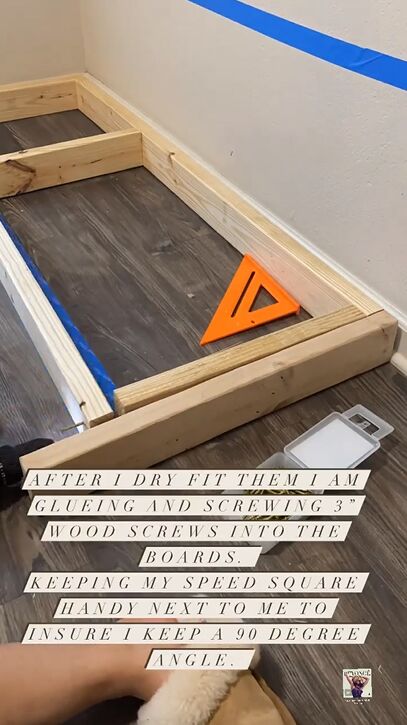
2. Glue and screw
Apply wood glue to the joints and use 3-inch wood screws to secure the 2x4s. Use a speed square to maintain 90-degree angles. Repeat the process for the top of the bench.
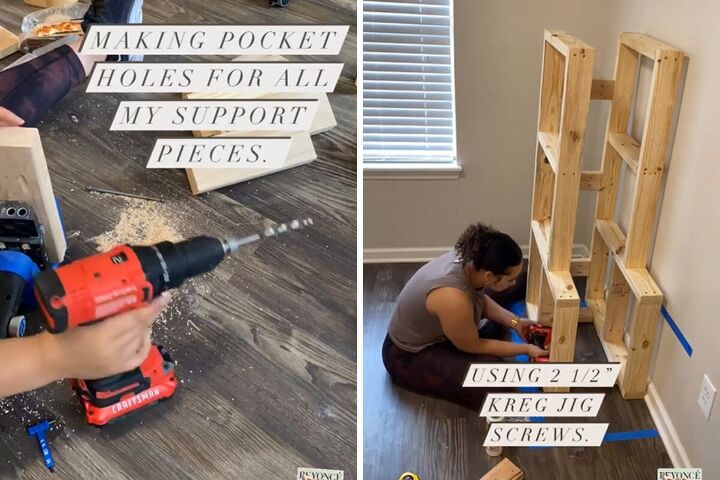
3. Add the support pieces
Create pocket holes in the support pieces using a Kreg jig, then attach them using 2.5-inch Kreg jig screws for added stability.
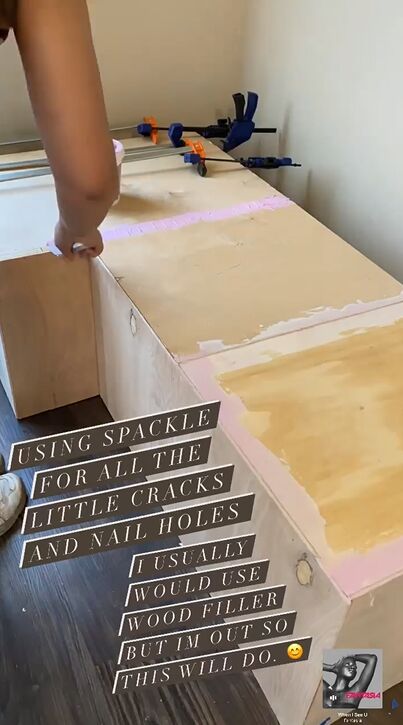
4. Apply spackle or wood filler
Fill in any cracks and nail holes with spackle, ensuring a smooth surface for painting.
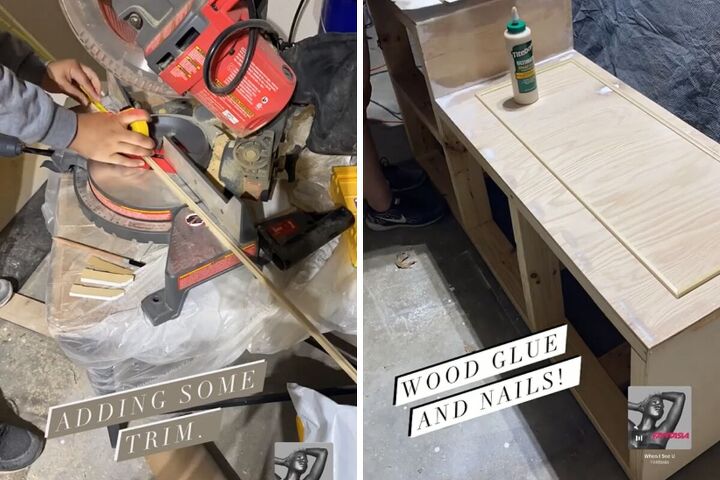
5. Add trim
Cut trim pieces to size and shape them at angles to form rectangles. Attach them to the bench using wood glue and nails.
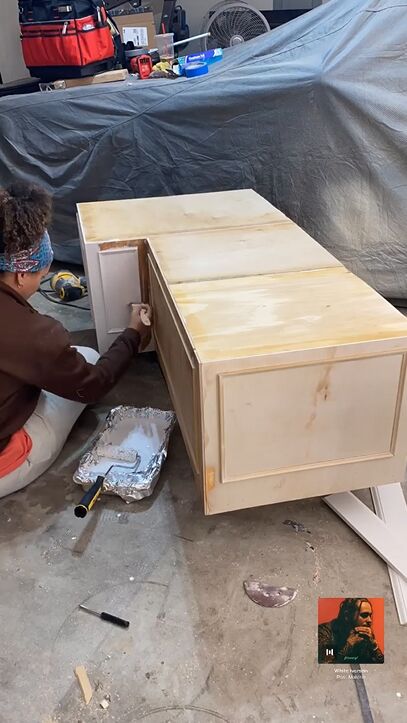
6. Prime and paint
Use a paintbrush to coat the bench with primer and paint, paying attention to the crevices where the trim is located.
How to make the backing with pool noodles


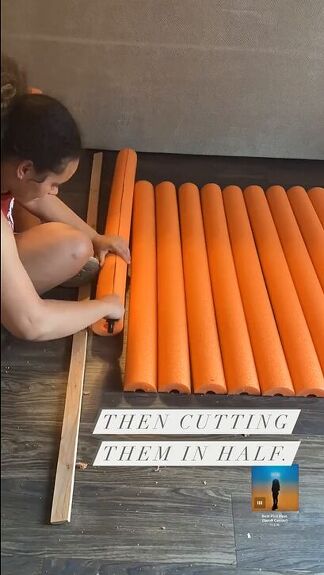
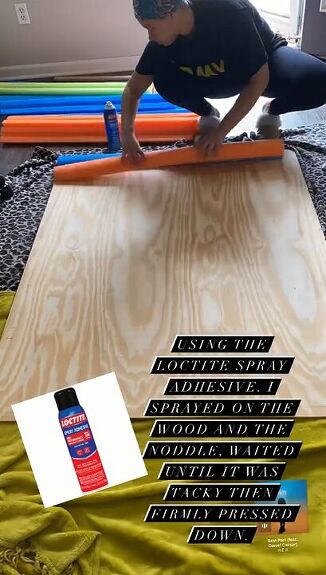
7. Make the pool noodle backing
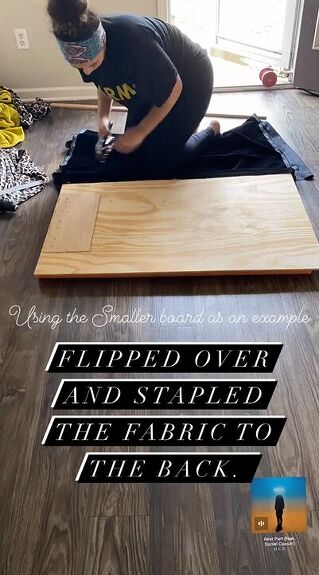
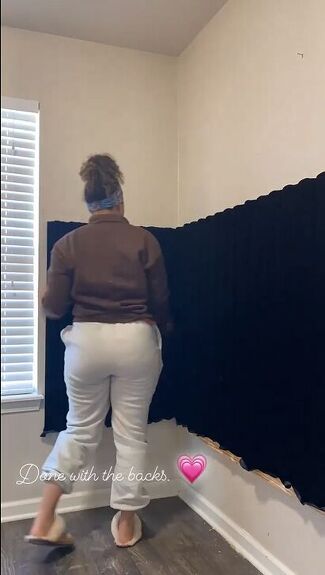
Measure and cut pool noodles to size using a bread knife, then cut them in half lengthwise. Attach the pool noodles to a piece of thin wood using Loctite spray adhesive. Once tacky, press the pool noodles down.
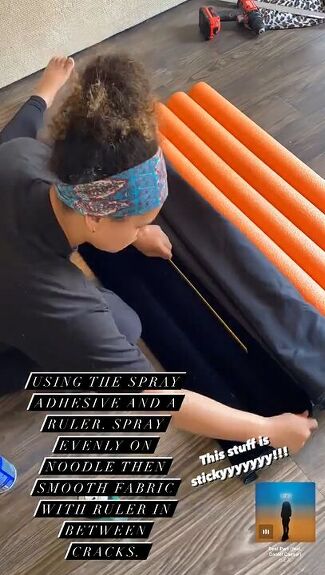
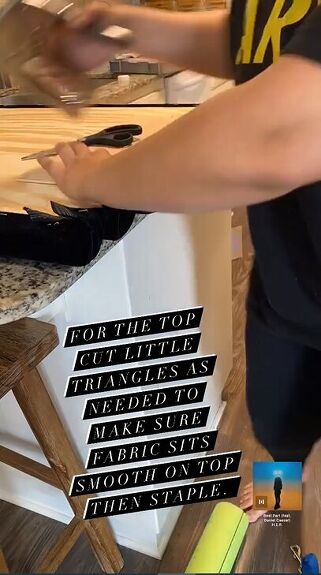
Flip the piece over and staple fabric to the back, smoothing it between the noodle cracks.
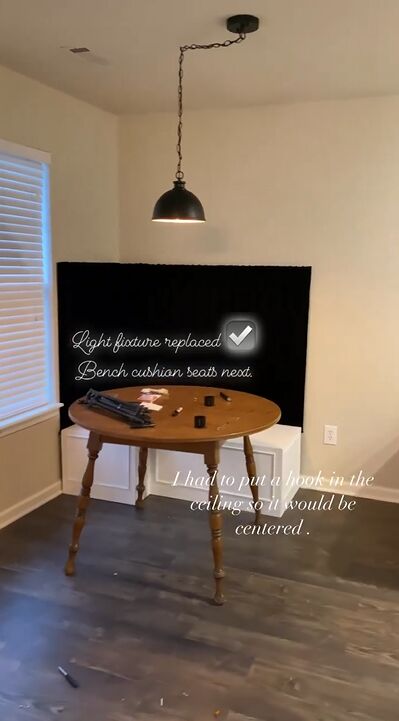
8. Replace the light fixture
Swap out the old light fixture for a new matte black one that complements the black backing. Install a ceiling hook to ensure proper positioning.
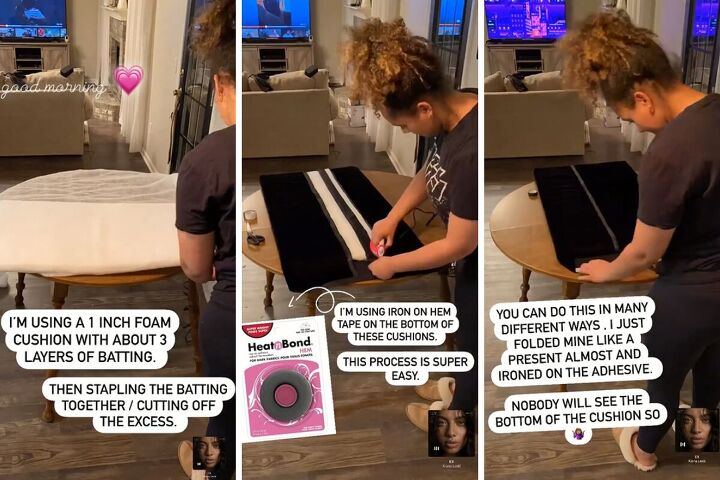
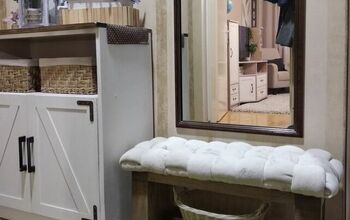
9. Make the bench cushions
Layer a 1-inch foam cushion with three layers of batting. Staple the batting together and trim the excess. Cover the cushion with black velvet fabric using iron-on hem tape. Fold the fabric like a present, iron the tape, and secure the fabric to the cushion.
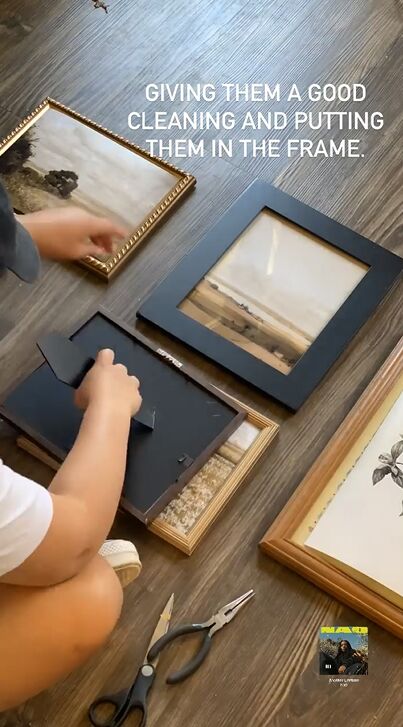
10. Create a gallery wall
Collect frames, clean them, and insert art prints. Experiment with the arrangement by laying them out on the floor before hanging them on the wall.
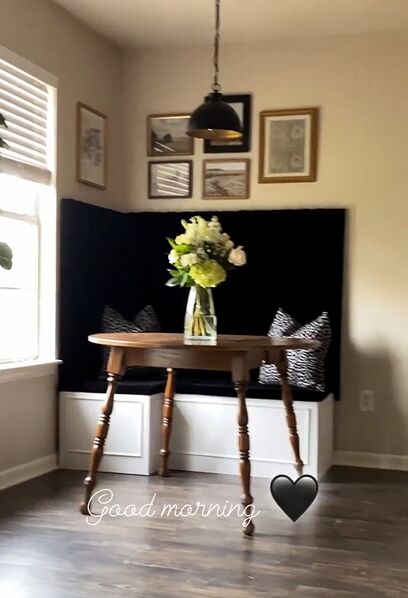
DIY breakfast nook with a bench
There you have it, a fantastic DIY breakfast nook transformation! From the cozy built-in bench and stylish black velvet backing to the upgraded light fixture and personalized gallery wall, your space is now a cozy and inviting haven. Enjoy your new breakfast nook and the satisfaction of creating something beautiful with your own hands.
Follow @flippedbyfaith_ on Instagram for more DIY ideas.
Comments
Join the conversation
-
Fabulous!
-
I LOVE IT 👏🏽👏🏽👏🏽👏🏽👏🏽👏🏽👏🏽💝💝💝💝💝💝💝


Frequently asked questions
Have a question about this project?