


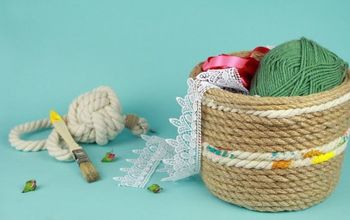
How to Recycle Packaging to Make a DIY Rope Basket Container

This project will show you an easy way to recycle old containers and/or packaging. We're going to make a DIY rope basket container.
Not only that, this project is very useful for people who don't sew or can't sew. The only sewing required is ONE straight line, that's it!
Best craft rope
f you enjoy my video then please remember to give it a thumbs up and consider subscribing to my channel for lots more crafty content.
🔔👍🏻
Tools and materials
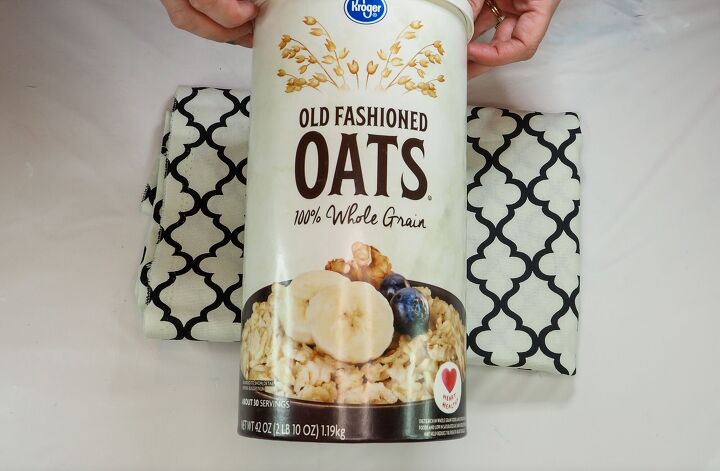
- An old container - I'm using an oats tube
- Pretty Fabric
- Rope - mine is 7mm
- Strong glue - I'm using hot glue
- Cardboard
- Needle and thread or sewing machine
1. Measure
My instructions will be based on this cylindrical shaped container but feel free to use any shaped container you like.
If you do and you're having trouble translating any of my steps to fit your project then feel free to drop your questions below.
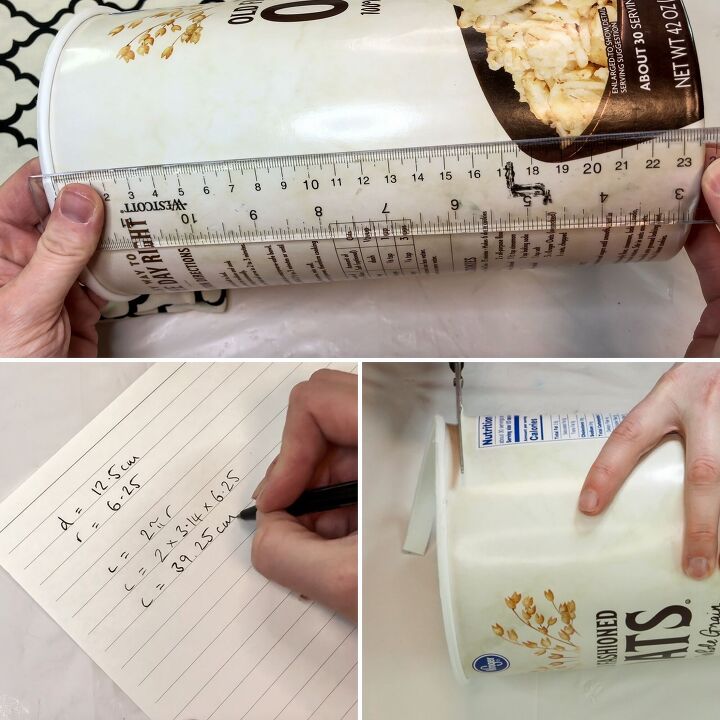
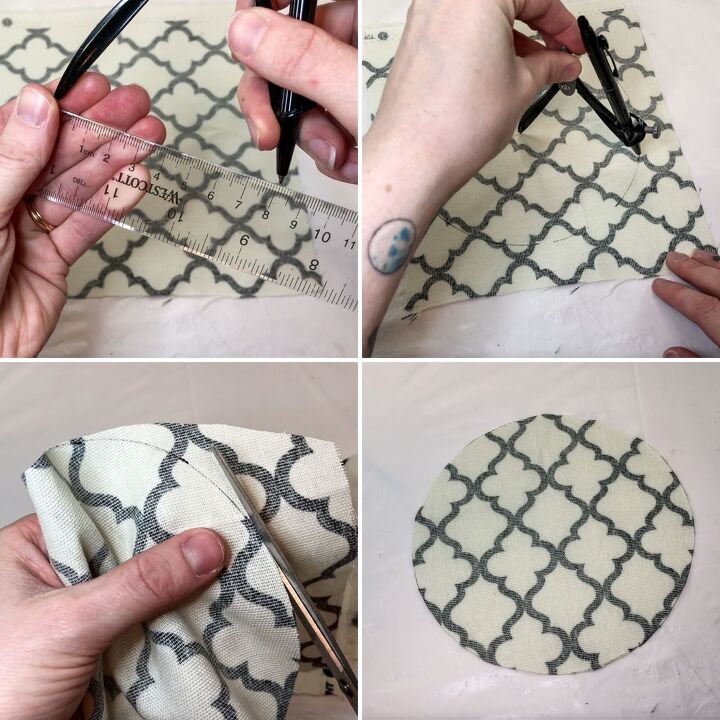
First, we want to work out how much material we need for the inside curved wall of the container. To do this, multiply the length by the height.
The height is simply how tall the cylinder is, my cylinder is 23.5cm tall. The width will be the circumference (c) of the base.
To get the base circumference, first measure the diameter (the widest part of the circular base), mine is 12.5cm. Then we need the radius, which is simply half of the diameter, so for me 6.25cm. Then to get the circumference, use the formula 2π r (2 x Pi x radius).
c = 2 x 3.14 x 6.25
Therefore my rectangular piece of fabric for the inside wall needs to be 23.5cm by 39.25cm. Also make sure to add in seam allowance on top of this, I usually add a couple of centimeters.
(You'll see in my last pic above that I then trim the very top off my cylinder to get rid of the lip. This is because I want my lid to lift on and off without friction, do the same if this is what you would rather).
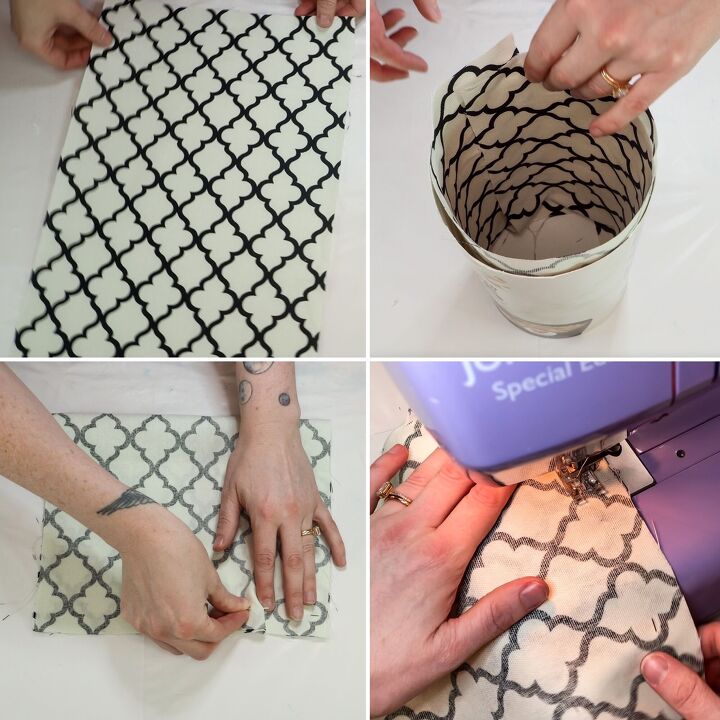
2. Make the insert
With my measurements sorted (including the extra seam allowance) I cut a piece of fabric to size and then slot this into the container to check the fit. I also use this fit to gauge how much seam allowance I actually need. Try to get a nice snug fit, not a baggy one.
Pinch the fabric at just the right place where the 2 ends overlap whilst covering the inside wall nicely and pin in place along an imaginary straight line.
Pin the fabric so that the right side is facing in. You could slip the fabric back inside the container at this point to check you've got your fit right before carrying on, just to double-check!
Then sew along the pinned line with a sewing machine or hand stitch with a very neat tight straight stitch.
Part 1 is complete!
3. Make the flat bottom
To make the flat bottom of the insert, refer back to the measurements made earlier.
I use a compass and set it to 8cm instead of 6.25cm so that when I draw a circle on my fabric with it, I've got a nice neat circle that equals the circumference of the base but with built-in seam allowance.
Cut this fabric circle out.
If you don't have or don't want to use a compass you don't have to. Just make your fabric circle after making the cardboard circle coming up next.
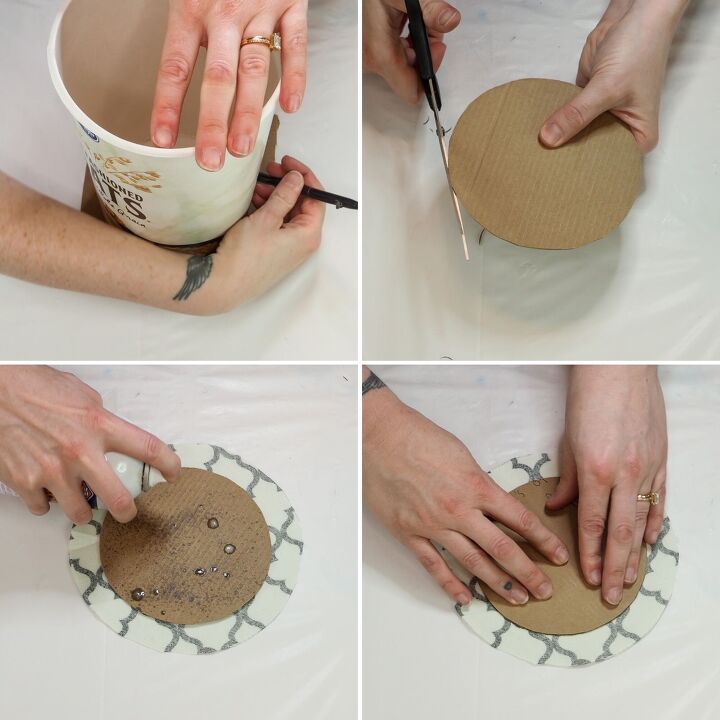
Place the container on top of a piece of cardboard and draw around the base (you can of course use a compass again and set it to the exact radius of the base, this will give you a circle the same size as your container base).
Cut out the circle from the piece of cardboard and then make sure that it slots into the cylinder nicely. If it's a tight fit, trim the edges of the cardboard circle until it slots in perfectly.
If you didn't want to use a compass earlier for your fabric circle then to another way to do this is to place the cardboard circle on top your fabric and draw a slightly larger circle around it, creating a seam allowance this way. Then cut the fabric circle out.
Now stick the cardboard circle down in the centre of the fabric circle, to the wrong side of the fabric.
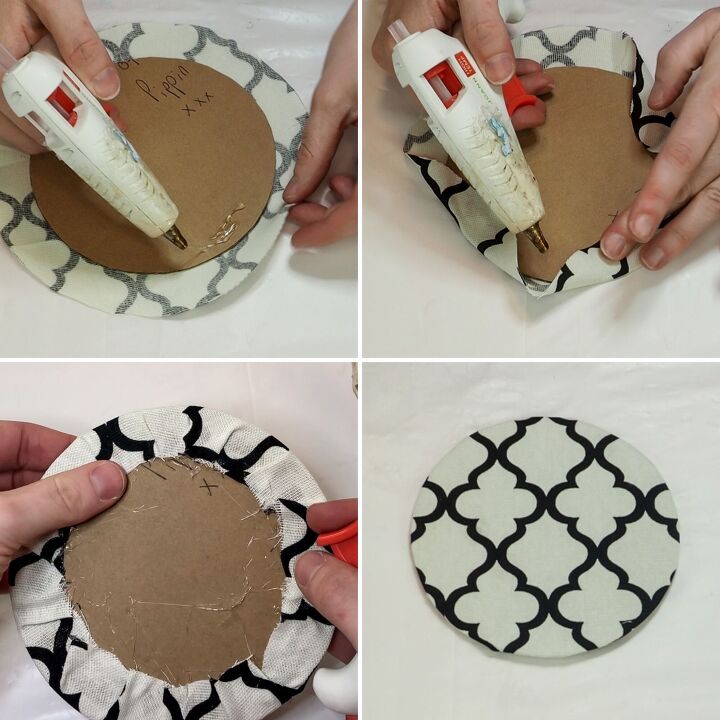
Glue the excess seam allowance down to the underside of the cardboard.
I used hot glue for a neat and compact finish.
Part 2 complete!
4. Join the two pieces together
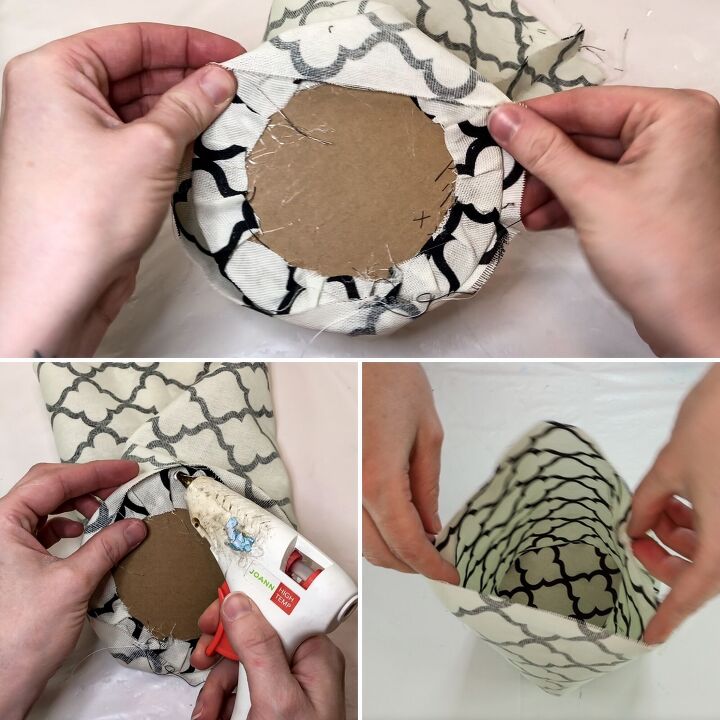
To join the 2 pieces together, slip the fabric sleeve (part 1) over the top of the fabric/cardboard disc (part 2) and glue the very bottom of the sleeve to the underside of the disc, just like you did with the fabric circle.
The sleeve/tube fabric should still be facing right-side in and the fabric disc should be facing right-side up as though it's looking through the sleeve.
Glue all the flaps of fabric down tightly.
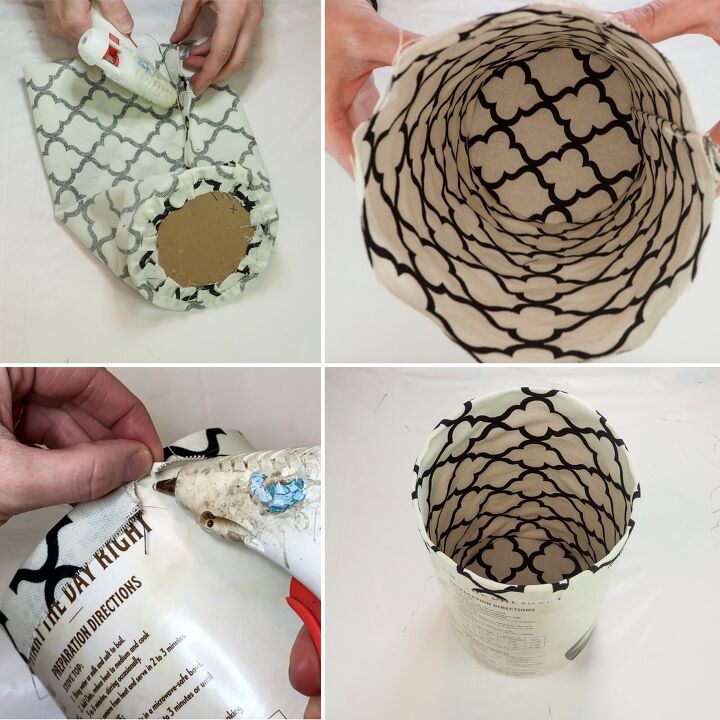
Now glue down the seam made earlier with the sewing machine, along the side of the cylindrical piece of fabric.
The whole insert will be one piece now and can be placed into the container.
There should be excess fabric poking out the top of the container, fold this over and glue it down to the outside top edge. This edge will be on show at times so you definitely want to cover it with fabric.
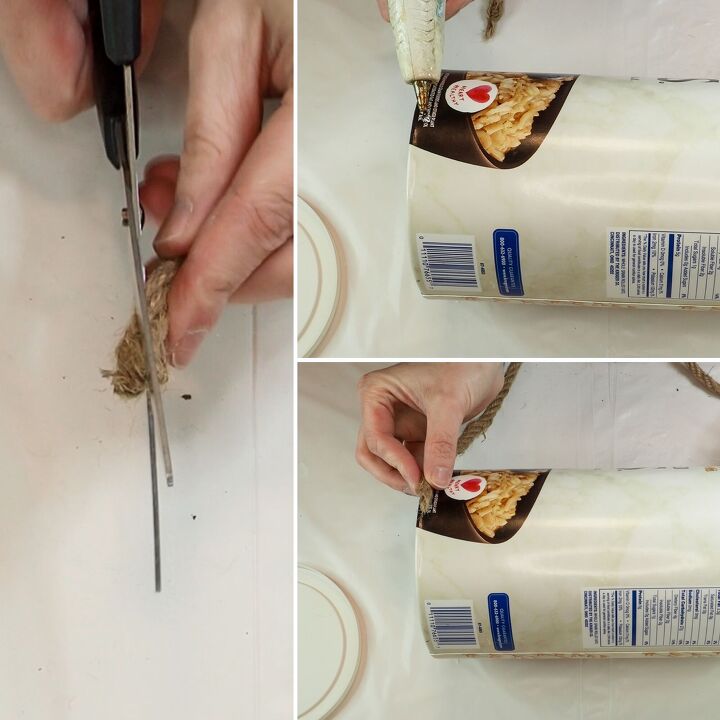
5. Add rope to the cylinder
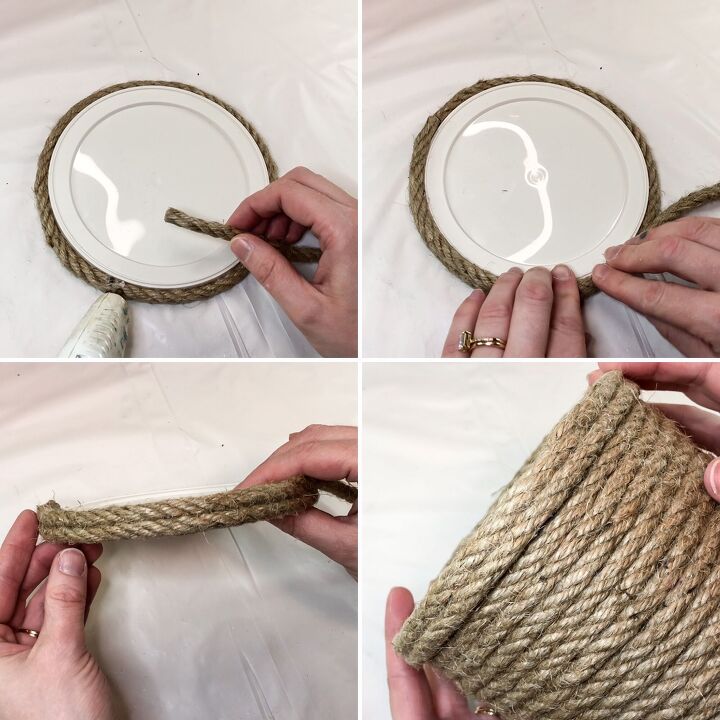
My rope is 7mm thick. First, cut the rope end at an angle to create a softer starting thickness. This will make for a more gradual step when making new rows.
Glue this end to the very bottom of the container. Consider if your container has a front side or a back side and start at the back. With mine being a cycling this didn't really apply to me.
Start wrapping the rope around the container gluing regularly as you go.
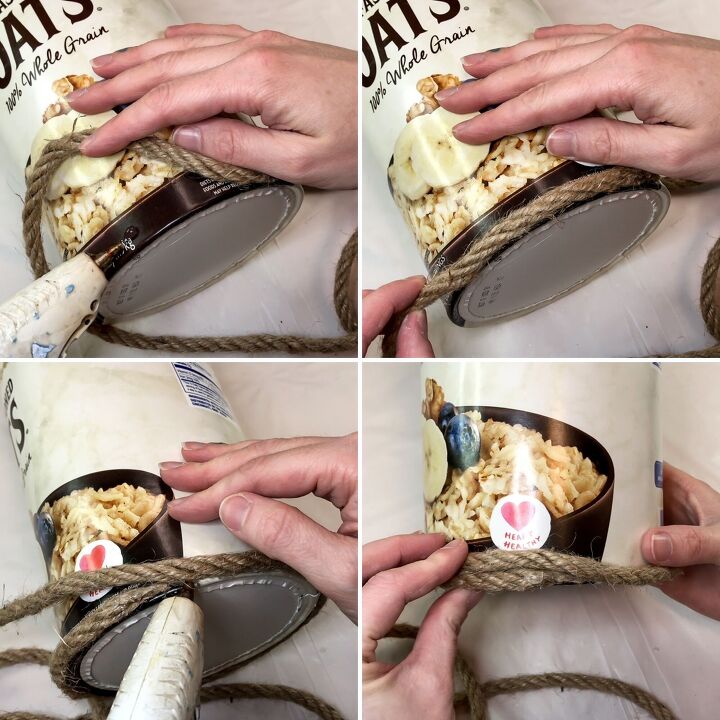
When it comes to making your 2nd row, simply rest the rope on top of the first row, hopefully creating a soft step due to thinning out the end of the rope at the start.
Keep going all the way up, making sure to keep the rows tight so there aren't any gaps between them.
Nearer to the top, keep trying on the lid to make sure you don't go too high with the rope. You want the rope to end and the lid to start with no gap between them but the lid also needs to sit there comfortably and not be pushed up by the rope underneath.
You will probably need to thin out the end of the rope again as shown in my pics. Glue it down neatly and try to avoid any obviously looking joins.
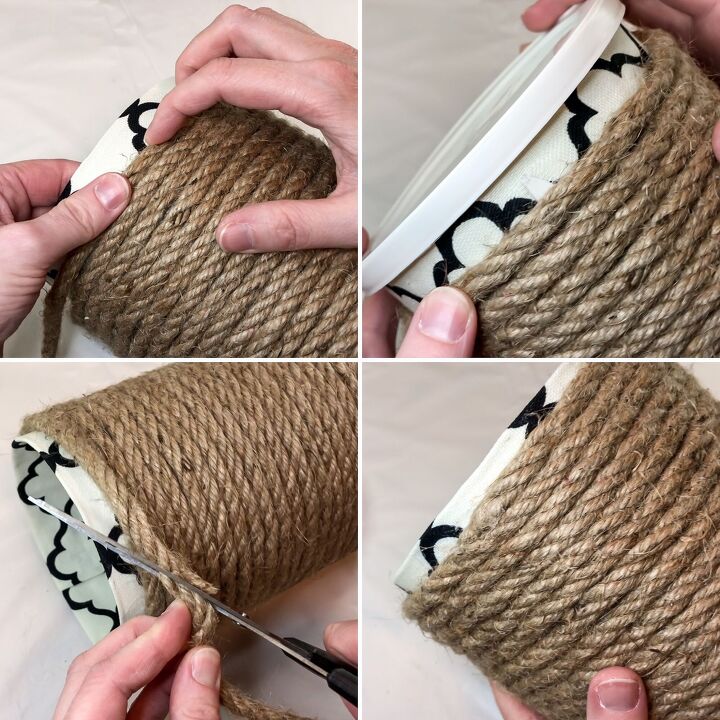
6. Make the rope lid and handle
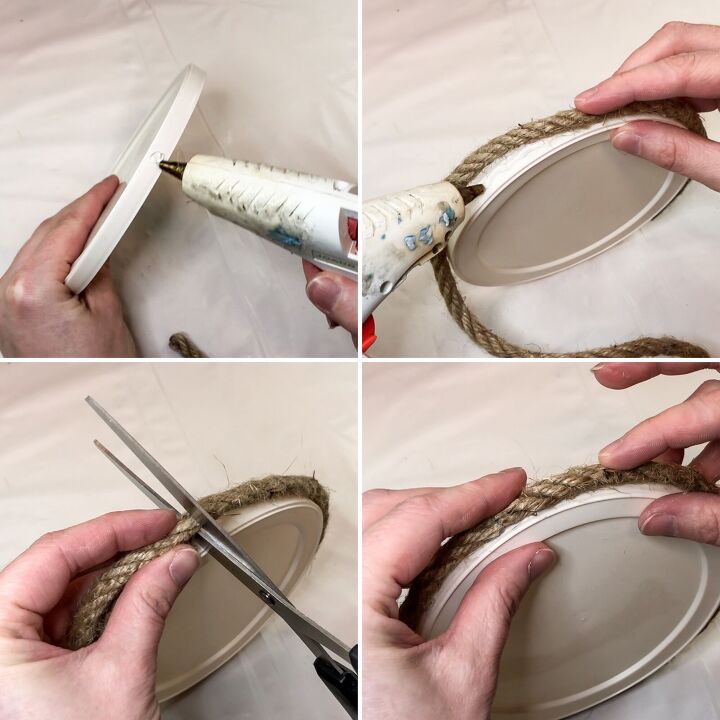
For the lid, it's a very similar process. First start by gluing a full rope loop to the outside edge of the lid lip.
There's no need to thin the rope out for this step, you want to make a full and complete loop. Cut the rope to the right length and glue the 2 ends snugly together.
Repeat the last part to create a 2nd row and glue this directly on top of the first.
Make sure these 2 rows cover all of the lid edge.
Test the lid to make sure it still fits the container well.
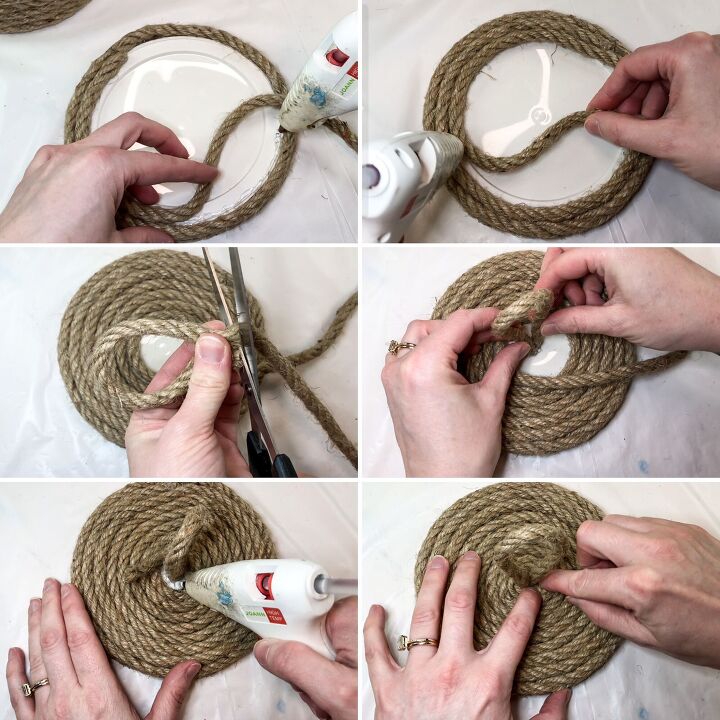
For the top part of the lid, you will need to thin the end of the rope out again and glue this down next to the row you just made at the outer edge of the bare lid.
With the rope, create a spiral around the lid, glueing it down as you go.
Leave a gap in the middle for a handle.
To make the handle, cut a short piece of rope and create a closed horseshoe shape. Glue this down standing upright in the centre of the lid.
Then continue gluing the rope spiral all the way round, wrapping around the handle too, until all of the lid is covered. Again, you may need to cut the rope free at a thin angle in order to neatly and tightly glue this in place.
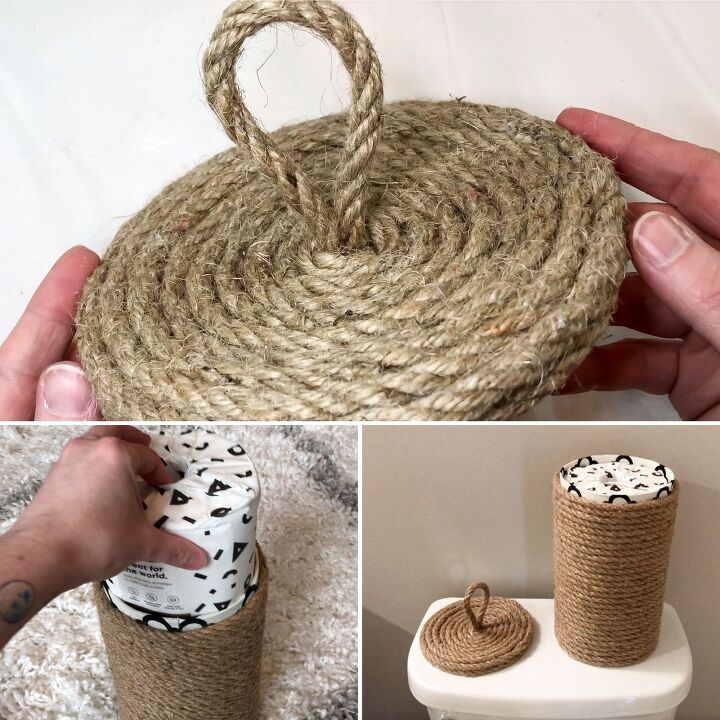
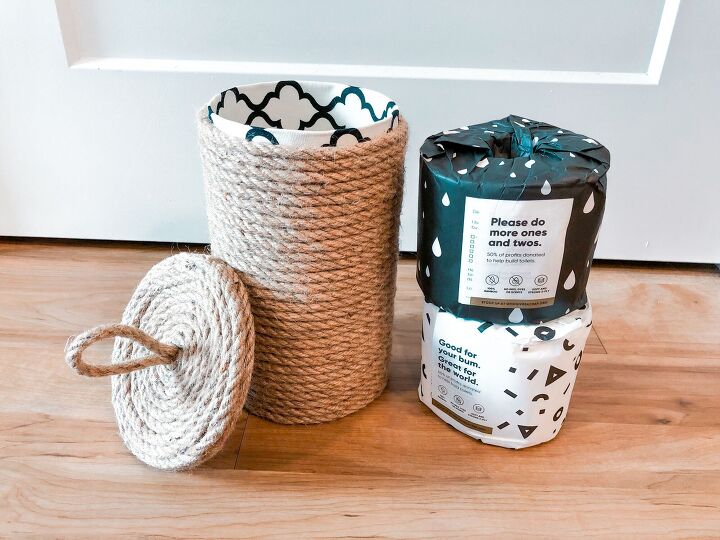
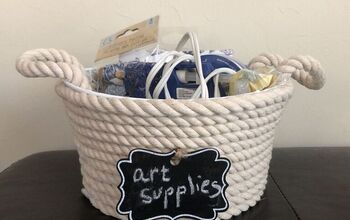
DIY rope basket container
And that's it! You can make a whole family of matching rope baskets to scatter around your home.
I've put mine in the bathroom to store toilet rolls. We use the 'who gives a crap' rolls and they fit PERFECTLY into the tube.
You can fully customize your containers based on what you want to put in them or where you want to put them. You could use the same fabric for the insert that you've used elsewhere in the room so that they match!
I hope you enjoyed this project and please remember to check out my YouTube channel and subscribe too 👍🏻
I've also got an instagram page (@hscraftytutorials) if you want to check that out.
Thanks so much for taking the time to view my post today.
Happy crafting x
💙
Resources for this project:
See all materials


Comments
Join the conversation
-
Very pretty!! I was a little skeptical but wow!!! Turned out beautiful. Tyfs
-
Just recently did 3 , but quickly put on adhesive backed paper and store bags of chocolate chips, one I keep my tools for decorating cakes etc. One for bags of spaghetti..They fit perfect and look cute on my shelves. Also pringles cans, did the same and keep individual packs of crackers..{fit perfect}.I never throw anything away...


Frequently asked questions
Have a question about this project?
What do you put in the cuntainer?