


How to Clean Grout So It Looks Brand New

By Tamara Jude
Although the beauty of tilework design lasts for years, the surrounding grout can become quite unattractive over time. Because grout sits below the edges of the tiles, the tiny channels can easily collect unwanted grime and dirt. Bathroom tiles are especially susceptible to mold and mildew due to daily exposure to humidity. Kitchen tile countertops see lots of spills. Even the tiling in your foyer or mudroom gradually collects dirt from constant foot traffic.
If your tile grout is looking dingy, don’t lose hope—you can quickly make grout look new with the proper cleaning methods. And once grout becomes clean again, be sure to take preventative steps to make future cleanings much easier. In this guide, we’ll explore several solutions to restore your grout to its former pristine condition and we’ll also show you how to keep grout immaculate going forward.

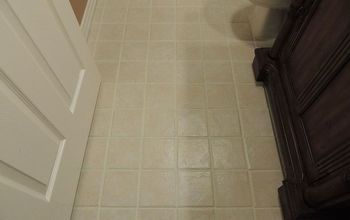
Photo via Martina at The Lived-in Look
What Is Grout?
Grout serves as filler in the spaces between each section of tiles. Not only does grout help to maintain the tile design, but the substance itself protects the tiles from cracking. Although many basic tilework patterns include simple white or gray grout, tile contractors can also provide different colors that best suit your tiles.
Types of Grout
There are several types of grouts available for tilework, and each one varies based on the tile materials used, the tile size, and the tile project location. The two most common types of grout used in most households are cement grout and epoxy grout.
According to Litokol epoxy grouting distributor The Tile Doctor, cement grout is used by 94 percent of American contractors in both commercial and residential projects. Cement grout is typically more porous, making it more susceptible to stain and grime collection over the years, but it’s easier to use and less expensive.
Epoxy grout, made from two types of resins, is water and stain-resistant, lasts longer, and comes in various colors. This type of grout has a plastic-like appearance which may be a turn-off for some homeowners. In addition, epoxy grout costs more and tends to be harder to use in standard tile projects.
Grout Sealers
Grout sealers, which can be found at home improvement stores, add that extra layer of protection to cement grout by making the grout more resistant to moisture (i.e., water from your shower). But, like most materials, sealants eventually wear off with normal wear and tear. We recommend resealing your grout once every year to prevent future deterioration, fading, or cracking. If your tiles are in high-traffic areas, like on the floor of a mudroom, they should be resealed at least twice a year. You should only apply sealers after deep cleaning the grout, which we’ll explain how to do here in a bit.
How to Check for Grout Sealer
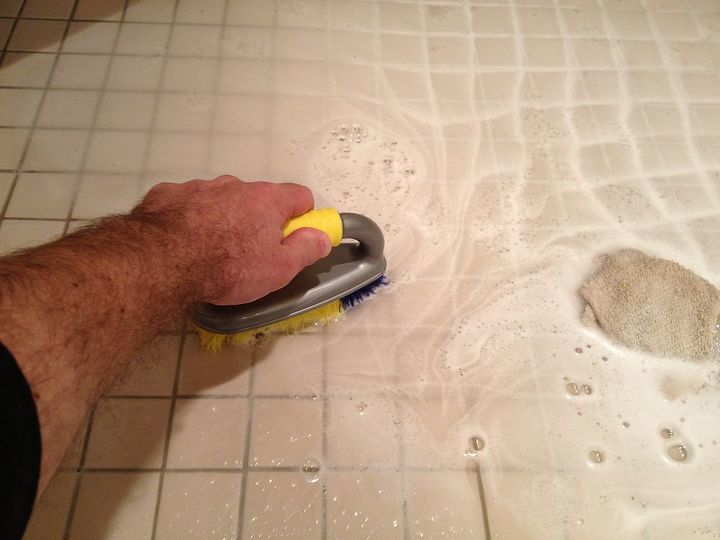
Photo via Home Repair Tutor
How to Clean Grout
When it comes to picking the best way to clean grout, the cleaning method you choose should be safe for not just the grout, but tiles, too. The wrong type of cleaner can damage porous tile materials such as marble and natural stone. Consider using less harsh cleaning methods first and, if faced with particularly stubborn stains, gradually move to more concentrated solutions.
Try one of these safer DIY methods that are gentle on the tiles and grout but effective on grout build-up. These methods work best on tile countertops, backsplashes, and floors.
Try a Patch Test
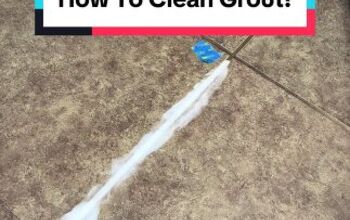
Method 1: Hot Water and a Stiff Brush
Using hot water and a stiff brush is one of the easiest and best ways to clean grout. The hot water helps to loosen the gunk and grease occupying the grout, and the brush further breaks down the stains. If you plan on using a toothbrush, make sure it’s a new one—old, worn toothbrushes won’t have enough power to break through the stains. Or, you can use a stiff-bristled grout brush to tackle dirty grout lines.
Prepare for Grout Cleaning
Tools and Materials Needed:
- Heat-resistant container or bowl
- Hot water
- Toothbrush or grout brush
- Clean towel, sponge, or microfiber cloth
Step 1: Pour Hot Water on Small Area of Tiles
Using a heat-resistant container, pour the hot water over a 6 to 8 square-inch area of tiles. Use caution when handling to avoid burning yourself.
Step 2: Scrub Grout
While the water is still hot, use the stiff brush to scrub the grout in a circular motion.
Step 3: Wipe Down Grout and Tiles
Clean the area with an old towel or cloth to remove the excess water and any remaining dirt. Continue this process until all the grout is clean.
Method 2: Hot Water and Dish Soap
If the hot water wasn’t enough to dislodge those stains, move to the next DIY solution: dishwashing liquid. Dishwashing liquid breaks down food stains and grease on your dishes and pots, and it’s gentle on grout yet strong enough to combat tougher stains. This method is especially effective in areas where grease stains are common, such as tile kitchen countertops or backsplashes.
Tools and Materials Needed:
- Medium-sized container or bowl
- Warm water (for cleaning)
- Water (for rinsing)
- Dishwashing liquid
- Stiff-bristled toothbrush or grout brush
- Clean towel, sponge, or microfiber cloth
- Mop (for floors only)
Step 1: Mix Water and Dishwashing Liquid
Mix a few drops of dishwashing liquid with warm water in a medium-sized container until light suds appear. You can add more dishwashing liquid as needed to create a stronger solution.
Step 2: Apply Mixture
Pour some of the mixture onto a small area of the stained grout. Be extra careful when using this solution on tile floors to avoid slipping on the soapy areas. Always work in small sections to prevent flooding the space with too much water.
Step 3: Scrub Area
Using your brush, scrub in circular motions to break through the grout stains. The dishwashing liquid and the brush work together to cut through caked dirt and grime.
Step 4: Rinse Tiles and Grout
Rinse the area with clean water to completely wash away the soapy mixture. Dry with another clean cloth or towel. Move on to the next small section of the tiles until the whole area is complete. For tile floors, you can mop the entire area with clean water when finished.
Method 3: Hydrogen Peroxide and Baking Soda
Look to your pantry and medicine cabinet for this hack: Hydrogen peroxide and baking soda are everyday household products that are non-toxic but powerful. Hydrogen peroxide is a mild acid with oxidizing and bleaching properties and can disinfect and break down organic residues such as bacteria and mold. Baking soda (or sodium bicarbonate), on the other hand, is an alkaline substance. Alkaline ingredients, commonly found in laundry detergents, can quickly dissolve grease and stains. Along with popular odor-fighting abilities, baking soda’s abrasive texture makes it a good scrubbing agent. When combined, these two ingredients become an incredible cleaning solution against stained grout. To even further enhance the grease-cutting power, add dishwashing liquid to the solution.
Tools and Materials Needed:
- Rubber cleaning gloves
- Small container or bowl
- Hydrogen peroxide
- Baking soda
- Dishwashing liquid (optional)
- Stiff-bristled toothbrush or grout brush
- Sponge or microfiber cloth
- Mop (for floors only)
Step 1: Create a Paste
Combine one part hydrogen peroxide with two parts baking soda into a thick paste in the small container. Optional: Add one teaspoon of dishwashing liquid to the solution. Create as much of the mixture as needed to complete the task, but we recommend making small batches to avoid wasting any unused product.
Step 2: Coat Grout
Apply the mixture to grout lines with the toothbrush or grout brush, working in smaller sections to keep track of your cleaning process. (This can get messy, so avoid covering all of the grout at the same time.)
Step 3: Let Mixture Sit
After applying the paste to the grout lines, let the mixture sit for a few minutes to penetrate the stains.
Step 4: Use Brush to Clean Tiles
Scrub the pasted areas with your stiff-bristled brush of choice. Use a little elbow grease to break through the stains.
Step 5: Wipe Down the Surface
Once you’ve finished scrubbing away the grime, use a damp, clean cloth or mop to wipe away any leftover paste. If the paste turns solid, use a damp cloth again to soften it and wipe it away.
How to Get Rid of Stubborn Grout Stains
Unfortunately, some of these DIY methods may not work on very dirty grout. If you find yourself facing some particularly stubborn stains, move to one of these stronger methods.
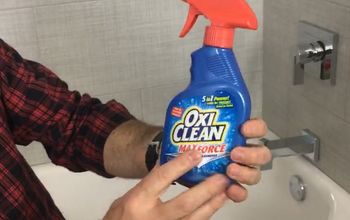
Commercial Grout and Tile Cleaners
Head down the street to your nearest home improvement store, and you’re sure to find a few commercial grout and tile cleaners that’ll work for stubborn stains. And on the bright side, most products contain ingredients that are effective and safe for tiles as well as grout. Regardless, read the product’s instructions carefully before using it to be sure that the cleanser is safe for the tiles you’re working on. Also, avoid mixing a store-bought cleaner with another cleaning product or DIY cleaner, as doing so may cause adverse reactions.
This multi-purpose cleaner works well on many surfaces including grout (white only) and ceramic and porcelain tiles. As part of the EPA’s Safer Choice Program, this CLR product does not contain harsh chemicals such as ammonia, bleach, or phosphates.
One of the few acid-free options available, this cleaning spray (and included brush) is gentle enough for use on all tiles, including natural stone. Although the cleaner works well on white and colored tiles and grout, it is ineffective on water spots, mold, and mildew.
This heavy-duty cleaner is excellent for colored and white grout and porcelain and ceramic tiles. Grout-EEZ works best on floors and comes with a grout brush (a brush handle or pole are not included).
Steam Cleaning Grout Stains
For the worst types of grout stains, you may need to switch to a steaming method. You can either rent a steam cleaner designed for tiles and grout or use a steam mop meant for your tile flooring. When using rental equipment, be sure to follow all steps provided by the company and only use water for the cleaning or their recommended cleaning agent, as mixing chemical cleaners or other types of non-toxic products in these machines could damage the equipment. After a thorough steam cleaning, wipe down the entire area with a clean, dry cloth.
Ventilate Rooms
Products to Use Caution With When Cleaning Grout
Can I Use Vinegar to Clean Tile Grout?
You should not apply vinegar to any unsealed grout. Although white vinegar serves as a budget and eco-friendly cleaning product in most situations, you may do more harm than good by using it on grout. Because grout is porous, acidic products can eat away at the grout, causing it to crack and crumble.
Can I Use Bleach as a Grout Cleaner?
This comes down to the type of bleach you’re using. Chlorine bleach can be too harsh on certain tiles (such as porous marble), leading to irreversible damage to the material. In addition, bleach can strip away colored grout, potentially ruining your tilework.
Oxygen bleach is a safer alternative to clean tile grout. This form of bleach, often found in powder form, provides a safe and powerful level of cleansing without stripping away any colors. Just be sure to follow the manufacturer’s instructions for use.
Can I Use Floor Cleaners to Clean Grout on Tile Floors?
The Tile Council of North America (TCNA) advises to not clean grout with oil or wax-based floor cleaners. Like we’ve mentioned above, regular cement grout tends to absorb stains and grime because of its porous nature. Although helpful on most types of floors, many floor cleaners can create issues because of their waxy and oily residue; unsealed grout typically absorbs those substances, leading to accelerated deterioration.
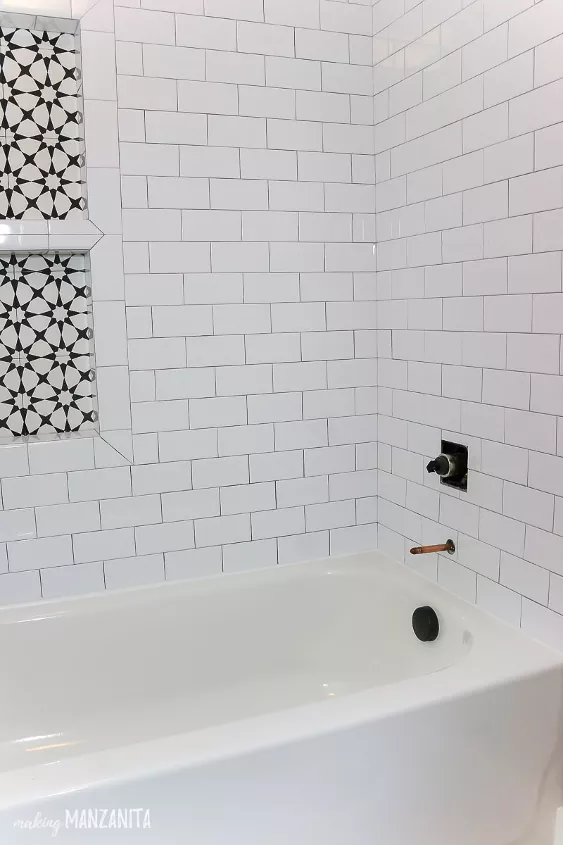
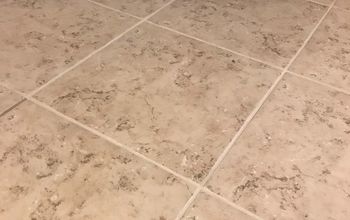
Photo via Chelsea @ Making Manzanita
How to Clean Shower Grout and Tile
For your shower, the best cleaning methods tackle both the tiles and the surrounding grout. Previously, we recommended not using vinegar on unsealed grout. However, your shower tile grout is sealed to prevent excessive moisture from the shower or bath from seeping into the grout work. In this case, using vinegar for your grout and tiles is a cost-effective and safe option on non-porous materials such as porcelain or ceramic tiles. Stick to plain water or specialized cleaners for marble and natural stone surfaces.
How to Clean Shower Tiles and Grout with Vinegar and Water
Tools and Materials Needed:
- Chemical-grade spray bottle
- White vinegar
- Water
- Stiff-bristled toothbrush or grout brush
- Clean towel, sponge, or microfiber cloth
Step 1: Mix Vinegar and Water
Mix equal parts of white vinegar and water in a spray bottle to create the solution. Be sure that the bottle is made from chemical-grade plastic so that the vinegar does not eat through the container. (Bottles made for cleaners or chemicals will be labeled appropriately.)
Step 2: Spray Tiles and Grout
Spray the shower tiles and the surrounding grout with the vinegar solution. Make sure to cover all the tiles thoroughly.
Step 3: Wait Several Minutes
Let the mixture sit for a few minutes to allow the solution to penetrate the soiled areas.
Step 4: Scrub Tiles
Use your brush to scrub all tile areas of your shower thoroughly.
Step 5: Wipe Down After Cleaning
Wipe off any excess solution and grime with a clean, damp sponge or cloth.
Add Some Steam
Commercial Shower and Grout Cleaners
If DIY methods aren’t getting the job done in your shower, try employing commercial cleaners made for shower tiles and grout. As a reminder, only use the proper cleaners for your type of tiles and keep the area well-ventilated.
Since alcohol is the main ingredient in this multi-surface bathroom cleaner, it should be used on white grout only. However, this product is effective for mold, mildew, and soap scum on ceramic and porcelain tiles, chrome, glass, and more.
This CLR cleaner is another safe, bleach-less cleaning alternative. This product safely tackles mold and mildew on grout, tiles, natural stone, and other nonmetal surfaces.
If your shower and grout cleaning needs an extra whitening boost, try this bleach-based spray—be sure to use it on bathroom surfaces with white grout only.
Tip and Hacks for Difficult Cases
If none of the suggested cleaning options work grout stains or the grout isn’t as bright as it could be, you could try painting it. Grout colorants, found in hardware and home improvement stores, cover pre-existing grout with not only a fresh color, but a sealant as well. However, using a grout colorant does not mean you should skip out on cleaning your tiles and grout. The North American Tile Cleaning Organization (NATCO) cautions that if you do decide to paint the grout, you will still need to thoroughly clean the tile and grout before applying the colorant. Grout colorants should only be used around porcelain and ceramic tiles.
How to Keep Grout Clean
Now that you have successfully restored your grout and made your tiles glow again, follow these easy steps to keep your grout stain-free.
Countertops
- Wipe down tile countertops daily to remove grease and food stains with a mild dishwashing liquid with water or a commercial all-purpose cleaner made for your tiles. After using dish soap to clean the countertops, rinse the tiles with clean water and dry with a clean cloth or paper towel.
- Always wipe down the countertops after preparing food on the surface to prevent stains from seeping into the grout.
Floors
- Sweep or vacuum tile floors to remove lingering debris. Mop the floor once a week to eliminate excess dirt.
- If your tiles are in a high-traffic area like a mudroom, set down a small rug to catch dirty shoes.
Showers
- Use a squeegee or dry cloth to wipe down the tiles after a shower to keep mold and mildew at bay. You can also turn on the exhaust fan or open a window to remove excess humidity.
- Clean your shower with a commercial daily tile cleaner or a DIY shower spray.
Summary
While the sight of grimy grout around your tiles can be unpleasant, there are plenty of solutions to get them like new again. From DIY solutions to more powerful commercial products, cleaning your grout doesn’t have to be a considerable challenge. And once you get your grout clean, you have plenty of simple solutions to help keep them that way, making future cleanings a breeze.
Comments
Join the conversation
-
I tried this method, and I found that a good scrubbing and a product called Grout Refresh did the trick. Mapei Grout Refresh comes in many colors. You can get it at Floor and Decor, directly from Mapei or on Amazon. It is tedious, but not a difficult project. The grout refresh has a sealer in it, so no more stains. I did a bathroom several years ago and still looks brand new.


Frequently asked questions
Have a question about this project?