


DIY Mug Rack: 8 Simple Steps to Say Goodbye to Cupboard Chaos

Transform your stuffed and cramped cupboards into an organized and visually appealing storage solution with this DIY mug rack project. By using mop racks and handles, you can optimize space, reduce clutter, and create a unique coffee mug display idea.
This post was transcribed by a member of the Hometalk editorial team from the original HometalkTV episode.
Follow the step-by-step guide to paint, modify, and mount the racks, and add decorative elements to personalize your kitchen decor while enjoying the practicality of this creative storage solution.
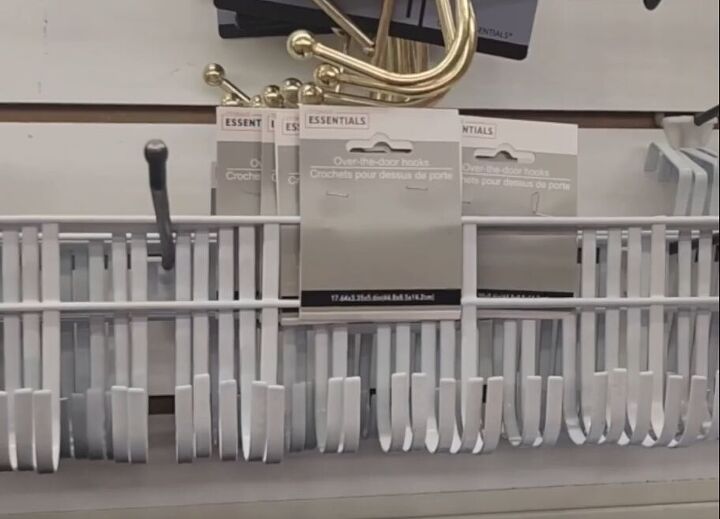
1. Gather the Materials
To get started, you'll need the following materials:
Over door hooks (three in total)
Pliers
Metal saw
Black zip ties
Faux greenery
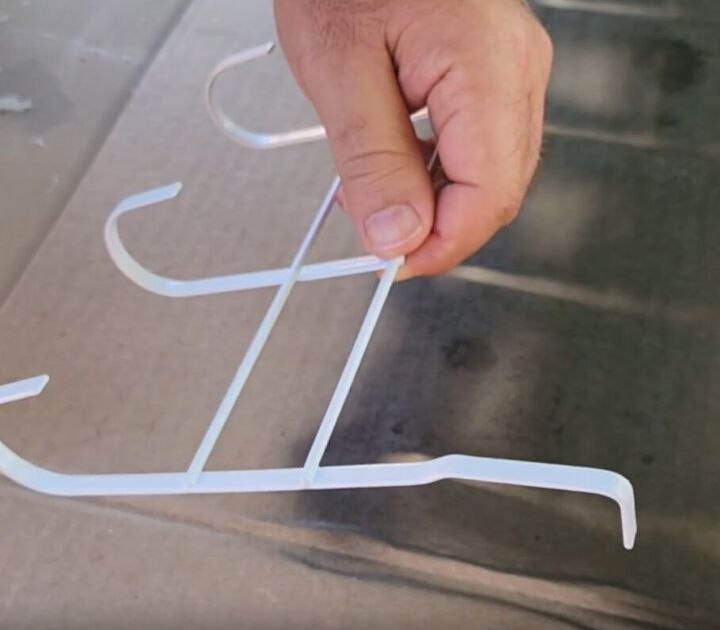
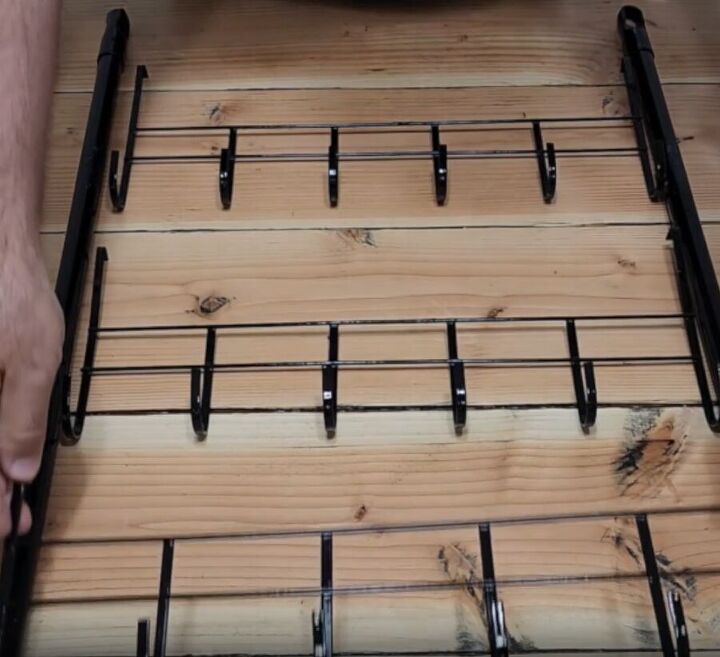
2. Prepare the Mop Racks
Take the mop racks and ensure they are ready for installation. Using pliers or your hands, bend the hook forward slightly so that it rests flush against the wall without sticking out too much. This step helps create a streamlined look.
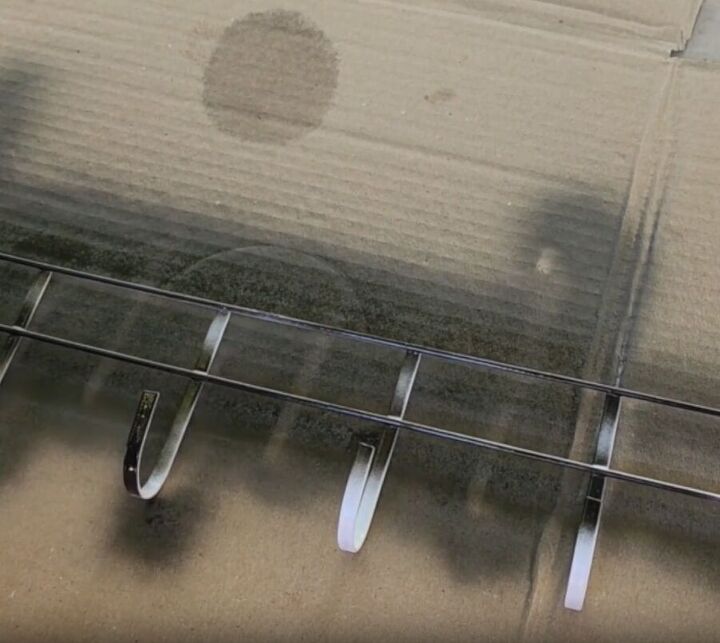
3. Apply Black Spray Paint
We want this mug display idea to have a sleek appearance, so we will apply black spray paint. Remember to use small, even coats, allowing each coat to dry before applying the next. This technique prevents the paint from running or dripping. Depending on the coverage, you may need two or three coats of spray paint.
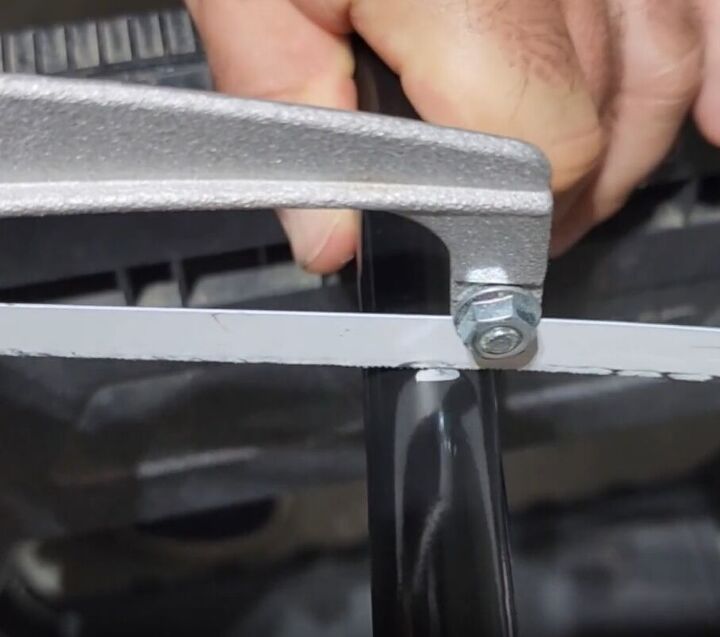
4. Modify the Mop Handles
Trim the mop handles by cutting off the bottom section with the screw end. Mark the desired length on the handle and use a metal saw to make the cut. Ensure you use a suitable blade designed for cutting metal and proceed slowly. Once you've cut through the handle, snap off the excess piece.
5. Arrange the Components
Lay out the cut mop handles and the painted mop racks. Arrange them according to your desired width, using the first rack at the top, the second one a few inches down, and the third rack at the bottom.
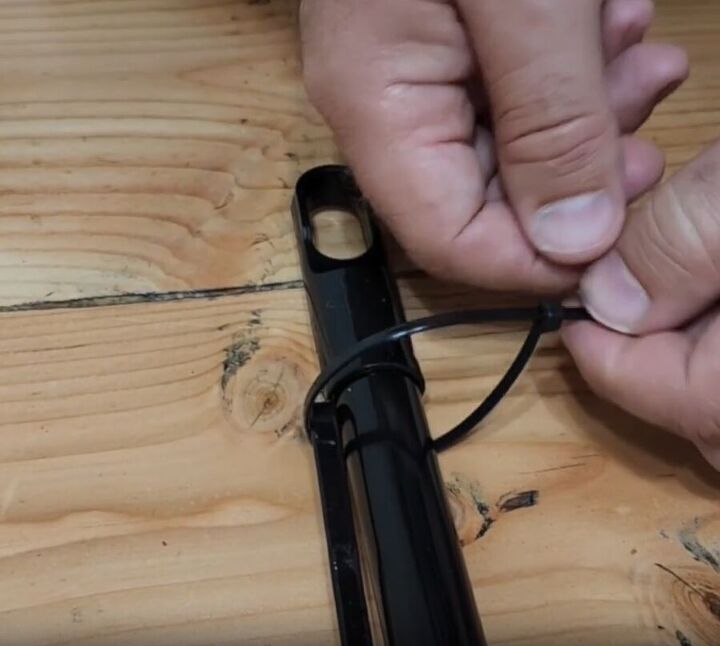
6. Secure the Components
To join the mop racks and handles, use black zip ties. Wrap the zip ties around the top of the mop handles and pull them tight. Attach two zip ties on each side of the racks to ensure sufficient friction and prevent the racks from falling down. Trim off any excess length from the zip ties.
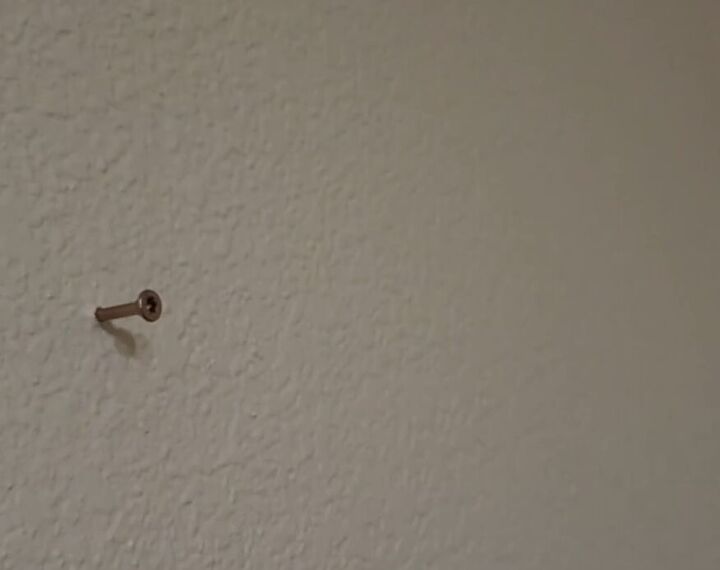
7. Mount the Organizer
Position the racks against the wall where you want them to be installed. Leave the screws slightly protruding from the wall to accommodate the handles.

Slide the handles onto the screws, ensuring a secure fit.
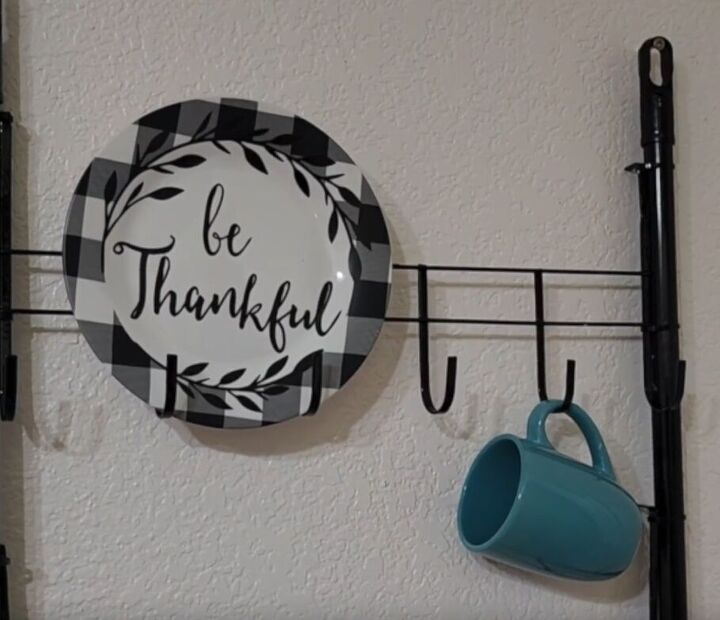
8. Add Decorative Elements
To enhance the visual appeal of your cupboard organizer and coffee mug display, consider adding decorative items such as plates and coffee mugs.
If you find that something is still missing, introduce some greenery for a refreshing touch. Be creative and customize the arrangement to your liking.
Clever Kitchen Organizing Projects
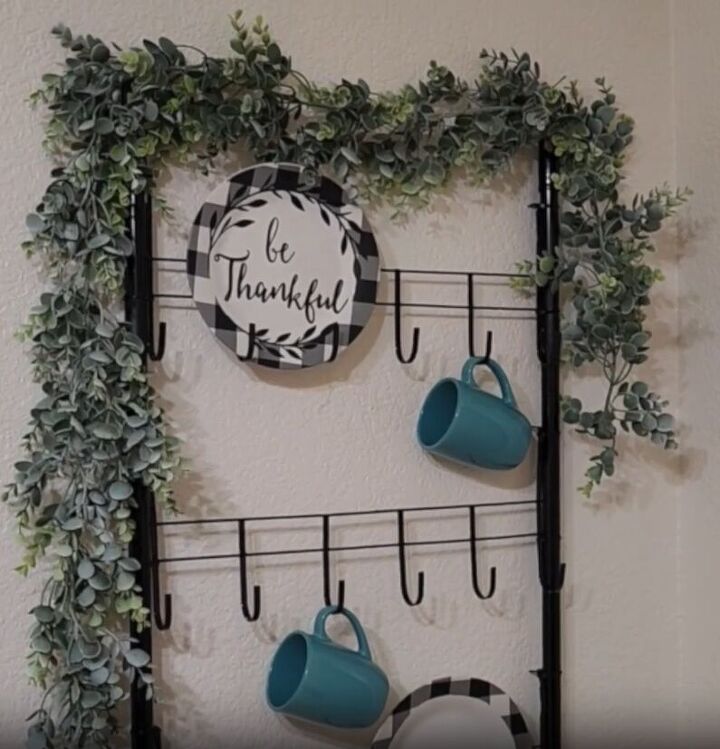
Kitchen Organization: DIY Mug Rack Tutorial
This DIY project offers a fantastic way to organize your kitchen and showcase your favorite coffee mugs.
By using mop racks and handles, you can create a neat and visually appealing storage solution. Take the opportunity to transform your cluttered cupboards into a beautiful and functional space.
Share your thoughts and experiences in the comments below, and let's celebrate your journey towards a more organized and charming kitchen.
Comments
Join the conversation
-
Looks good but I would not rely on zip ties, especially for crockery. Rather screw the hook racks to the poles or use pop rivets.
-
It looks amazing! I don't have space in my kitchen but it would work in my shed, and might make that place look a bit tidier and nicer too. Thank you.


Frequently asked questions
Have a question about this project?