


DIY Wood Christmas Tree Shelves
Tired of the traditional Christmas Tree. Learn how to make this easy Modern farmhouse DIY wood Christmas tree shelves. Add holiday cheer to any space, big or small, with a versatile minimalist tree that was a breeze to make from 2x4's.
Wonder why we decided to make this DIY Wood Christmas Tree Shelves? Since I have had my own place, I have always put up slim trees. I'm just fascinated by pencil-thin simple trees. I am not sure why I don’t like “traditional” wide trees- maybe it’s because I am just overwhelmed by how much you have to add to a big tree to make it look decent-Who knows?.
This year we have a huge great room and lots of space so I wanted more than just one pencil tree since it would just disappear in this big space. So I started looking for ideas on how to have a bigger tree without having a tree at all! So I came across some wooden wall tree shelves and We decided to supersize it to fit our current home.
The tree would match our modern Farmhouse decor and will serve as a display for my Christmas houses mini collection. What also made this wooden tree idea so appealing was that it could be done for under $15!
This is how you can make your 6 foot DIY Wood Christmas tree shelf...
Supplies:- 4- 2x4"
- 1 1/2" wood screws
- 150 grit Sandpaper
- Minwax Dark Walnut stain
- Decor
- Miter saw
- Angle finder
- Pocket hole jig
- Drill/ drill bits
- Orbital sander
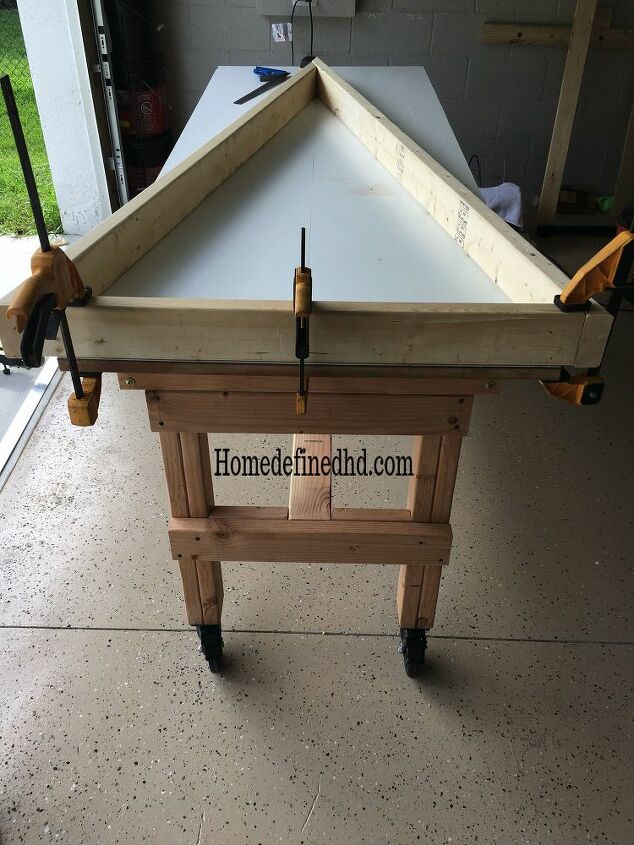
Step 1: Make the frame for your DIY Wood Christmas Tree Shelves...
Start by cutting the wood: 1- 2x4x71" and 1- 2x4x68"- Both need a 64° angle at the top end and 13° angle at the bottom end.
Then cut the bottom shelf - which also completes the triangle frame: 1- 2x4x32" with a 13° angle at both ends.
Continue by placing the pieces of the frame on a flat surface, clamp it together and attach the pieces using wood screws. You may add wood glue for stronger joints- we opted not to since we plan on taking it apart to store it after the holidays.
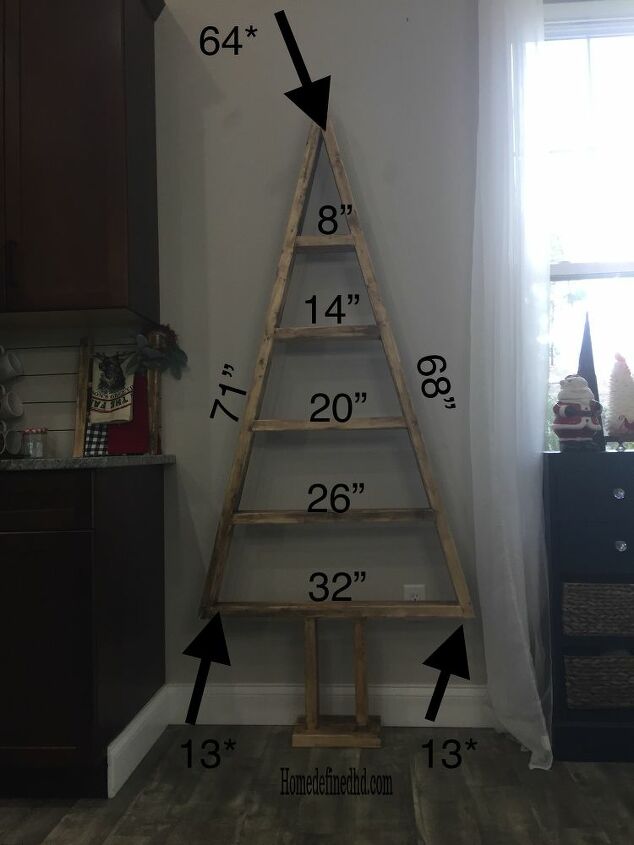
Step 2: Build the shelves...
Cut the following pieces with a 13° angle at each end.
- 1- 2x4x8"
- 1- 2x4x14"
- 1- 2x4x20"
- 1- 2x4x26"
Proceed to attach the shelves- from largest to smallest - leaving 12" between shelf. Used 2 wood screws on each side to secure the shelf.
Step 3: Make the base of your DIY Wood Christmas Tree Shelves...
- Cut 2-2x4x14.5" and 2- 2x4x12"
- Make 2 pockets holes on one of the 2x4x12".
- Proceed by joining the 2- 12" pieces with wood screws.
- Then attach the 2 - 2x4x14.5" to the 2 pieces of 2x4x12"- 2" from each end.
Step 4: Attach the base to frame...
Then, use wood screws to attach the base to the center of the bottom support board.
Step 5: Sand and stain...
Using 150 grit sandpaper sand the tree.
Proceed by giving it one coat of Minwax in dark walnut.
Step 6- Decorate and Enjoy!
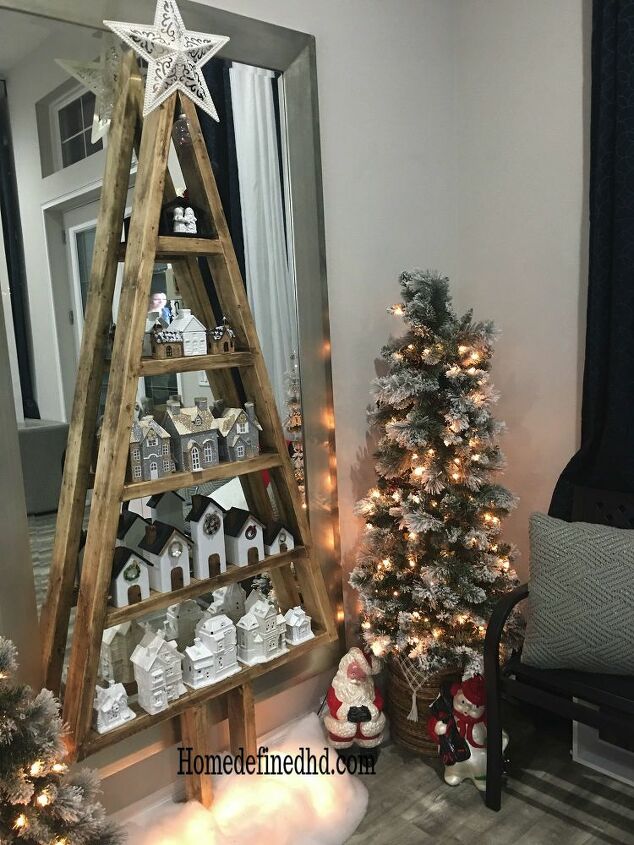
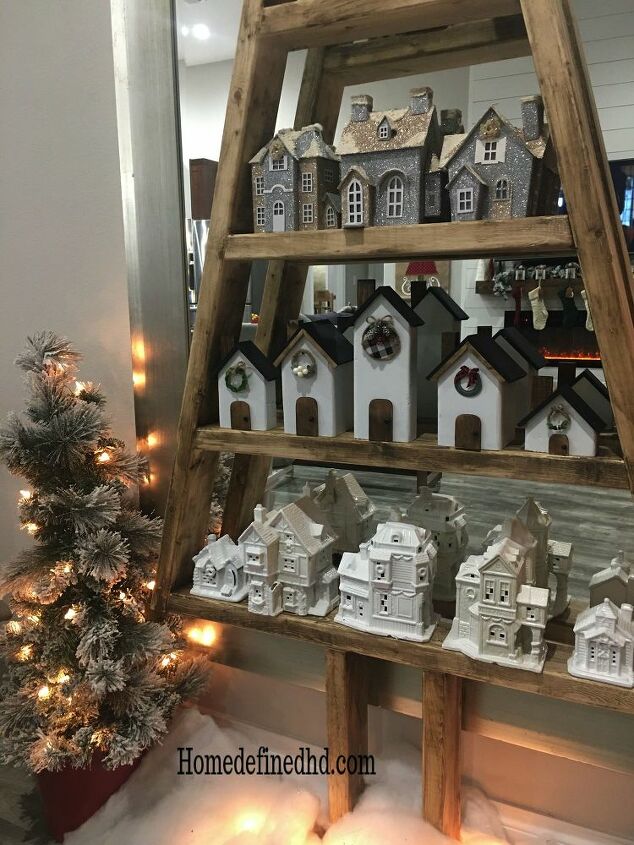
There are so many things you can display on this easy DIY wood Christmas tree shelves; you can add lights and garland, add rustic ornaments or festive decor. The possibilities are endless!
I am using it to display my Christmas house mini collection and the new wooden houses we just made.
It looks amazing and it’s very functional.
Did you make a DIY wood Christmas tree? How did you decorate it? I would love to know in the comments below.


Comments
Join the conversation
-
My husband and I were talking about thirty minutes ago about what to do for a tree this year. I just forwarded this to him. I WANT!!! 😊
-
Great idea!


Frequently asked questions
Have a question about this project?
Why is one side 71" and other 68". Is this neccessary?
Is this displayed in front of a mirror intentionally? The effect is beautiful and allows full viewing of the "houses." I'll bet it's gorgeous when lit!