


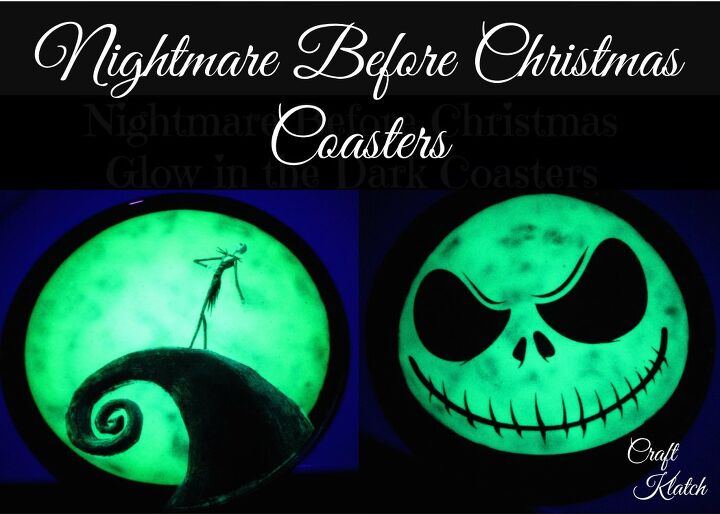
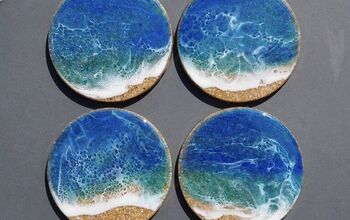
Nightmare Before Christmas Glow in the Dark Coasters DIY
Do you love the Nightmare Before Christmas characters? They are so fun and so creepy! Learn how to make Nightmare Before Christmas coasters for your holiday decor!
And they glow in the dark!
I love the imagery of The Nightmare Before Christmas characters and the movie.
I love everything about it!
But…I have to make a confession…
I have never seen it!
Every time the movie comes up in discussion…
I’ll have a serious look on my face, enthusiastically nod my head, agree with everything…
…then…when I realize I can’t bluff anymore, I drop my…
“I’ve never seen it.”
Usually, there’s a collective gasp, jaws drop, eyes pop wide open…
…and there is a moment of stunned silence when everyone looks at me like I’m from another planet. because nobody knows what to say…
…only for a moment…
Then, the words start flowing…
- How have you NEVER?!?!
- It’s the BEST EVER!
- You MUST watch it!
I nod, “I know, I know… This is the year I’m going to watch it!”
It just hasn’t happened yet, but I’m hopeful that this is the year!
When I was preparing to make this coaster, I asked my sister, “Is the Nightmare Before Christmas a Halloween movie or a Christmas movie?”
She froze…a beat of silence…eyes narrowed a little…total judgment in her tone of voice…
“You still haven’t seen the movie?”
“Nope.”
But I swear I want to and I WILL!
Maybe this year.
In the meantime, I can make a couple of awesome coasters!
Be sure to follow me on INSTAGRAM! I share fun stories and stuff over there! You can find me @craftklatch
Directions for Nightmare Before Christmas Coasters
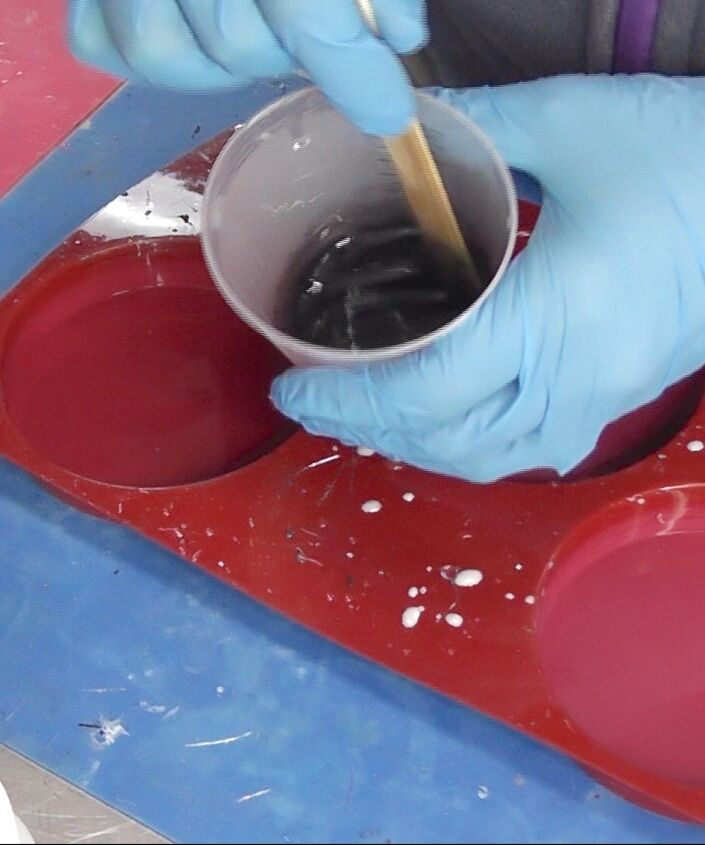
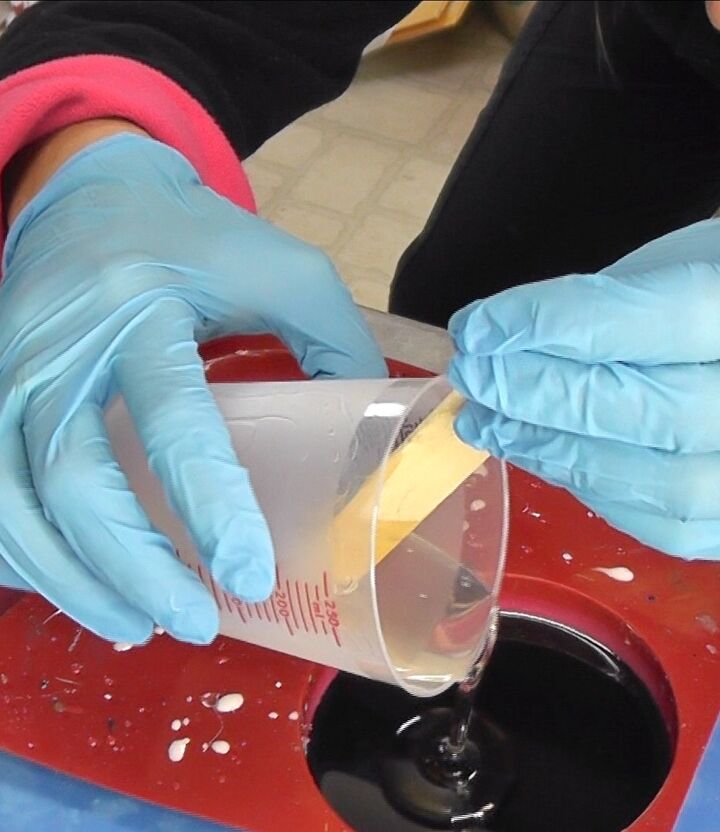
1. Mix two ounces of resin, according to the package directions, and add some black pigment until the color is solid.
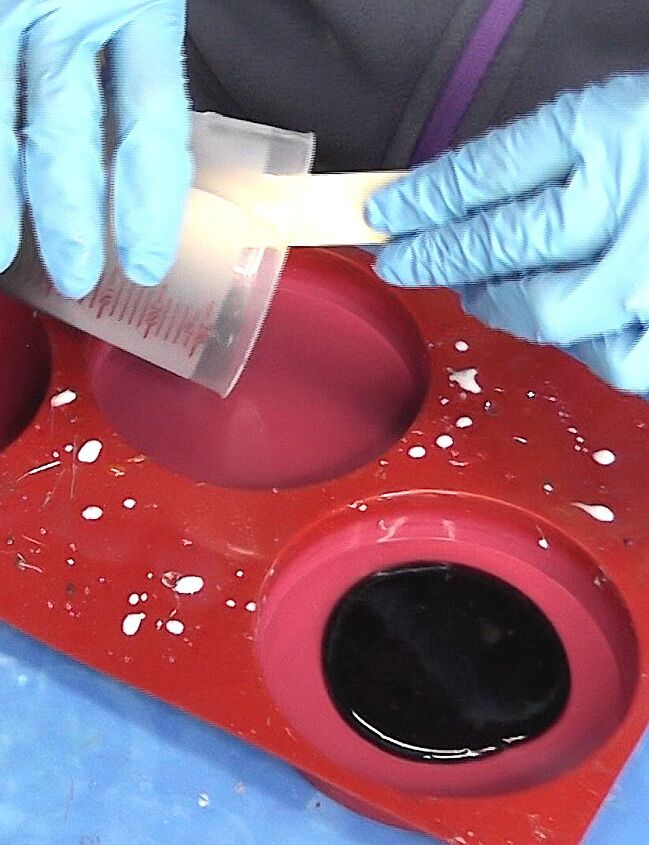
2. Pour it into the mold and take a lighter to pop the bubbles. Let it cure for a minimum of 12 hours.
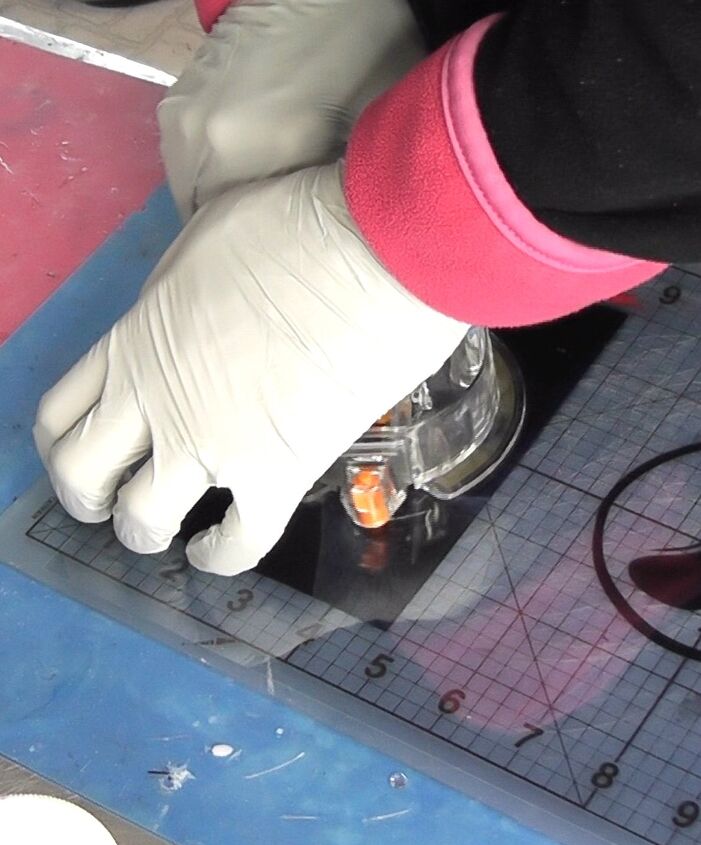
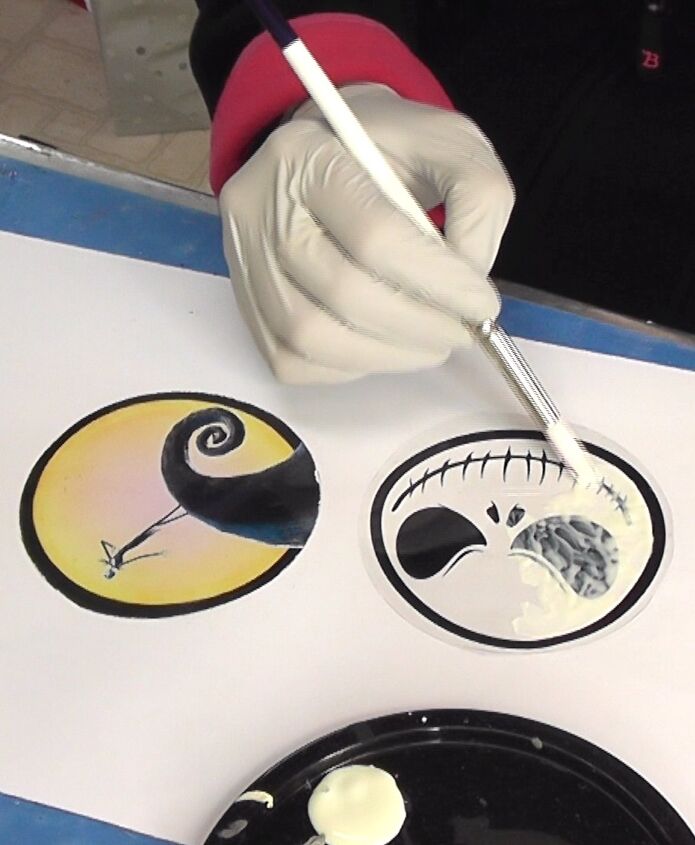
3. Print your Nightmare Before Christmas images on transparency film. Cut out the images. I use the circle cutter and have it set at just under four inches.
TIP: I use a laser printer, but others have told me that the inkjet works just as well ~ just make sure the transparency film you use is made for your type of printer.
4. Paint the glow-in-the-dark paint on the shiny side of the film. Allow the paint to dry. Realize this might take several coats.
5. Mix two more ounces of resin and pour them into the mold. Take your lighter and pop the bubbles.
6. Slide your images into the resin and press down with your stir stick. Use your lighter to pop the bubbles
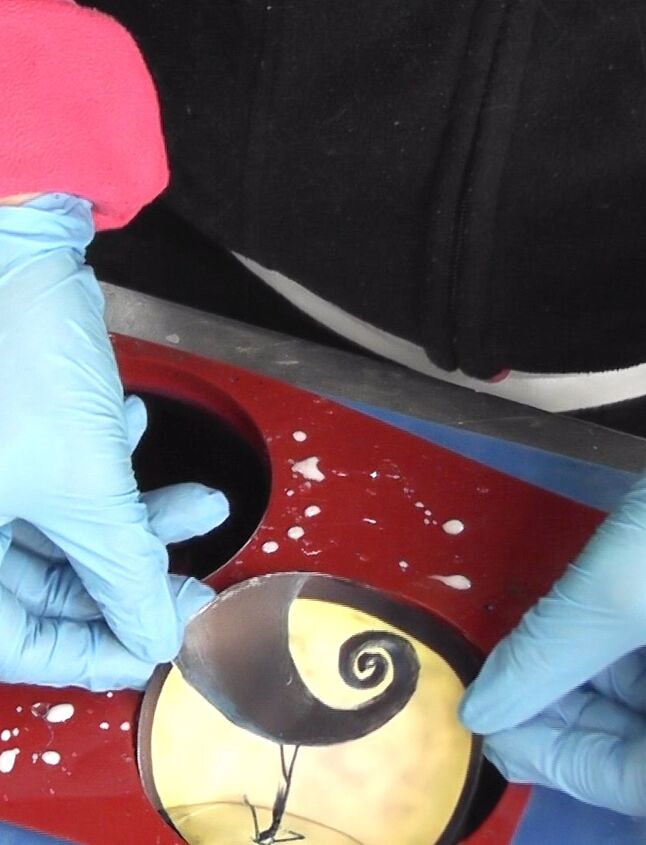
They need to cure a minimum of 12 hours before removing them from the mold.
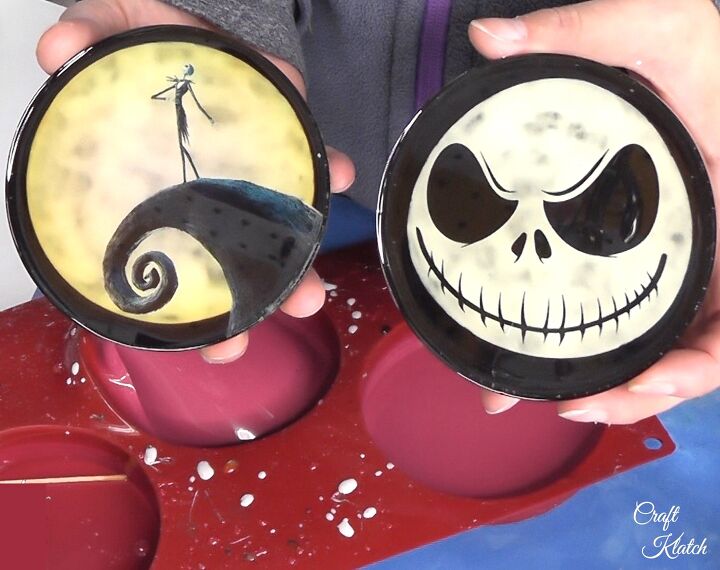
That’s it! Let them gather some light and they will glow in the dark!

Here is another fun project!
Thanks for stopping by!
Remember: Life’s too short not to shimmer, so grab your glue gun and your glitter!™ Stay safe!
Mona
DIY Halloween crafts


Frequently asked questions
Have a question about this project?