


How to Make a DIY Christmas Tunnel With Twinkling Lights

'Tis the season to transform your outdoor space into a winter wonderland with a dazzling DIY Christmas tunnel! Follow this step-by-step tutorial to create your very own holiday archway using simple materials.
With just PVC pipes, rebar, and string lights, you'll craft a magical pathway that adds a festive touch to your home. Let's dive into the details and light up your holiday season.
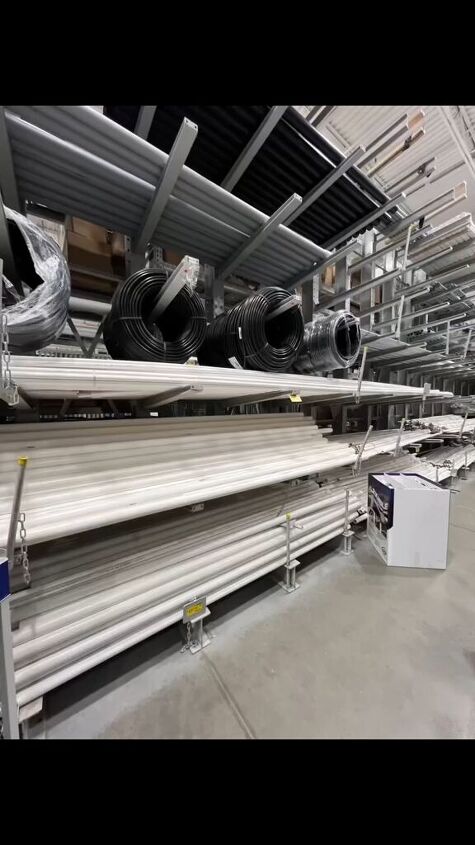
Tools and materials
- PVC pipes (number depends on your desired arch quantity)
- Rebar (2 for each PVC pipe)
- String Christmas lights
- Hammer
Steps
Step 1: Determine the Arch Quantity and Size
Begin by deciding how many arches you want for your Christmas tunnel. Each PVC pipe will form an arch, so consider the space you have and how dramatic you want the effect to be. Ensure that each PVC pipe is long enough, ideally 16-20 feet, to provide sufficient height for people to walk comfortably underneath.
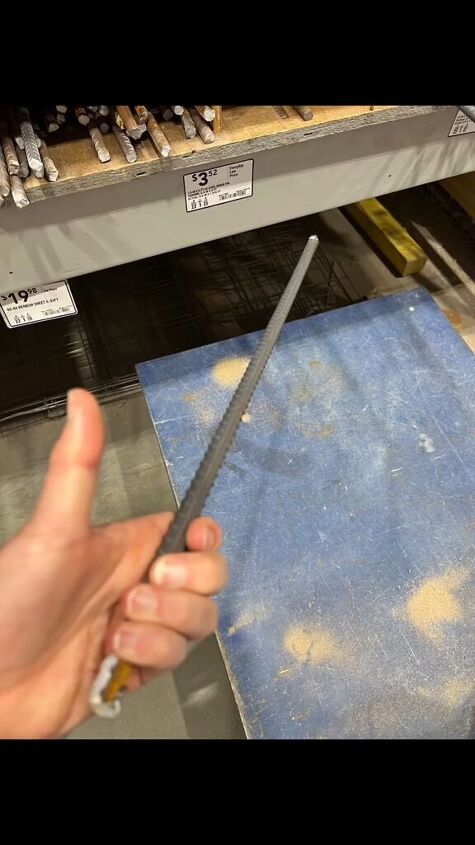
Step 2: Acquire Rebar for Staking
Purchase rebar to anchor the PVC pipes securely into the ground. You'll need two pieces of rebar for each PVC pipe—one for each side of the sidewalk. This ensures stability and keeps your Christmas tunnel in place, even in windy weather. Each rebar should be about 1 foot long.

Step 3: Select String Christmas Lights
Choose the string lights that will adorn your Christmas tunnel. Opt for colors that complement your overall holiday decor theme. Ensure you have enough lights to wrap around each PVC pipe, creating a bright and festive ambiance.
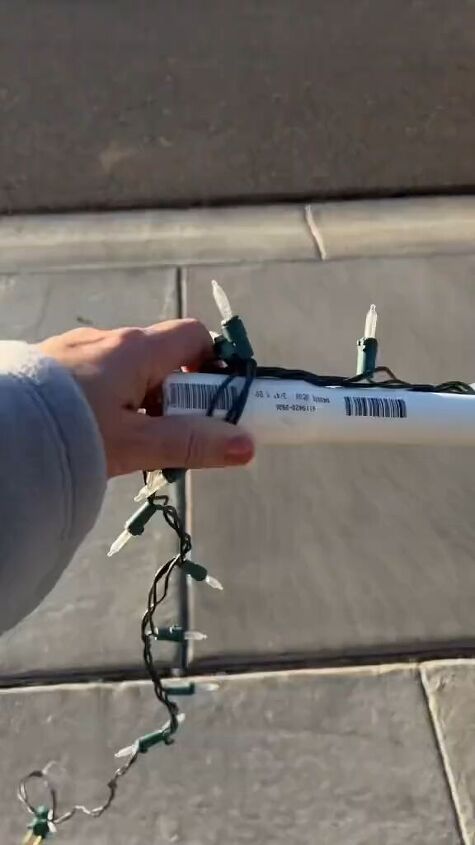
Step 4: Wrap PVC Pipes with Lights
Start wrapping the string lights around each PVC pipe. Be creative with your design, making sure to distribute the lights evenly for a balanced and dazzling effect. Secure the lights in place by wrapping them snugly around the pipe.
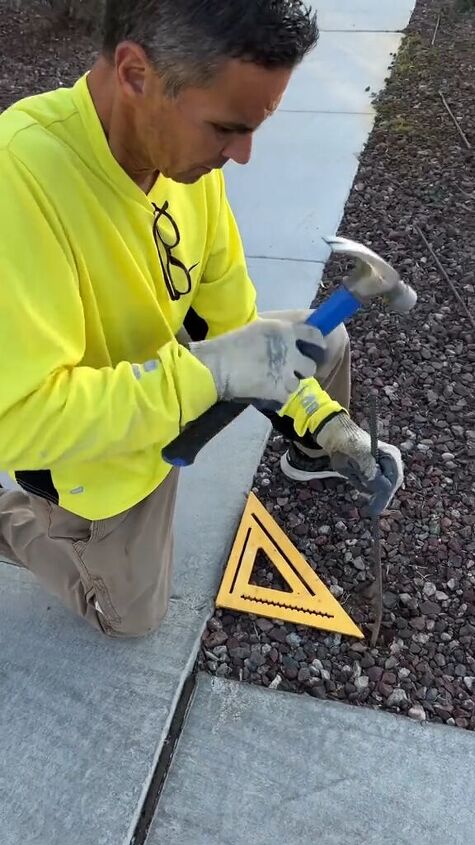
Step 5: Install Rebar into the Ground
Hammer a few inches of the rebar in rows on either side of the sidewalk. This provides a sturdy anchor for your Christmas tunnel.
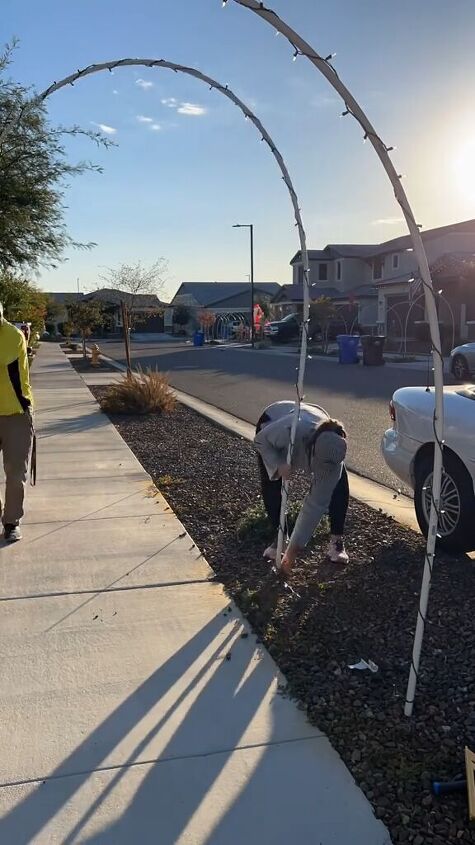
Step 6: Attach PVC Pipes to Rebar
Slide each PVC pipe over the rebar stakes, attaching them securely to the ground. Ensure that the arches are evenly spaced and aligned to create a visually appealing tunnel effect.
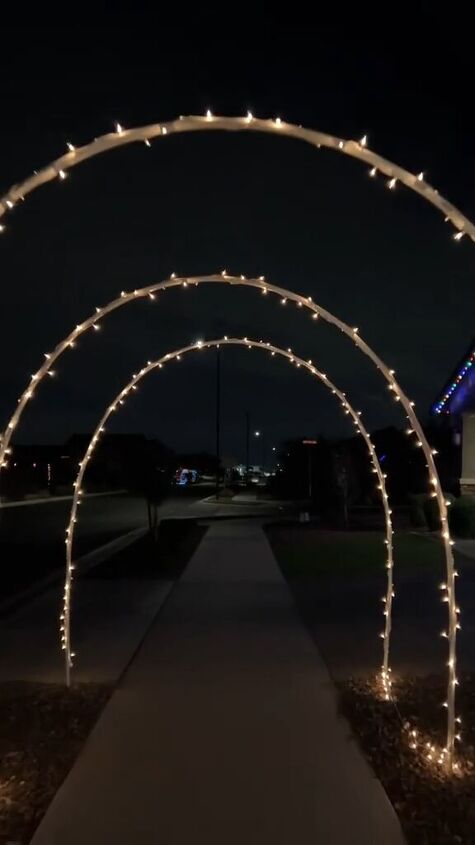
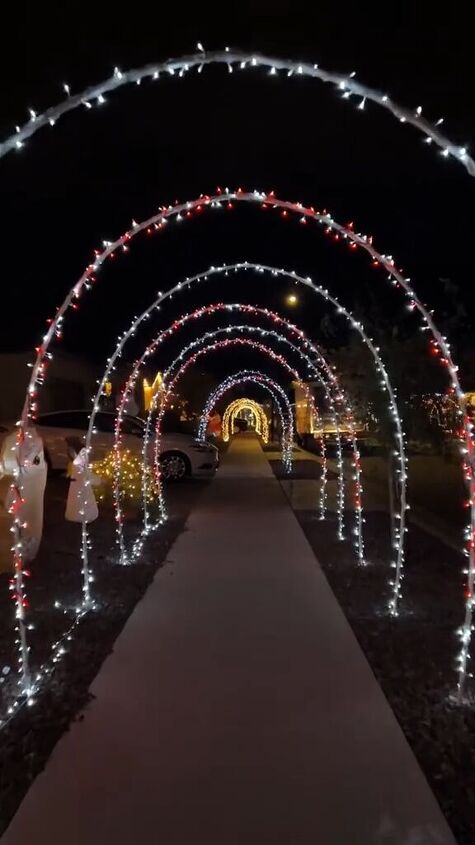
DIY Christmas tunnel
Congratulations! You've successfully crafted a DIY Christmas tunnel that will illuminate your home with festive cheer. This simple yet stunning project transforms your outdoor space into a magical wonderland, creating lasting memories for you and your loved ones.
Now, invite friends and family to experience the joy of walking through your enchanting Christmas tunnel and bask in the warm glow of holiday lights. Happy holidays and enjoy your spectacular creation! Leave me a comment to let me know how your Christmas tunnel turned out.
Follow @juliecarmonahome on TikTok for more DIY ideas.


Frequently asked questions
Have a question about this project?