


How to Make a Cute DIY Halloween Gnome For Your Decorations

Get ready to create an adorable DIY Halloween gnome with this easy tutorial! I'll show you step-by-step how to make a cute gnome that's perfect for adding a touch of Halloween magic to your decorations.
Using simple materials like fabric, a styrofoam cone, a wooden bead, faux fur, and more, you'll learn how to craft each part of the gnome, from its body to its nose, beard, hat, and even a little broom.
This project is a fun and creative way to get into the Halloween spirit and make your own unique decoration. Let's get started!
This post was transcribed by a member of the Hometalk editorial team from the original HometalkTV episode.
Tools and materials
- Black fabric
- Pencil
- Scissors
- Styrofoam cone
- Hot glue gun
- Decor rocks
- Batting
- Rubber band
- Craft wire
- Wooden bead
- Faux fur
- Striped fabric
- Old witch's hat
- Black felt
- Rotary cutter
- Cutting board
- Pliers
- Stick
- Scrap botanicals
Steps
1. Make the gnome's body
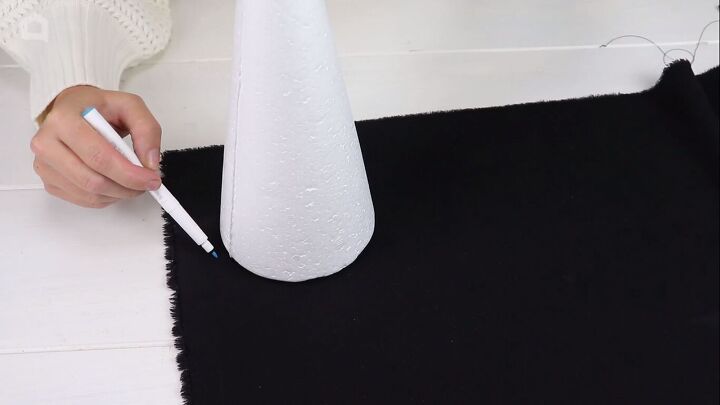
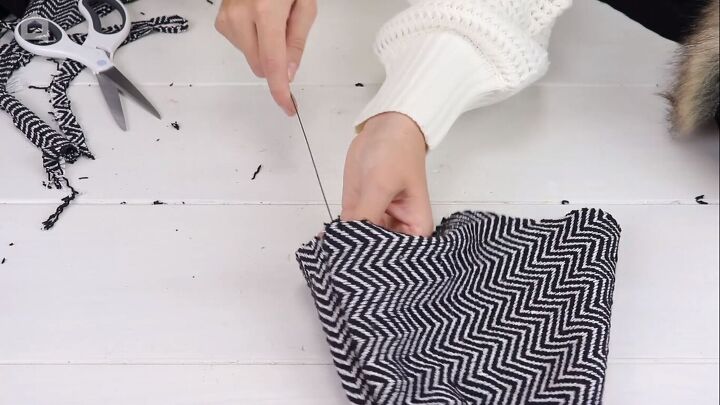
To begin my project, I'm going to take a piece of cotton black fabric and a nine-inch styrofoam cone. I'm going to place it on my fabric and trace a circle around the cone that is just slightly larger than the base. Then I'm going to cut out the circle.
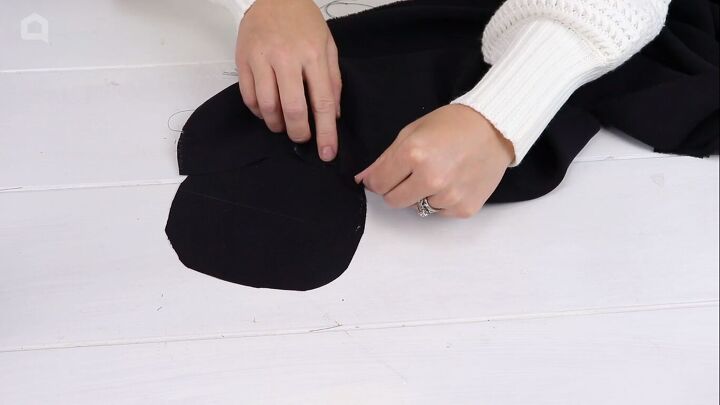
Taking the remainder of my fabric I am going to glue it around the circle using fabric hot glue. I just scallop the fabric, pinching it in place as I go around the entire circle. Basically, I'm creating a bag that we are going to put our Styrofoam cone in. This is going to be the body of our gnome.
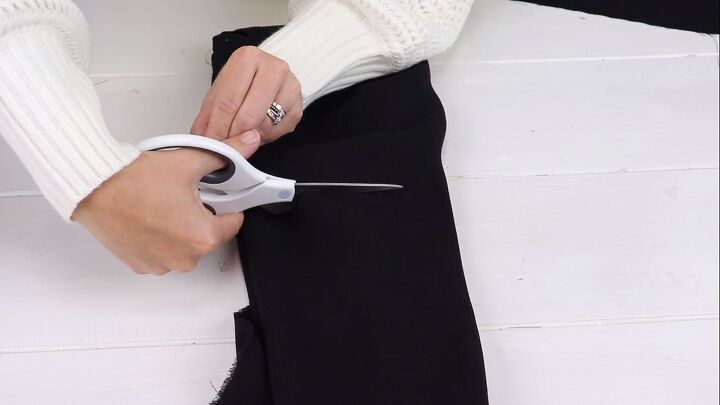
I am left with this long cylinder shape. I'm going to size up my styrofoam cone and cut it off just about four inches below the top of the cone.
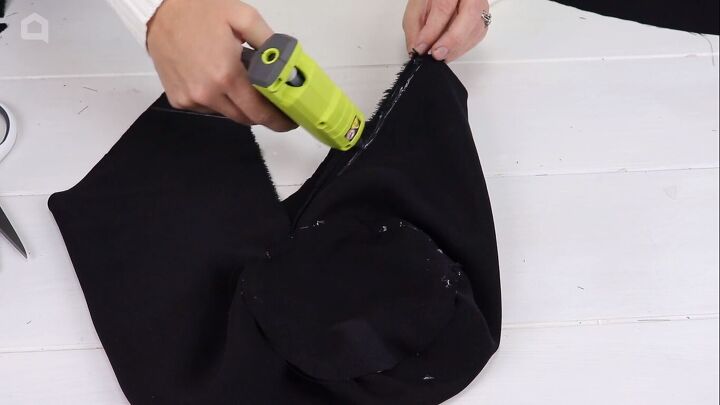
I'm going to finish it off by gluing together the pieces of fabric where they stopped.
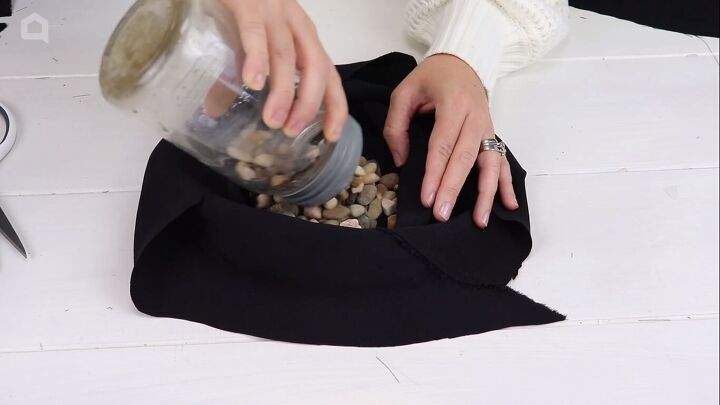
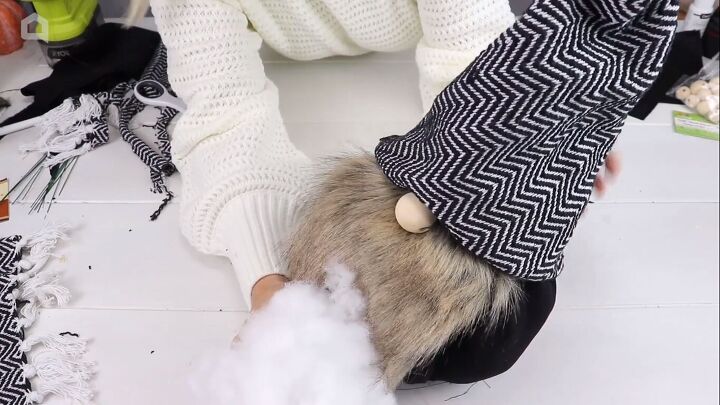
Once I have that ready, I'm going to lay it on my work surface, and I'm actually going to open it up just like it's a bag. Then I'm going to take some decor rocks and place them in the bottom. This is going to give the bottom some weight so that our gnome won't tip over.
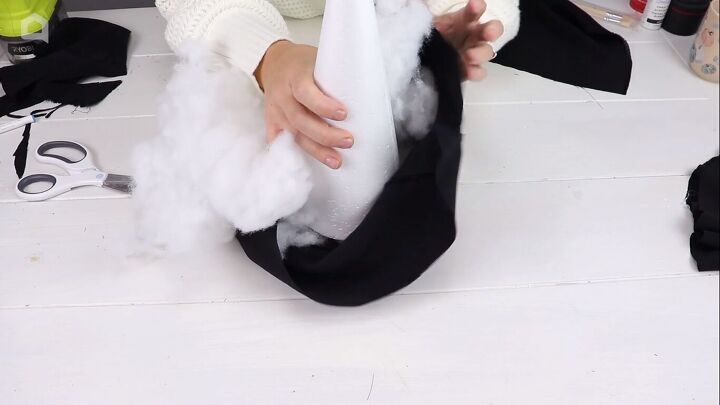
I'm going to take some cotton batting, place my Styrofoam cone in there, and place batting all around as well. We want a nice fluffy body.
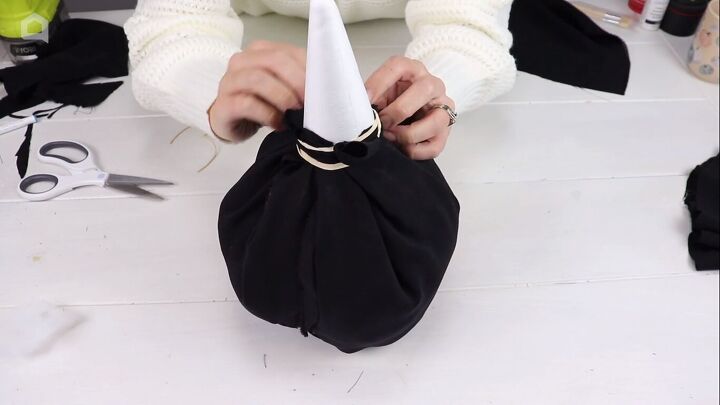
Then I'm going to bring up the fabric and tie it around the cone with a rubber band.
2. Make the gnome's nose
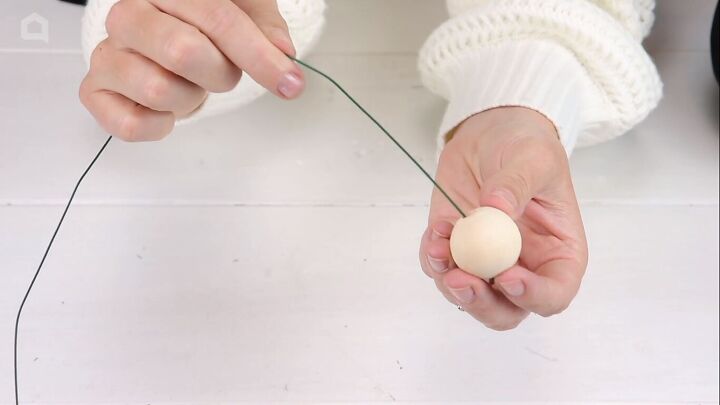
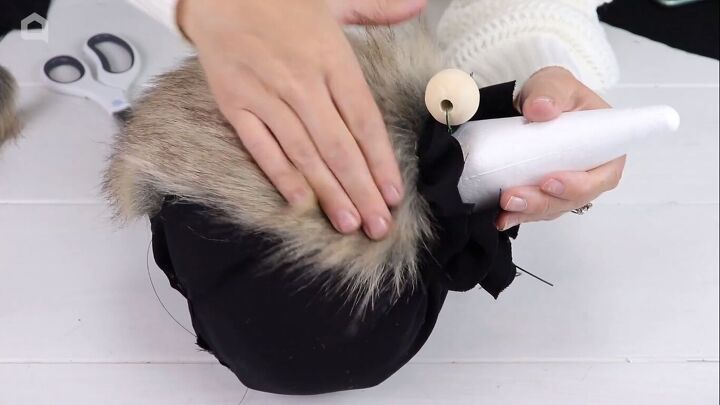
I'm going to take this large wooden bead, thread through a stiff piece of craft wire, and twist it around.
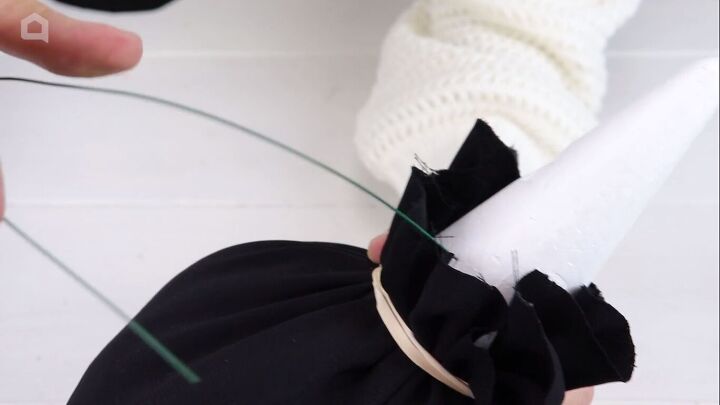
Then I'm going to take one end of the craft wire and poke it right through the styrofoam cone, just above where my body stops.
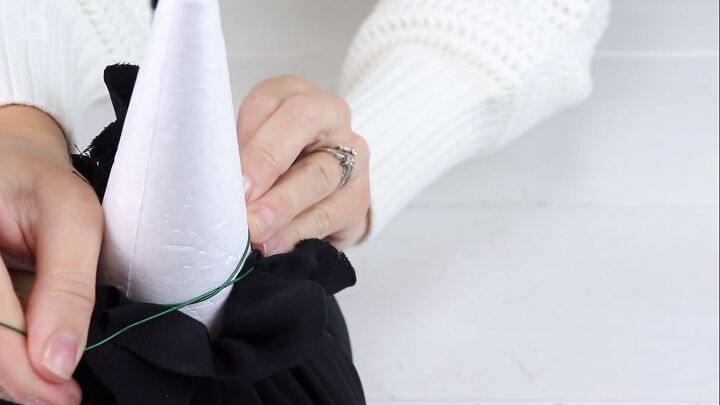
I'm going to take the other piece, wrap it around the back, and twist my wire to secure my nose in place.
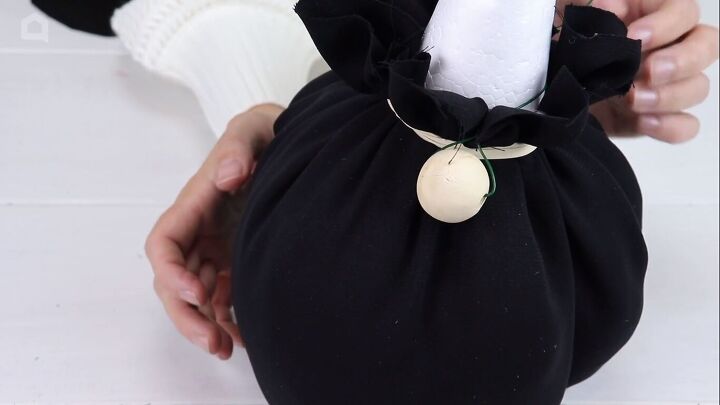
This is what it looks like with the nose attached.
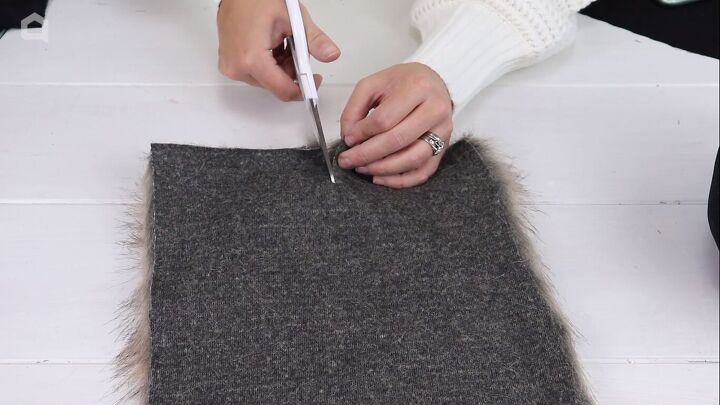
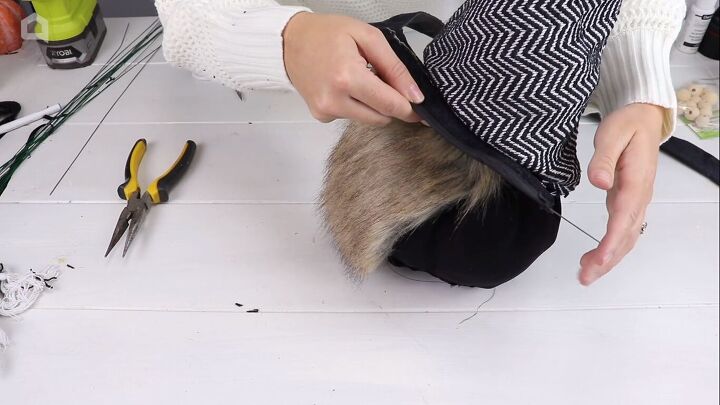
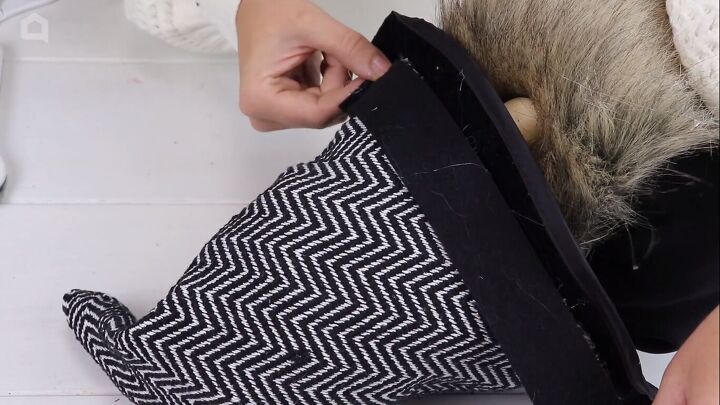
3. Make the faux fur beard
I'm going to take a piece of faux fur and cut it for a beard. When cutting faux fur, you always want to make sure you cut from the backside so you don't wreck the fibers of the fur.
Once I have my beard shaped to my liking, I'm going to secure it just under the nose, but I want to make sure I pull it up nicely, so it looks natural. So I'm going to come in with my fabric hot glue and secure it in place.
4. Make the gnome's hat
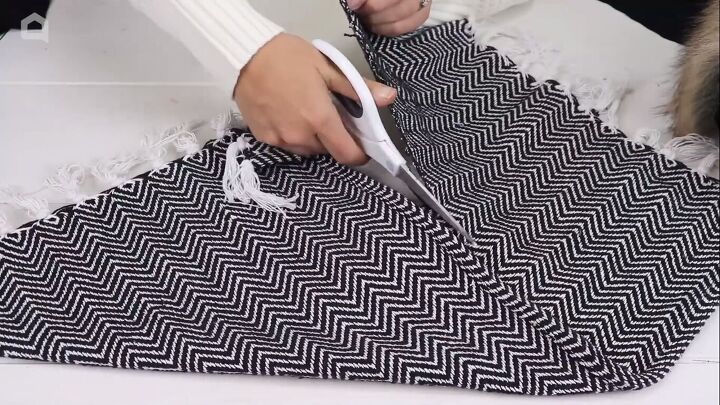
Next, I'm going to take this woven rug that I just picked up at my local dollar store, and this is what I'm going to use for the hat. We want the hat to be nice and stiff. So I'm going to fold it over into a triangle shape and cut off the excess. I'm also going to cut off the tassels because we don't need those.
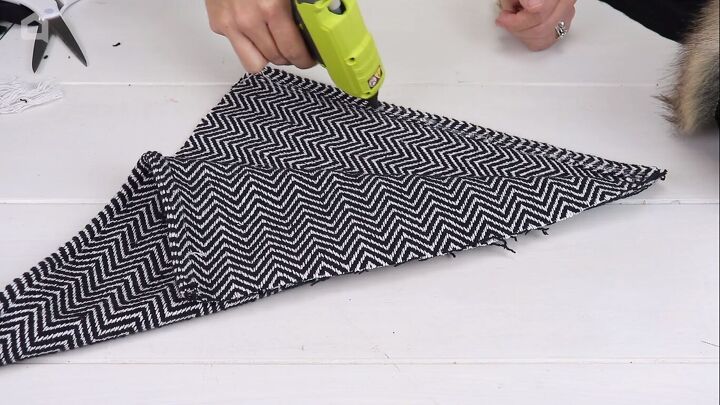
Folding it back over, I'm going to glue along one edge of the triangle so that I have an opening for my hat.
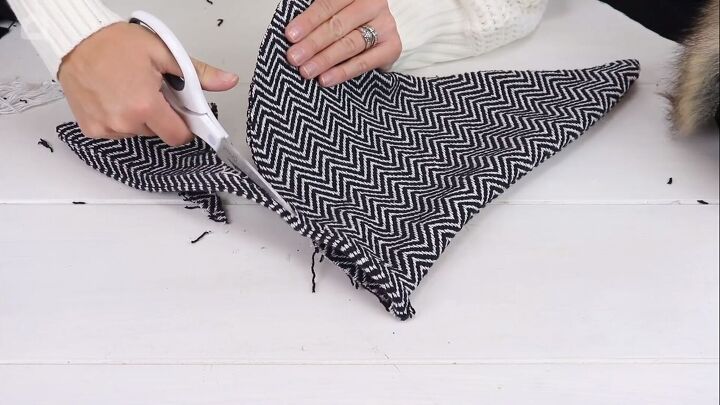
I'm going to flip it inside, then cut a swoop along the opening just so our hat sits nicely and naturally. So I just start at one edge, and I cut a nice half semicircle along the edge of my hat.
To make my hat stand up nicely, I'm going to run a large piece of stiff floral craft wire up the spine of my hat.
Then I'm going to place my hat on my gnome. I'm going to fold the hem under so it's nice and neat, then stuff the hat with some batting.
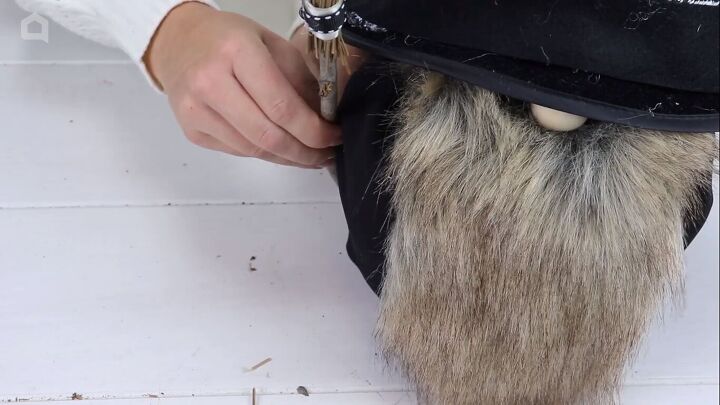
I couldn't find a witch's hat that would fit my gnome, so I took one from my last year's Halloween decorations and cut off the brim. I trimmed the brim down and then I'm going to glue it into place.
Next, I'm going to take a piece of felt, cut it down into a two-inch strip, and apply this on the rim of my hat.
5. Make a broom for the gnome
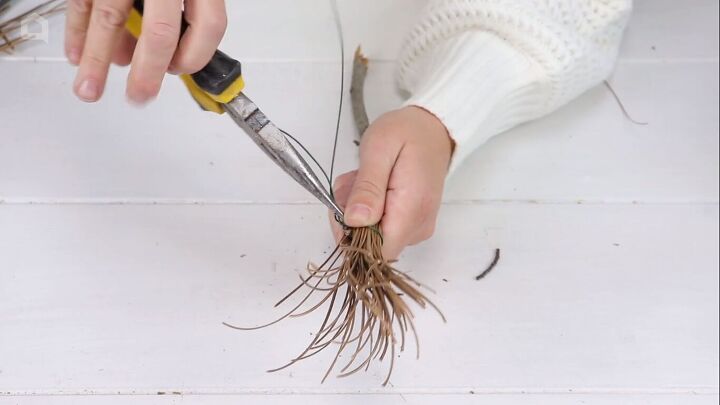
I have these rustic botanicals left over from an old arrangement, so I'm going to cut it up to make a broom for my gnome. I cut off the curly pieces, so I'm left with these nice straight pieces. Then I'm going to take a stick that I found outside, and I'm just going to wrap it around with some floral wire, secure it with some tape, and then as well, I'm going to come in with some decorative ribbon just to give it a little bit more embellishment. So I'm just going to secure that with some hot glue.
Once that is done, I am going to take some more floral craft wire, and to secure this to my gnome, I'm just going to wrap it around the stick. Then I'm going to poke it right through the fabric on the side of the body and secure it tightly.
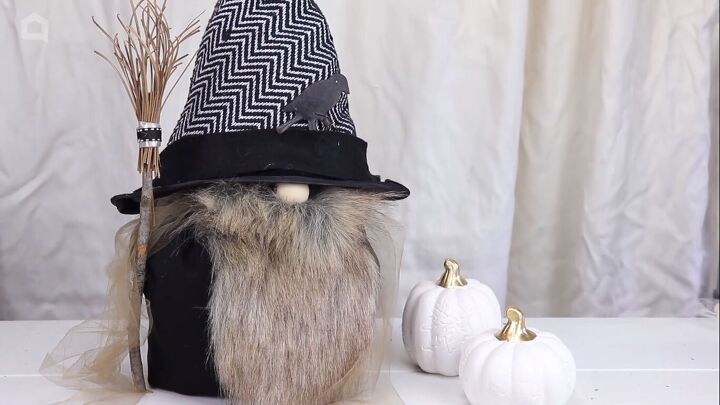
DIY Halloween gnome
With that, my gnome is complete. I added in some pieces of tulle and just stuck them up under the hat. I added in this little rustic wrought iron crow that I had kicking around in my Halloween decor and I just tucked it in the brim of the hat. I think this gnome turned out pretty cute, and I encourage you to get creative if you're going to make this gnome, and put your own spin on it.
What do you think of this DIY Halloween gnome? Let me know in the comments or check out these other Halloween gnome ideas.


Frequently asked questions
Have a question about this project?