


How to Upgrade Your Plain Windows With DIY Window Grids

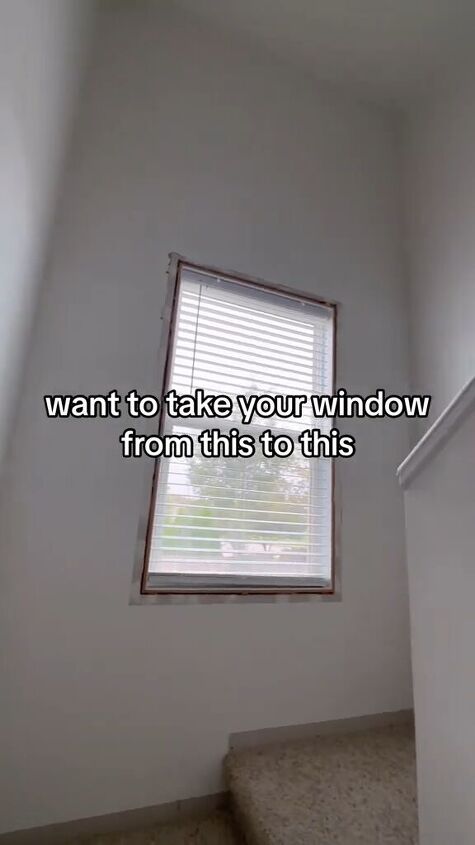
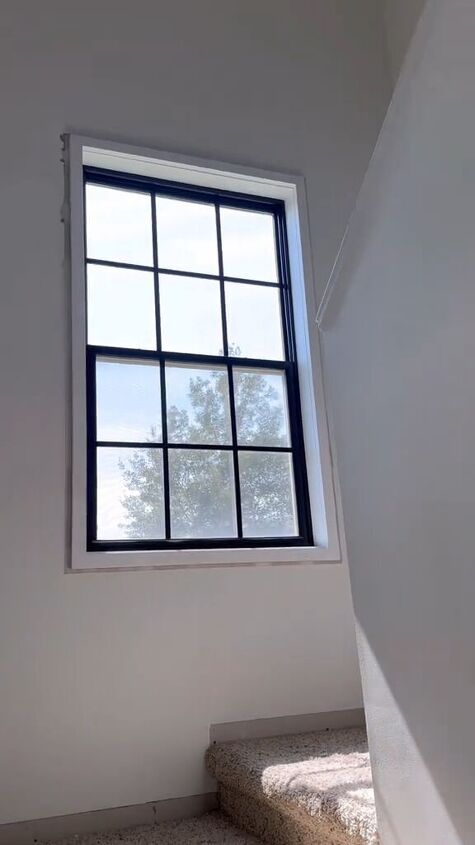
I turned a boring window into a beauty by making DIY window grids, all for under $50. I’ll show you how to make windows with grids with these quick, easy steps. By transforming your window, you can add a touch of elegance and character to your space. Here's what you'll need:
Best spray paint!
Tools and materials:
- Painter's tape
- Plastic sheeting
- Black spray paint
- Mounting tape
- A ruler or measuring tape
- A pencil
- A utility knife or scissors
- Window cleaner and a cloth (optional)
Table of contents
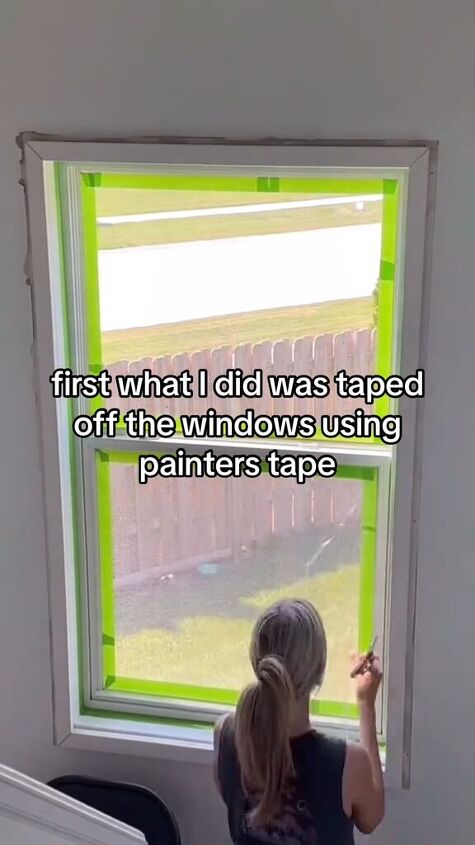
Step 1: Tape off the windows and trim
Start by taping off the window using painter's tape. This will protect the surrounding areas from any overspray during the painting process. Make sure to tape around the entire perimeter of the window.
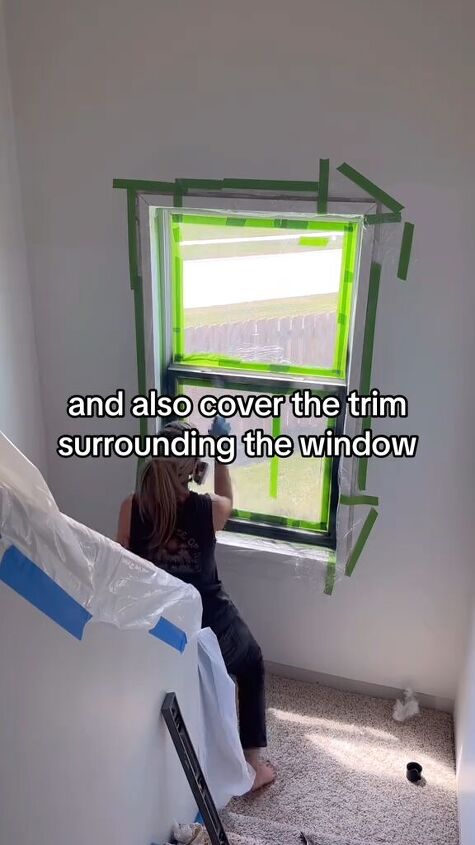
I used plastic sheeting to cover the glass to ensure that no paint gets on the actual window. To protect the trim surrounding the window from accidental paint splatters, use painter's tape to cover it completely. Ensure that the tape is securely in place.

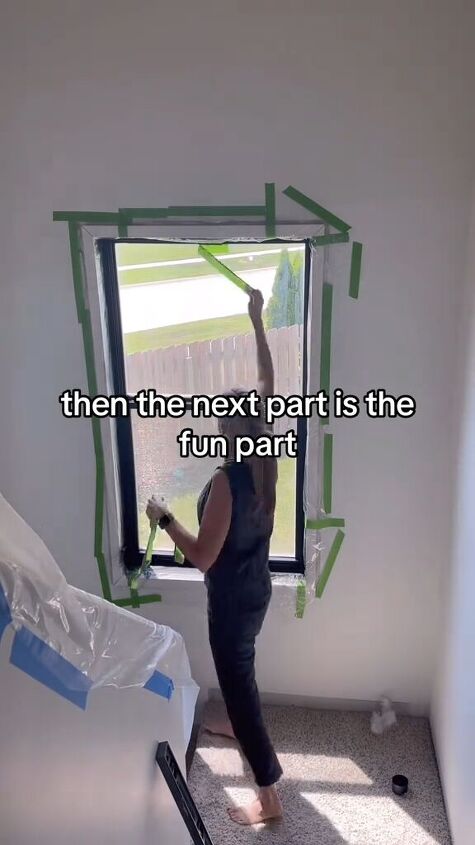
Step 2: Apply black spray paint
Now, it's time to give your window that faux pane look. Apply three coats of black spray paint to the plastic sheeting. Allow each coat to dry before applying the next one. Make sure you follow the manufacturer's instructions for drying times between coats.
Step 3: Remove the tape
Once the final coat of spray paint has dried completely, carefully remove the painter's tape from both the window and the trim. This will reveal your newly painted faux window.
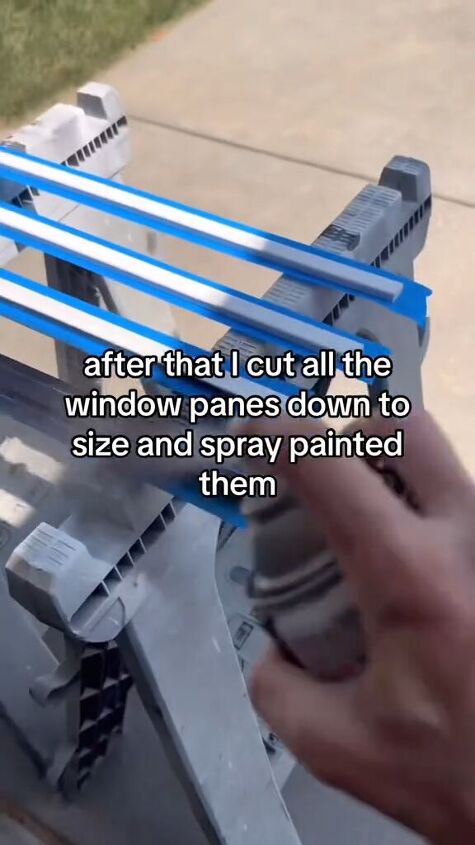
Step 4: Cut the faux panes
Measure the size of the faux panes you want to create on your window. Using a ruler or measuring tape, mark the dimensions on the plastic sheeting. Make sure the lines are straight and evenly spaced to create a pane effect.
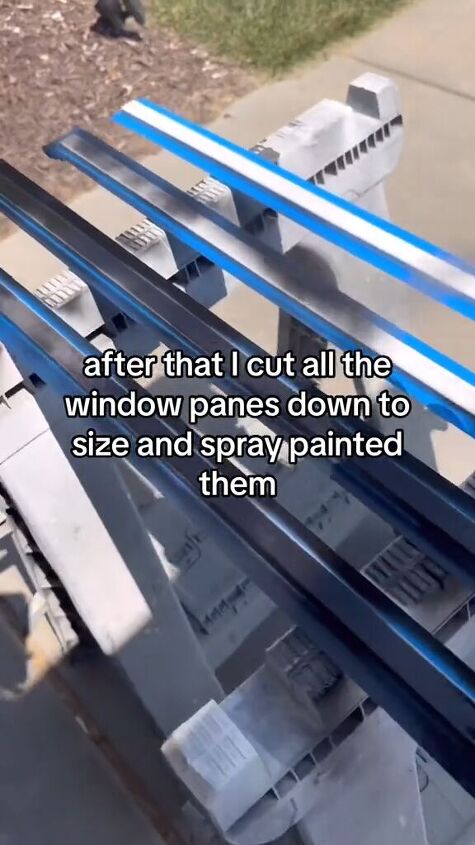
Step 5: Spray paint the faux panes
Carefully cut along the marked lines using a utility knife or scissors to create individual faux panes. Once you have all your panes cut out, spray-paint them using the same black spray paint you used earlier. Apply as many coats as needed to achieve the desired opacity and finish.
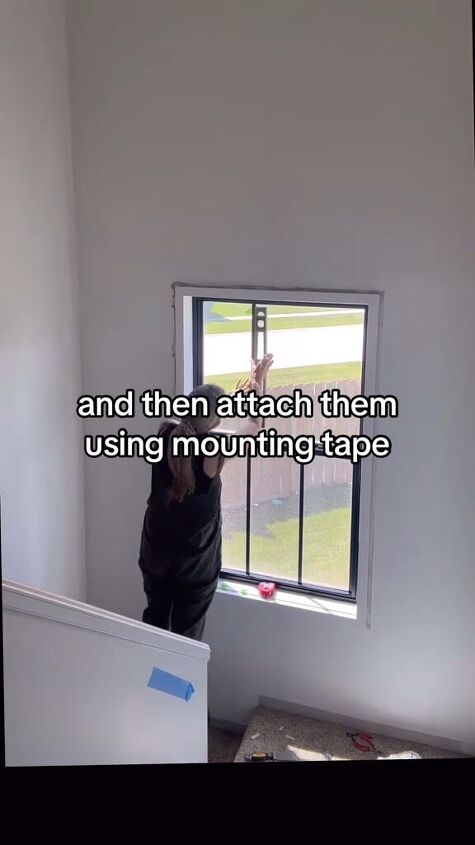
Step 6: Attach the faux panes
Once the panes are dry, it's time to attach them to your window. Using mounting tape, apply strips of tape to the back of each faux pane. Make sure the mounting tape is evenly distributed to ensure a secure attachment.
Carefully position each faux pane on the window, adhering them using the mounting tape. Press firmly to ensure they are securely attached to the plastic sheeting.
DIY window grids
This DIY project allows you to enjoy the look of divided panes without the cost and hassle of installing actual window grids. Let me know in the comments how you’ve transformed your plain-Jane windows!
Follow @a_bit_unexpected on TikTok for more DIY ideas.
Comments
Join the conversation
-
When remodeling our bathroom, I wanted to do this with black panes. I used black electrical tape and it was done in 15 minutes. Looks great.
-
I have used white electrical tape and it doesn't fall/unravel! Easy to measure/ line up after you figure how many panes you'd like! I used a trim in the past and it kept falling. The tape is the same width as real "panes"!♡


Frequently asked questions
Have a question about this project?