


Light Up Your Nights: How to Make Stunning Outdoor Solar Wall Sconces

Hey there everyone, and welcome to the amazing world of DIY home improvement!
Today I have an outdoor DIY project to share. I'll guide you through the process of creating impressive outdoor solar wall sconces that will illuminate your space with a warm and inviting glow.
Harnessing the power of solar energy, I'll show you how to transform ordinary materials like pipe, wood, and even humble Jenga pieces into gorgeous custom lighting fixtures.
This post was transcribed by a member of the Hometalk editorial team from the original HometalkTV episode.
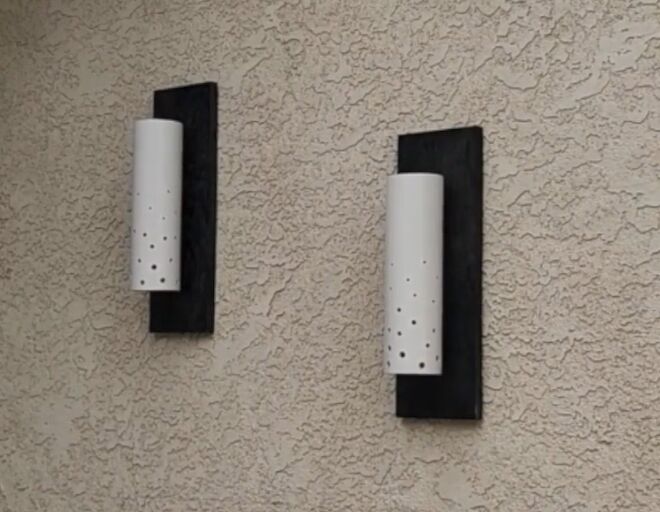
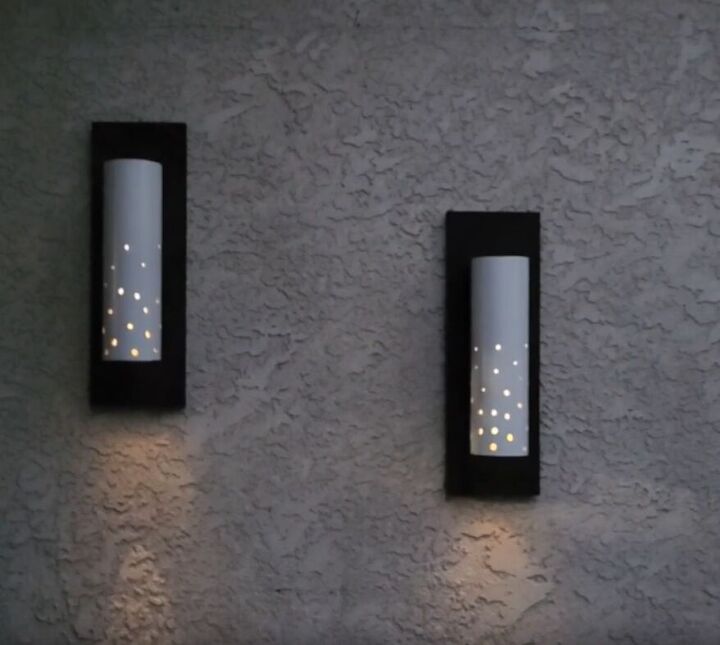
Best outdoor sconces!
This clever and unique project not only adds a touch of elegance to your outdoor ambiance but also proves that with a little creativity and ingenuity, you can achieve remarkable results on a budget.
Get ready to embark on a journey of creativity and craftsmanship as we delve into the art of making beautiful and affordable outdoor solar wall sconces.

1. Cutting and Smoothing the Pipe
To begin our DIY solar light project, head to your local hardware store and purchase a three-inch pipe that measures two feet in length. Using a saw, such as a skill saw or a Sawzall, cut the pipe in half by marking the twelve-inch line and making a clean cut.
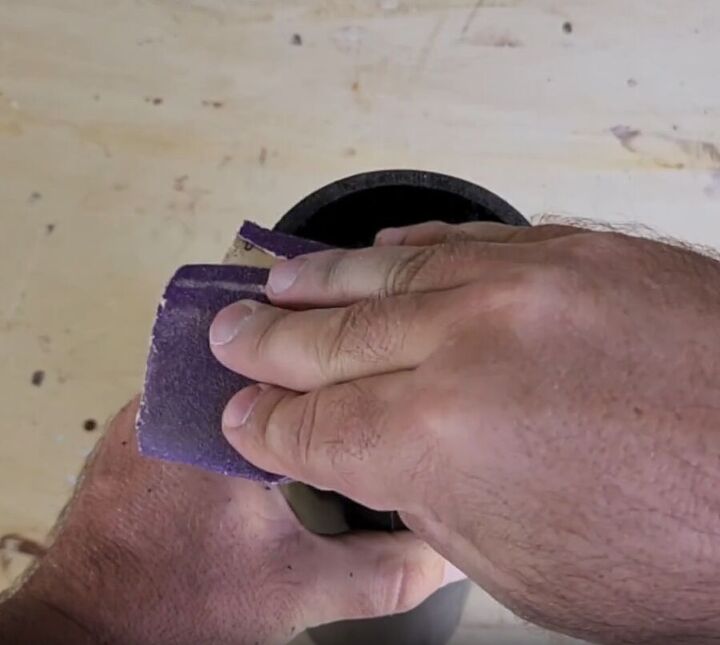
Once cut, the ends may appear rough. Simply take 80-grit sandpaper and carefully sand around the edges until they become smooth and polished.
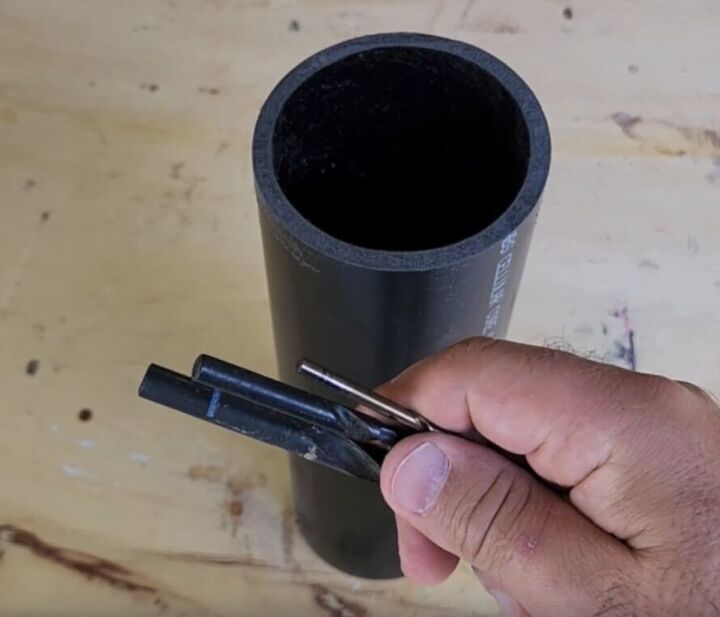
2. Drilling the Holes
Alright, it's time to grab your drill bits! Make sure you have three sizes on hand: large, medium, and small.
Now, here's the plan: we're going to drill some holes in one end of the pipe. Small holes near the top, then medium size in the middle, and finally, larger holes at the bottom.
This step will give our outdoor solar wall sconce a unique and stylish look. Let's get drilling!
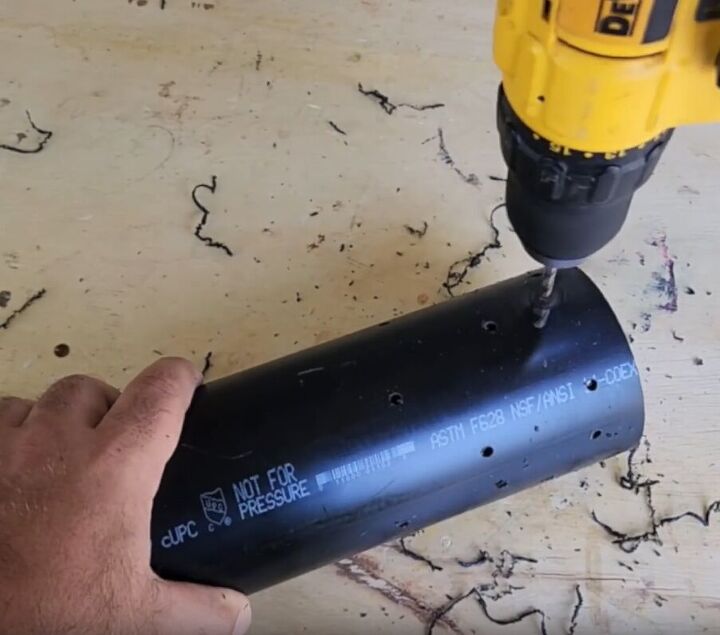
Begin by using the small drill bit to randomly drill holes all around the pipe on one end, avoiding crossing the halfway mark. Embrace the beauty of randomness rather than following a specific pattern.
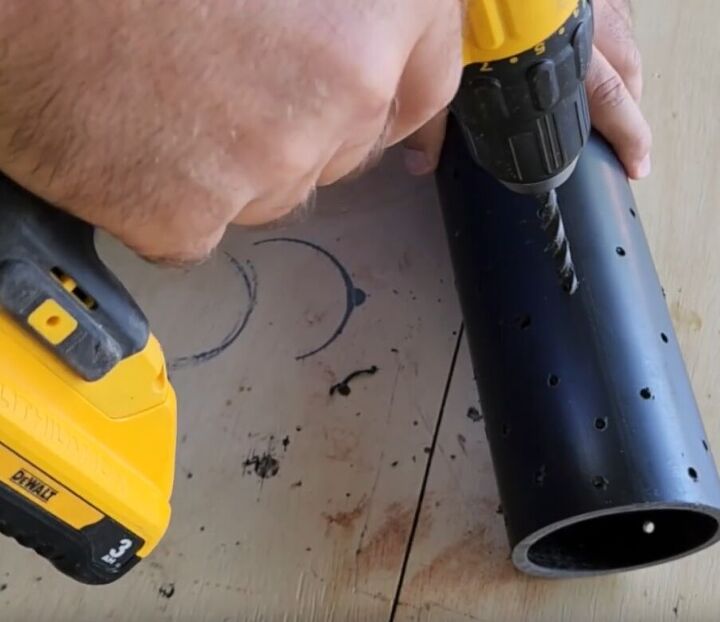
Once you have a sufficient number of holes, switch to the medium drill bit. Starting from the middle, enlarge the smaller holes slightly. This step becomes easier due to the initial drilling.
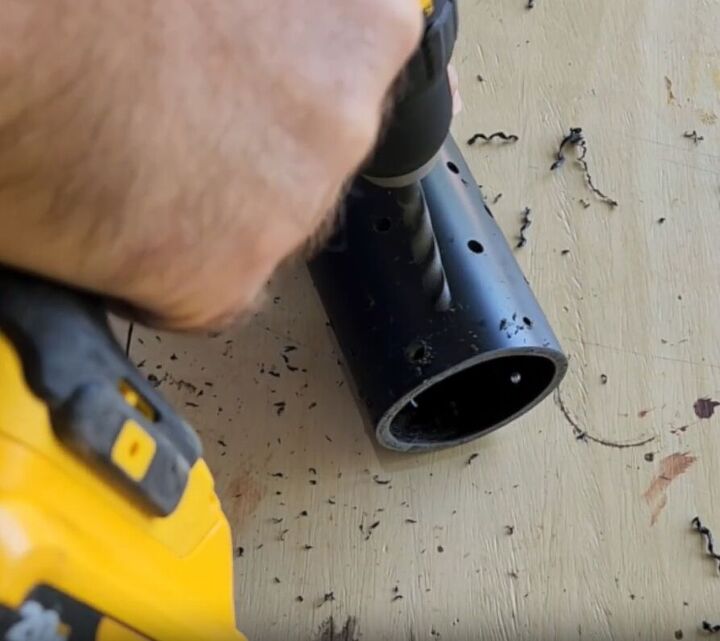
Finally, use the largest drill bit to drill out a few of the small holes on the bottom, creating a varied hole size pattern.
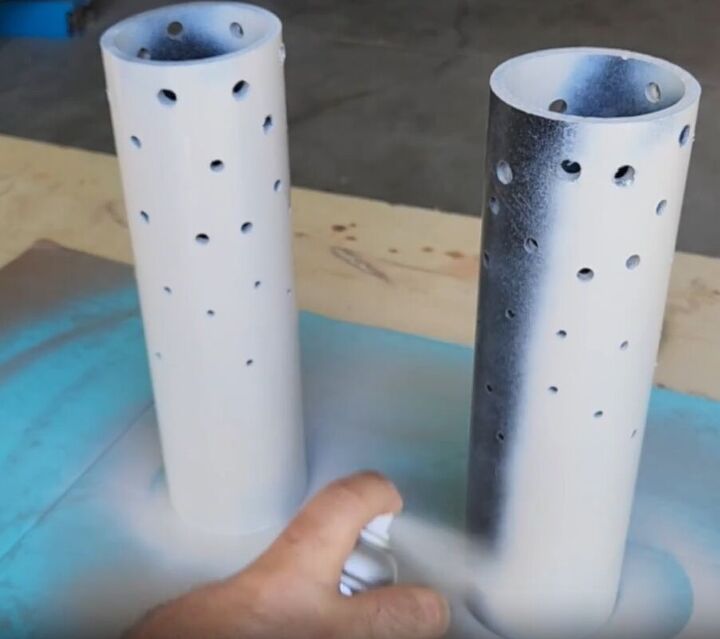
3. Painting the Pipe
Now that the drilling is complete, it's time to paint the pipe. Start by applying paint that provides good coverage. Begin with small bursts of paint, ensuring you achieve a smooth finish. It's preferable to apply two or three coats rather than risking drips or unevenness.
Allow the paint to dry completely, paying attention to painting the inside of the pipe as well.
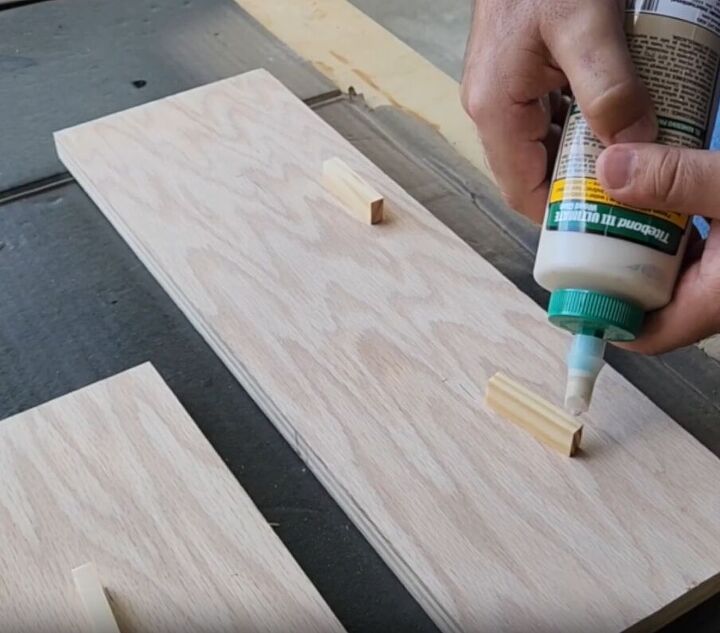
4. Prepare the planks
Prepare two scrap wood planks by cutting them slightly longer than the pipe. Next, attach two Jenga pieces to the middle of each plank using wood glue. These pieces will serve as spacers.
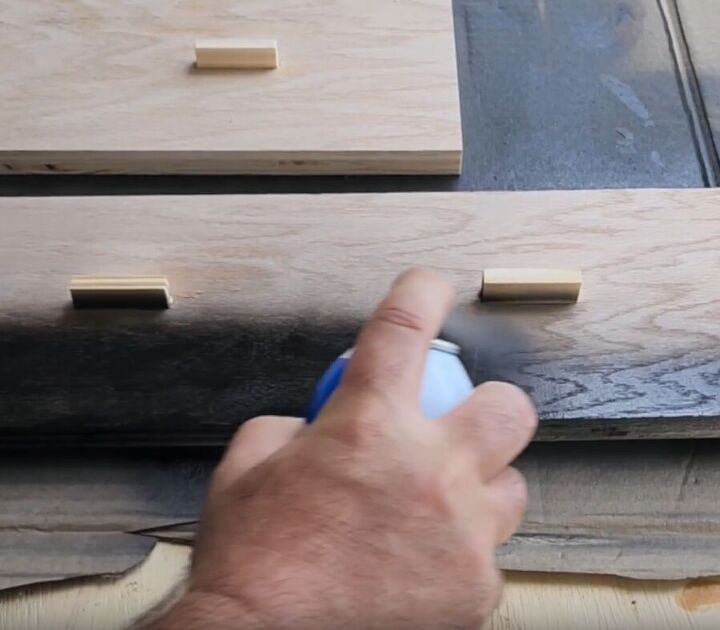
Once the glue has dried securely, apply a single coat of black spray paint to the planks. This will allow the natural wood grain to shine through with a subtle touch.
After the paint has dried, you'll notice that it doesn't fully cover the wood, giving the diy wall sconce a rustic and charming look.
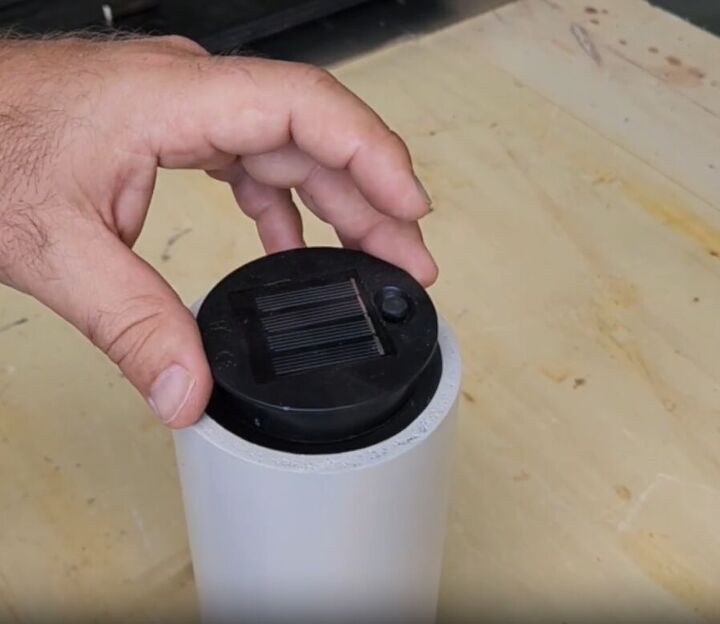
5. Creating a Barrier for the Solar Lights
If your chosen solar lights are smaller than desired, I have a simple solution.
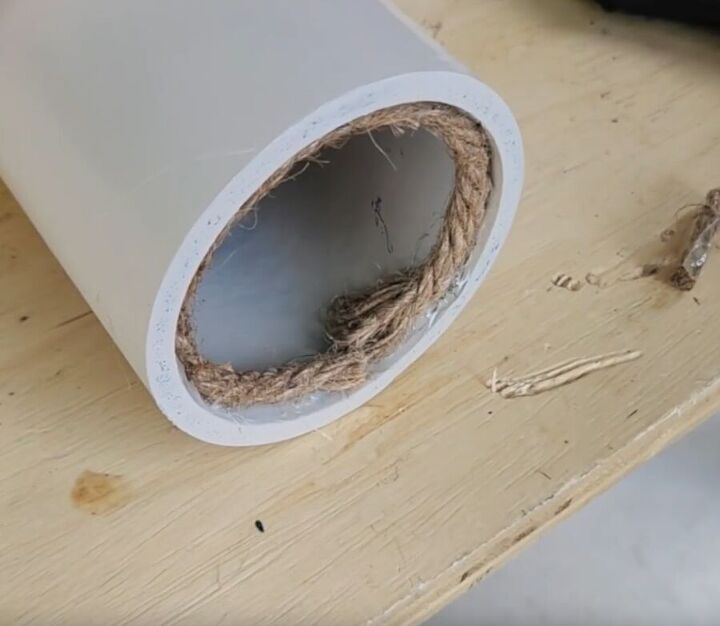
Use hot glue to attach a rope, also acquired from the Dollar store, along the inside top of the pipe. Wrap the string tightly around the pipe, ensuring it adheres securely.
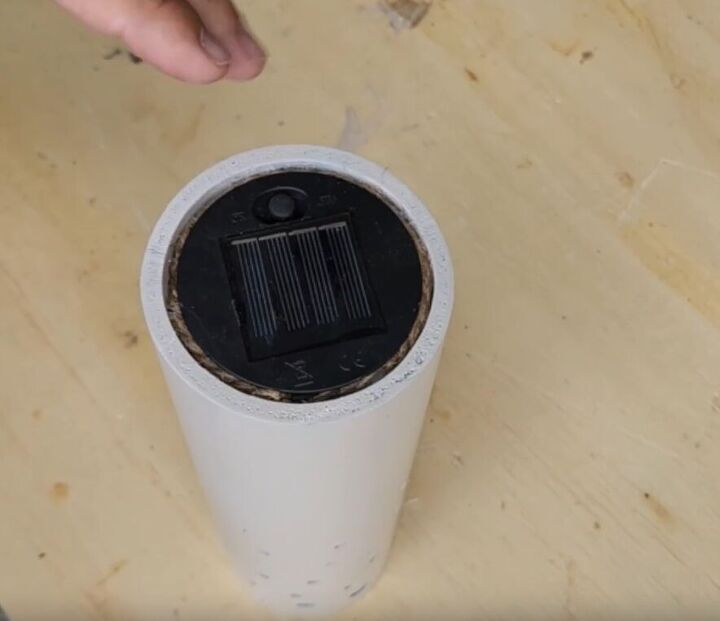
This rope acts as a barrier to hold the solar lights in place. You'll find that it holds firm, allowing you to effortlessly drop the light into the pipe, creating a flush and perfect fit.
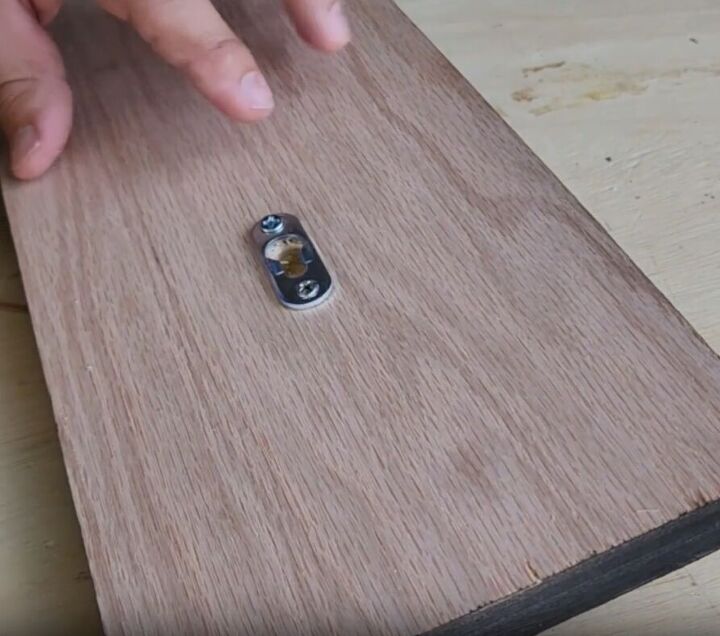
6. Mounting the Pipe and Finishing Touches
To mount the pipe and complete your DIY outdoor lighting project, take the previously painted board and attach a lightweight mounting hook to the back.
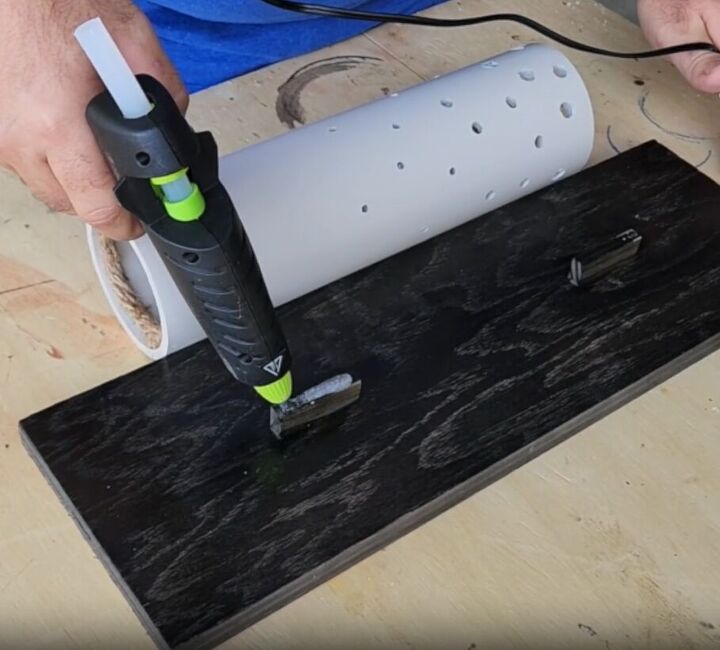
Once everything has dried completely, apply a generous amount of hot glue to the Jenga pieces.
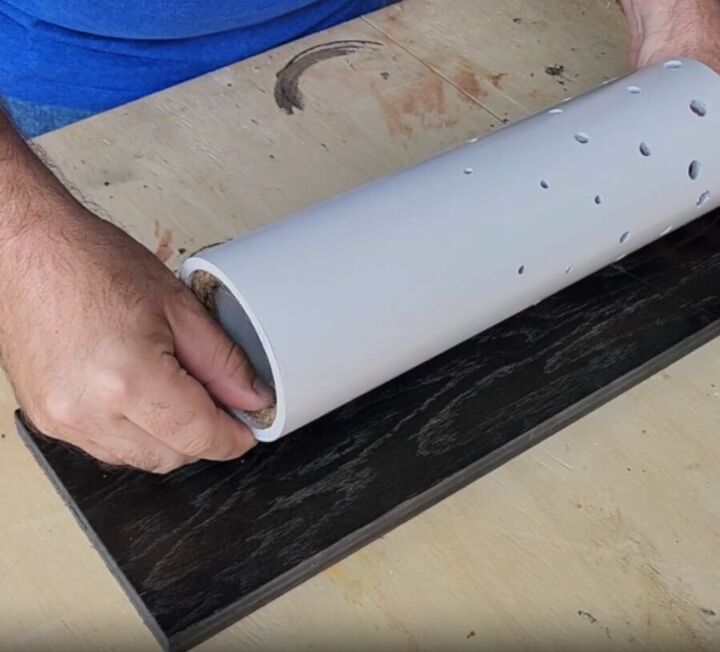
Carefully center the pipe on the Jenga pieces and press it down firmly. The glue will hold the pipe in place.
Looking for more creative outdoor lighting ideas?
Outdoor Solar Wall Sconce Tutorial
And there you have it, folks! We've reached the end of our journey in creating unique outdoor lighting using pipes and solar energy.
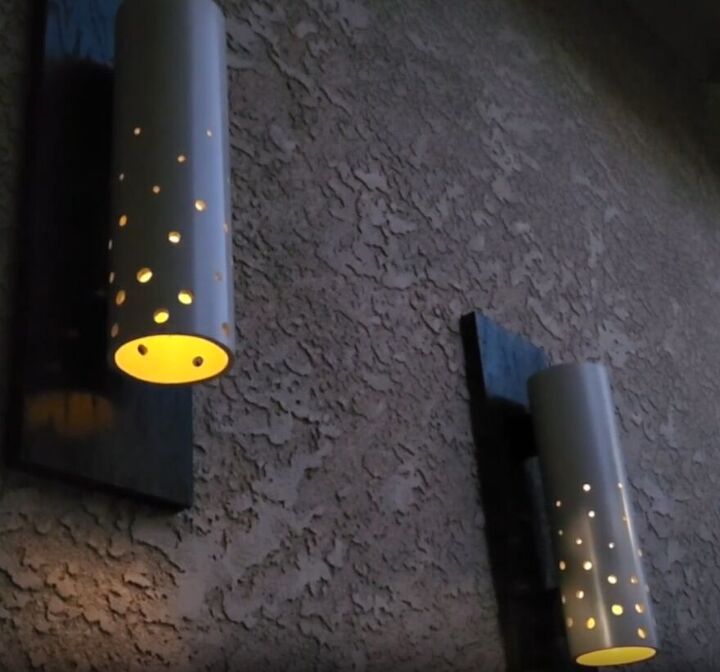
This outdoor light idea is not only eye-catching but also eco-friendly, making it a win-win for your space and the planet. The resourceful use of materials like pipes, wood, and Jenga pieces adds a touch of ingenuity and charm to this project.
Now it's your turn to give it a try! Get creative, have fun, and don't forget to share your experience in the comments below. I'd love to hear how this project brightened up your outdoor space and any tips you discovered along the way.
Resources for this project:
See all materials


Comments
Join the conversation
-
Also- most pipe has writing on it that you’d want to cover up… and you can paint it to match your house colors.
-
Im gonna get white and use it on my deck. Its got a roof over it so i can take them off to charge. There’s only one area the gets enough sunlight to charge anything.


Frequently asked questions
Have a question about this project?
Is it possible to cut pvc pipe with a miter saw? And if yes… what type of blade should I use?
You said to cut a 3 foot piece of pipe in half by marking the 12 inch line? Do you mean 18 inch or do you mean cut it into two pieces, 12 inches long and the other 24 inches long?
Why did you use black pipe and spray paint it one white pipe is available just curious