


Get Organized: How to Make a Stunning DIY Acrylic Calender

Do you want to make your own unique calendar but don't know where to start? No problem! This DIY acrylic calendar is perfect for beginners. It's easy to make and only takes an hour to complete.
This post was transcribed by a member of the Hometalk editorial team from the original HometalkTV episode.
A few supplies are all you need to make this stylish DIY acrylic wall calendar!
1. Purchase an acrylic sheet
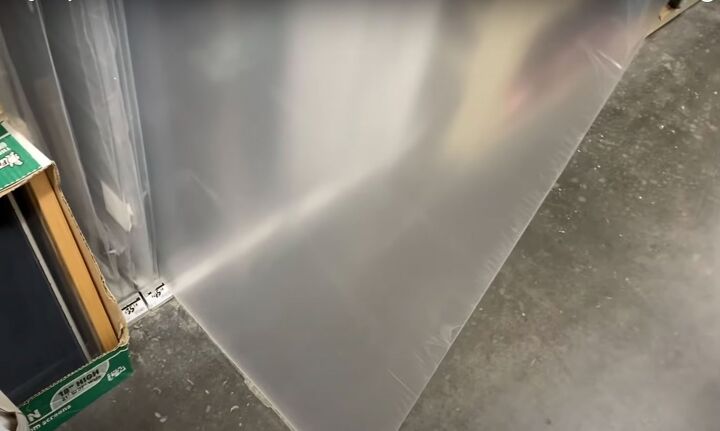
To begin making my DIY acrylic calendar, I purchased a 36” by 48” piece of acrylic sheet from Home Depot.
The sheet will come with a protective covering on each side, be sure to leave it on throughout the entire project to keep the acrylic clean and scratch-free.
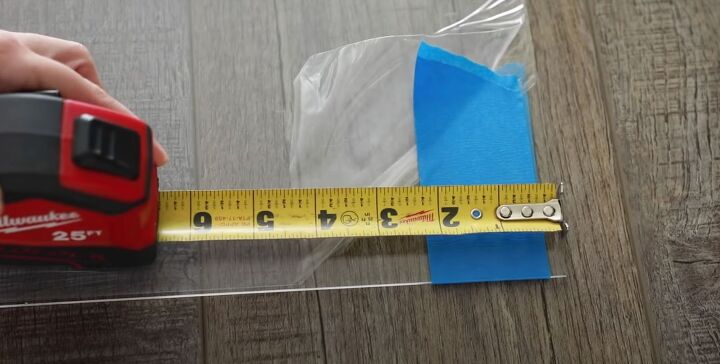
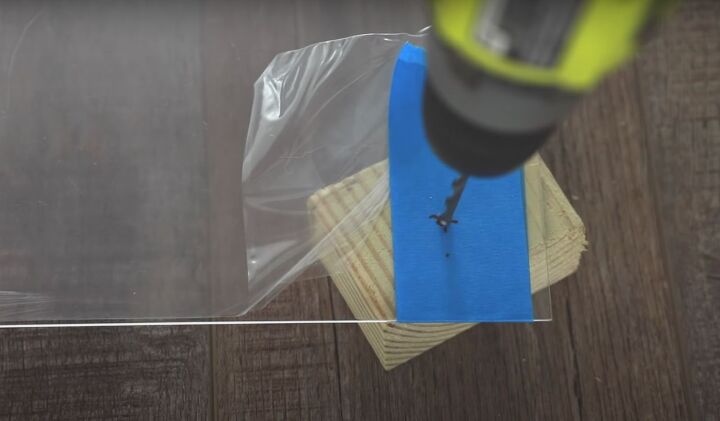
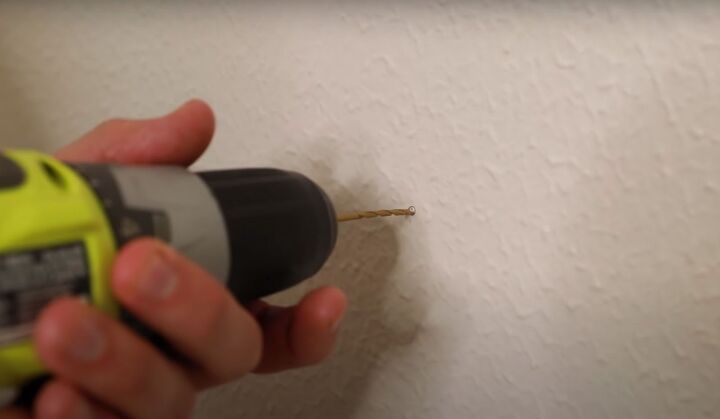
2. Drill holes in the 4 corners of the sheet
To prep the dry-erase board for drilling, I covered each of the four corners with two layers of painter's tape.
By applying painter's tape, you create an extra layer of resistance that will help prevent the drill bit and teeth from tearing at your material.
To get the area you want to drill, you need to measure up and over one and a half inches and mark the spot.
I then use a regular drill bit to slowly drill a hole into the acrylic. I drill at a steady pace and do not apply too much pressure; this will help ensure I don't crack the sheet. I suggest testing this on a scrap piece of acrylic first.
It's a good idea to place a block of wood under the sheet so that you do not damage your work surface.
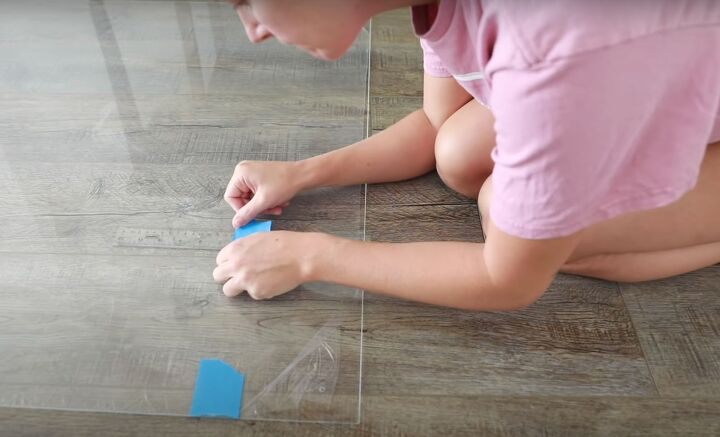
3. Measure and mark the clear dry-erase calendar
I now needed to measure and mark a rectangular border.
From the bottom of the acrylic sheet, I measured two and a half inches up and marked it six and a half inches from each side. I then marked eight and a half inches from the top.
I use painter's tape to mark these measurements.
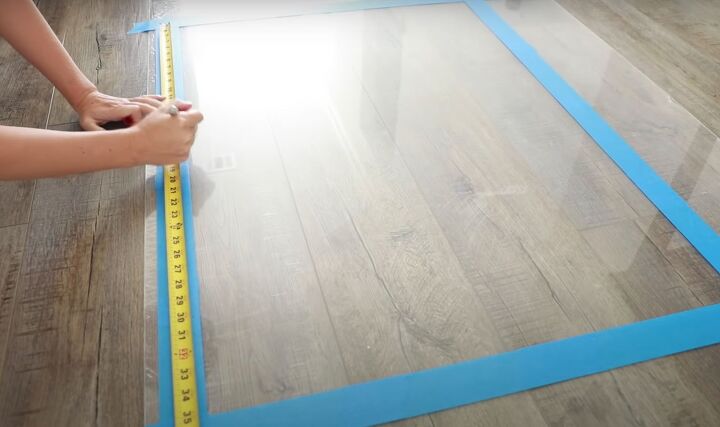
Then, to make the smaller boxes, I measured 5-inch strips.
I marked and taped off the vertical lines and repeated this step for the horizontal lines.
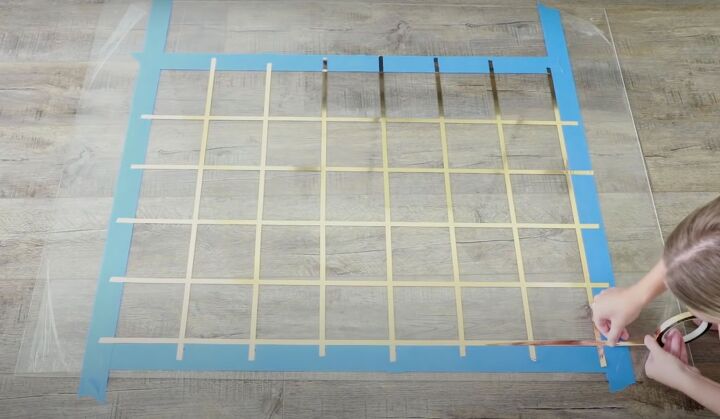
The tape I used to make the lines is called charting tape, but you can also use washi tape in any color that matches your home's décor.
More Washi Tape Ideas
After all the lines were marked, I cut the excess tape off with a craft knife and removed the painter's tape.
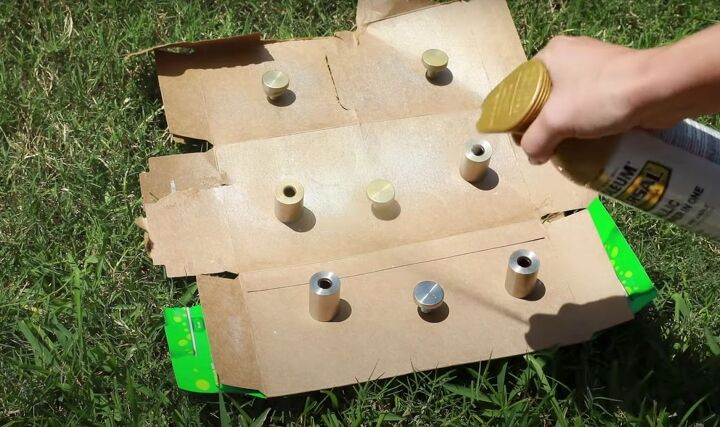
4. Spray paint the standoffs
I wanted the wall standoffs to match the tape I used on the DIY dry-erase calendar, so I went outside and gave them a coat of gold spray paint.
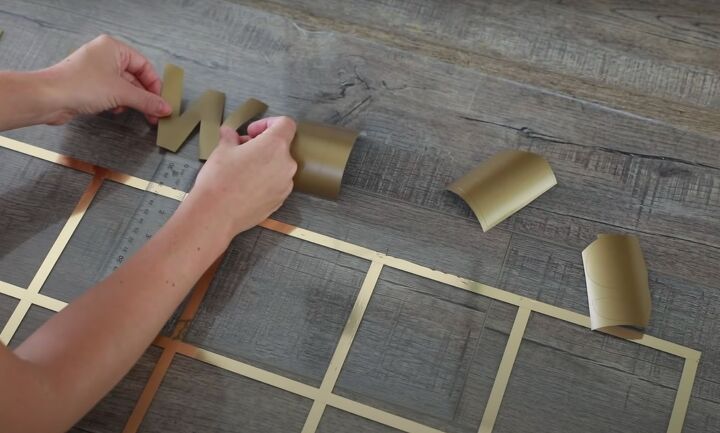
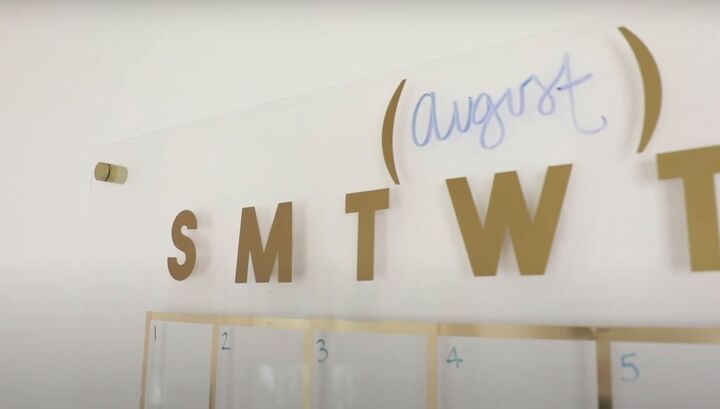
5. Stick vinyl letters to the board
While they were drying, I secured my vinyl letters to mark the days of the week at the top of my calendar.
I made mine with my Cricut, but you could cut your own or get a set of stickers from the craft store to spell out the days of the week.

6. Hang the DIY acrylic calendar
It's finally time to hang my new DIY dry erase board calendar to the wall.
Having a partner comes in handy for this step; they can help you hold the calendar up while you mark off the corners where you drilled the standoff holes and make sure it's level.
Predrill the standoff holes.
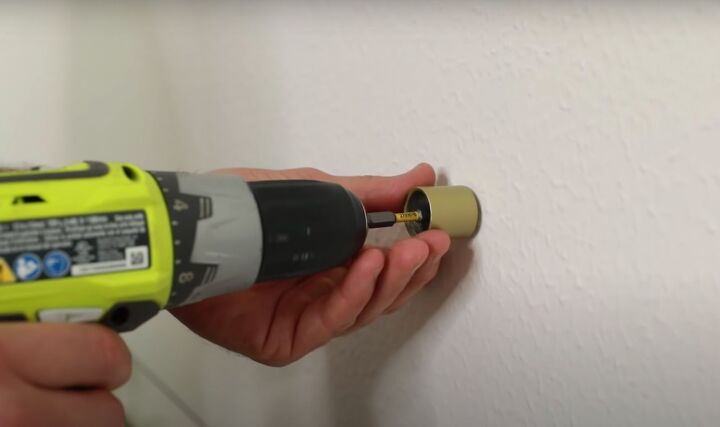
The standoffs I ordered came with anchors and screws. So I first secured the drywall anchors to the wall.
Then I drilled in the base of the standoff.
Next, we lifted the calendar, slid the screws into the pre-drilled holes, and secured them with stoppers.
Now you can use dry-erase markers to add the dates and all your reminders.

Make your own acrylic calendar tutorial
I'm thrilled with how this acrylic wall calendar turned out. It's a chic way to plan out the week or the month without being a total eyesore, and it's totally customizable. You can use it in any room of your house to fit your décor.
This is the perfect addition to my new home office. I hope this has inspired you to make your own giant DIY acrylic calendar.
I would love to hear what you thought of this project in the comments!
Resources for this project:
See all materials


Comments
Join the conversation
-
It's an interesting DIY for home calendars; however, it requires practice to do it right.
-
I love your work. It looks gorgeous! I actually love planning. I watched Brian Tracy’s video where he says it’s very important to plan your day and goals. I’ve actually tried a lot of planning ways. So, as for me, there’s nothing better than an online calendar. Btw, my wife likes printed calendars. She’s actually a great fan of them, so I think I’ll gift her a printable october 2022 calendar, because she has her bday in october. So, yeah, planning is crucially important. It really improves your quality of life quality.


Frequently asked questions
Have a question about this project?
If the taped boxes, for date information and your writing, are all on the front side of the acrylic sheet, how did you prevent the taped boxes from becoming unglued and falling off (i.e.: multiple writings and wiping off)? Would it not be better to adhere all tappings to the backside then only the writing on the front? Easier to clean because you write on the side with nothing in the way. I could see maybe coating that back side with magnetized paint (do they make that clear to see through?) to allow for notes/magnets to be used also, I see where you have notes on the sides. I love this calendar idea and will be making some for gifts and for me. Good job!