


How to Build a DIY Laundry Cart: Practical Storage Solutions

I wanted to surprise my wife with a delightful addition to our laundry room organization system. So, I decided to create a custom storage solution with a DIY laundry cart!
In this post, I'll guide you through the steps to build a practical and stylish container, filling that gap between the washer and dryer. With just a few basic materials and tools, you can craft this space-saving laundry cart and keep your essentials neatly organized and easily accessible.
Let's get started on this fun DIY laundry room project!
This post was transcribed by a member of the Hometalk editorial team from the original HometalkTV episode.
Tools and Materials:
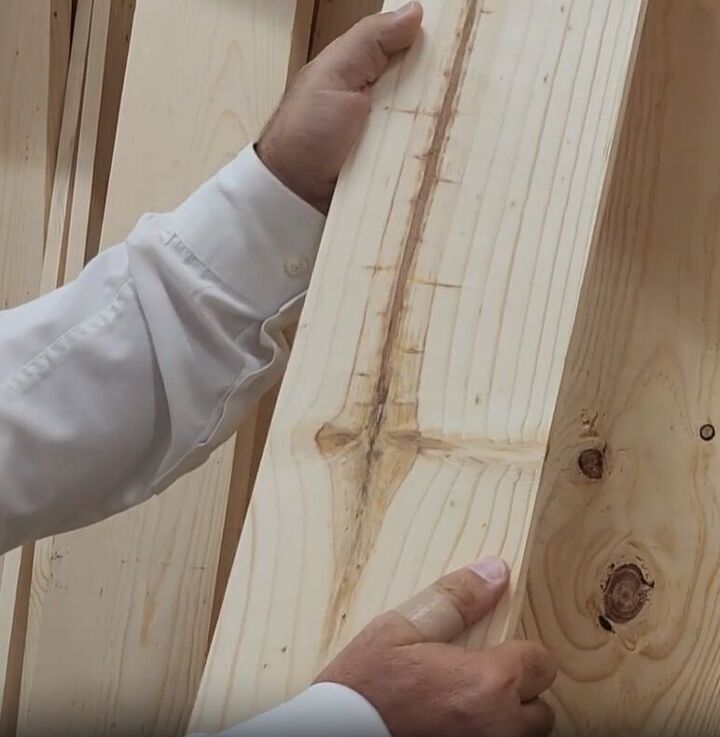
- 1x8 wooden boards
- 1x3 wooden boards
- Measuring tape and pencil
- Miter saw or jigsaw
- Brad nailer or screws
- Drill
- Sandpaper (80 grit and 220 grit)
- Caster wheels (four in total)
- Hinge
- Paint or stain
- Rag
- Handle
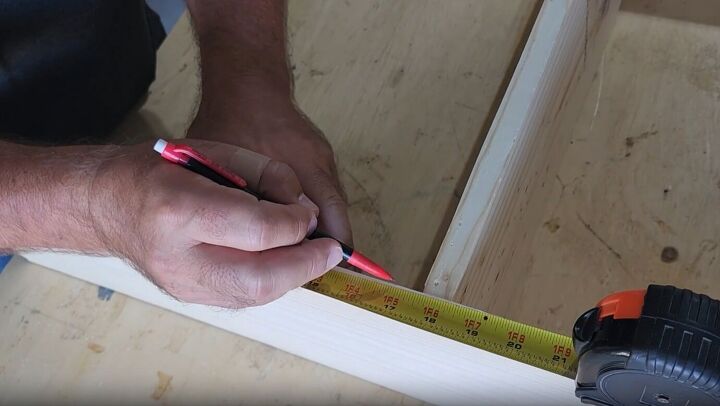
1. Measure and Cut the Boards
To begin, we'll need some 1x8s and 1x3s.
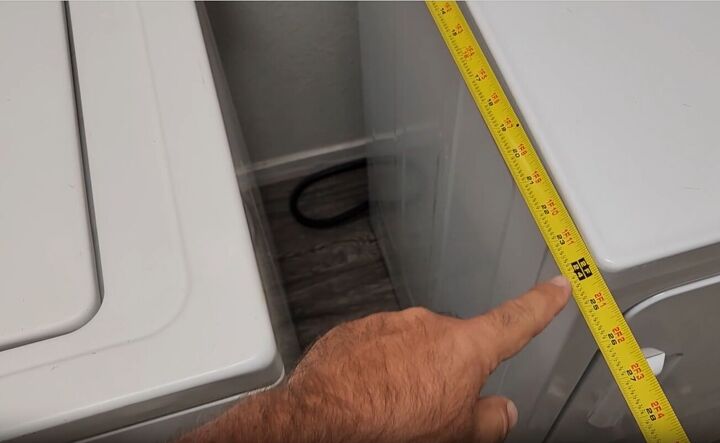
Measure the width of your washer and dryer; mine was 24 inches.
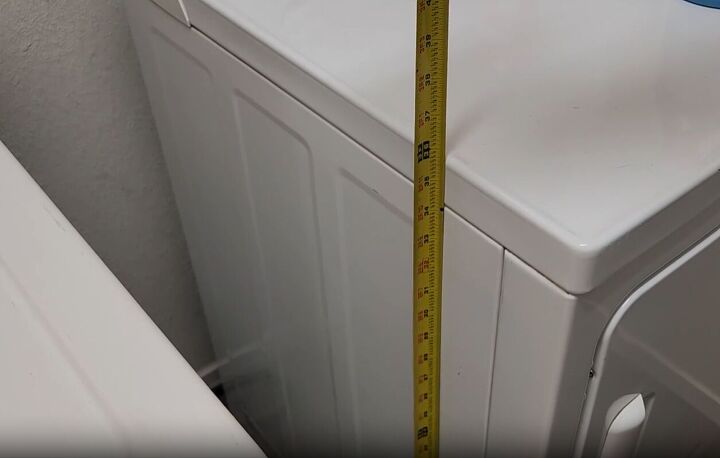
Next, measure the height, mine was 36 inches.
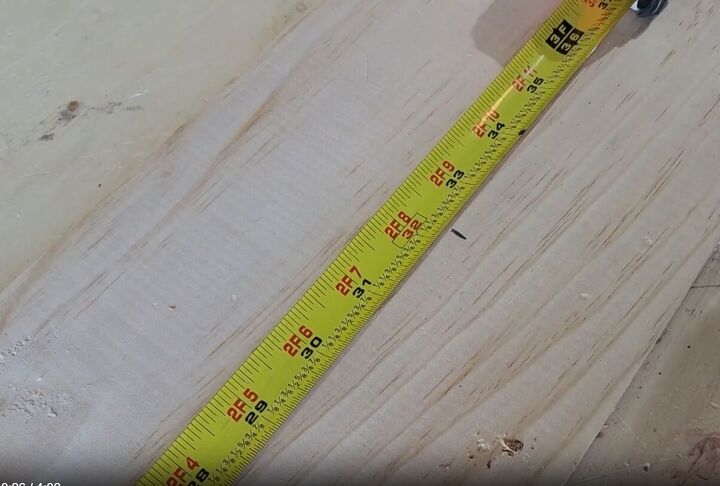
We are now going to measure and cut 2 of the 1x8 boards at 32.5”.
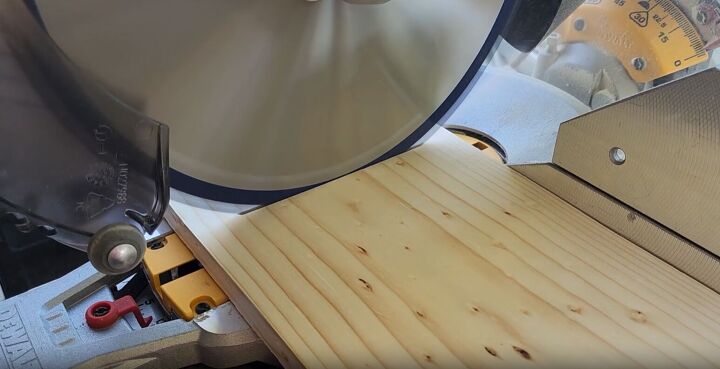
We also need two more 1x8s measured and cut at 24”
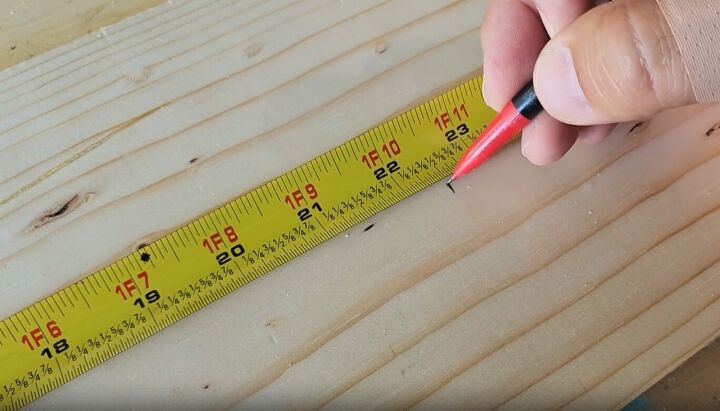
Lastly cut two more 22” pieces from the 1x8s.
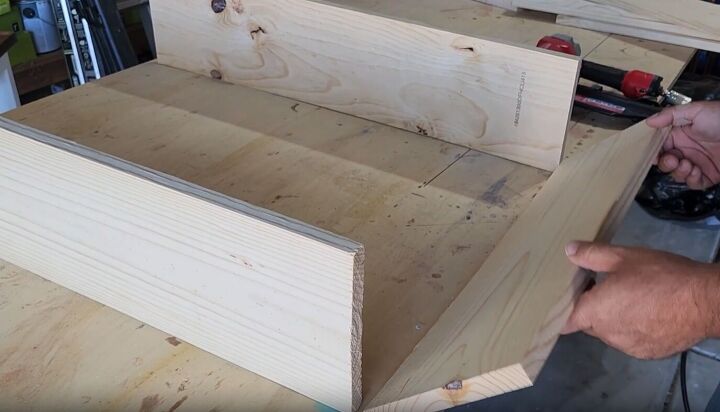
2. Assemble the Bottom and Middle Shelves
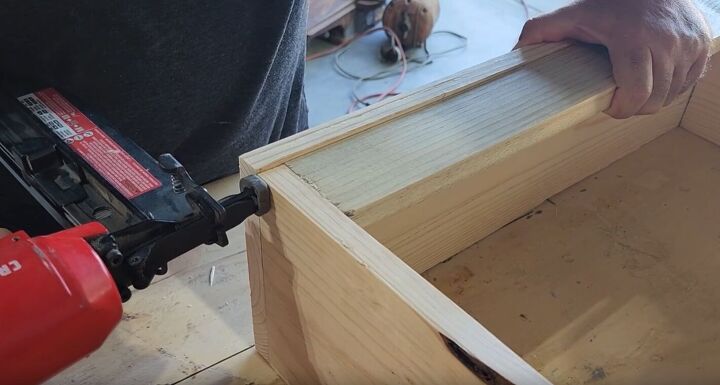
The front and back parts of our DIY laundry board will be the longer pieces. We are going to attach our first 24" piece to the bottom of those two boards.
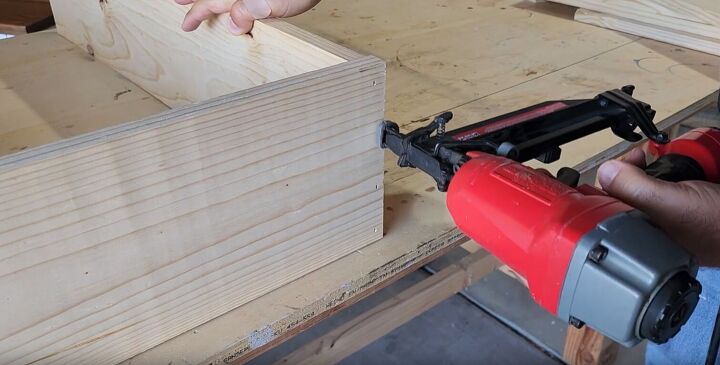
Personally, I prefer using my trusty Brad nailer, but screws work just as well. However, always remember to pre-drill, especially near the ends of the boards, to avoid splitting them. Pre-drilling reduces the risk of any mishaps during assembly.
With the bottom securely in place, we'll move on to installing the middle shelf. Measuring 17 inches from the top, we'll position it to provide ample room for storing items without any concerns about space.
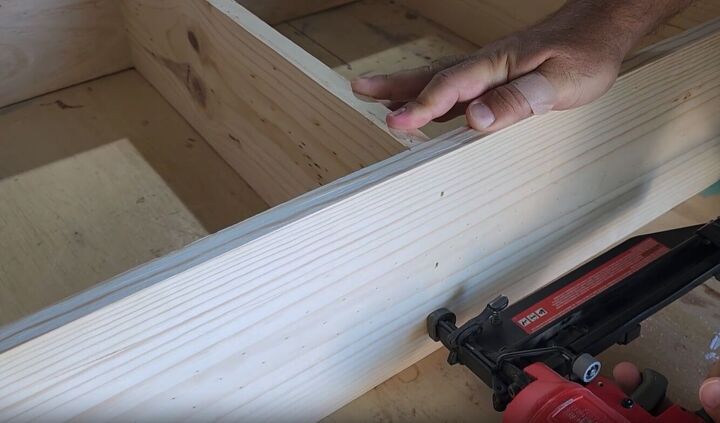
Just like before, I'll be using the Brad nailer to attach this board firmly.
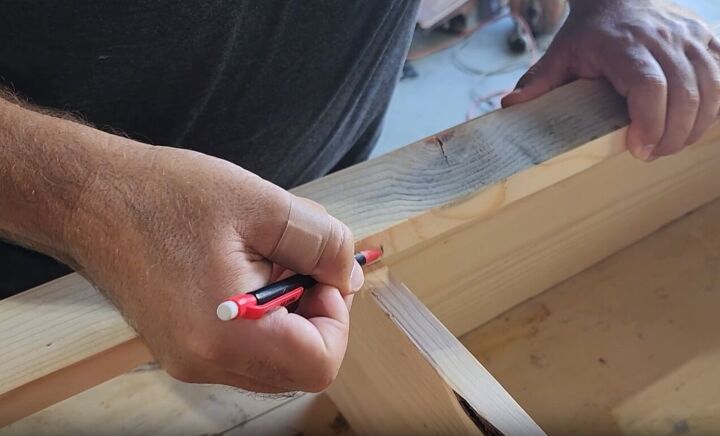
3. Add Barrier Boards
To keep your items from falling off the shelves we are going to add barrier boards on both sides.
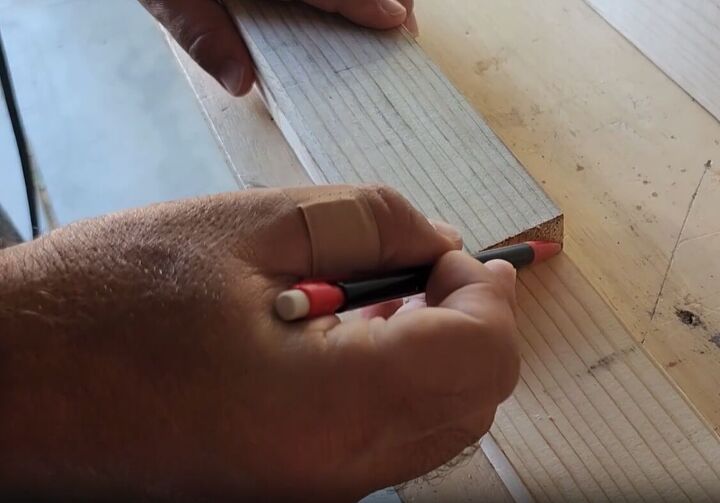
Measure and cut your 1x3s to the required length. If you're tired of measuring, use the first cut board as a template for the rest.
Nail them on the inside of each shelf on both sides. Use the Brad nailer on the side and bottom for extra strength.
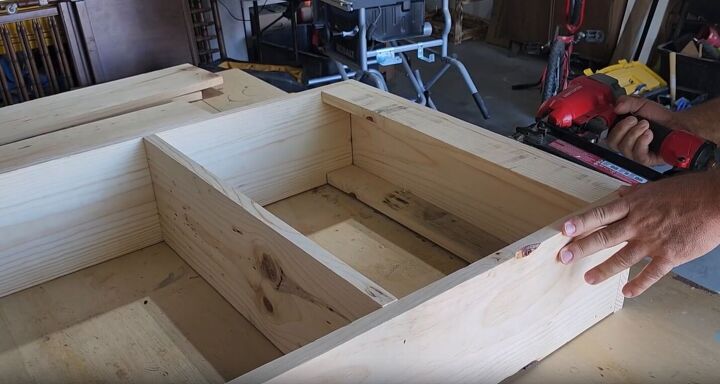
Don't worry if some cuts don't line up perfectly; you can sand the edges later for a smooth finish.
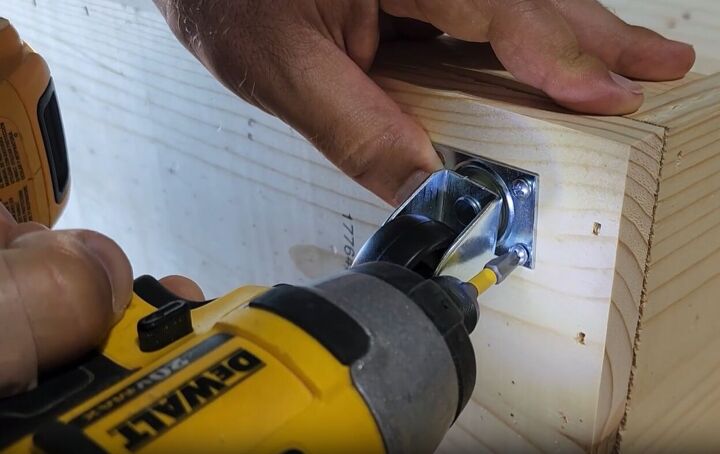
4. Add Wheels for Mobility
Attach four caster wheels to the bottom of the DIY laundry cart. Remember to pre-drill and use appropriately sized screws to avoid any protrusions. The wheels will make it easy to move the cart when needed.
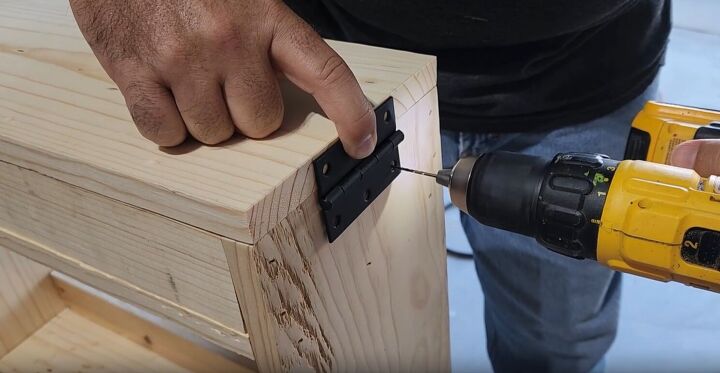
5. Create a Hidden Top Shelf
Using the last 24-inch board, attach a hinge to the back. This will serve as a hidden shelf on top of the container, perfect for storing small laundry items like pods and dryer sheets.
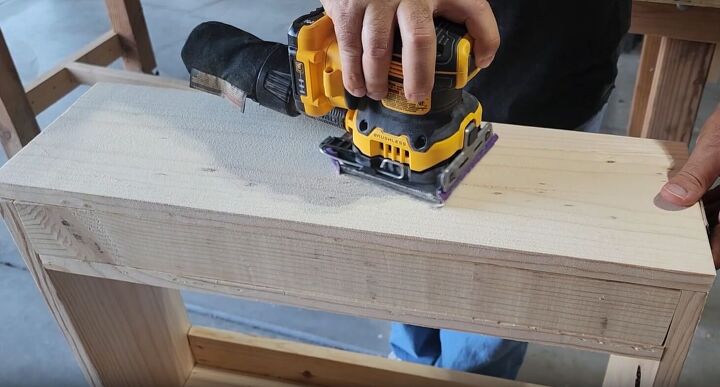
6. Sand the DIY Laundry Storage Cart
Sand all the boards with 80 grit followed by 220 grit for a smooth surface.
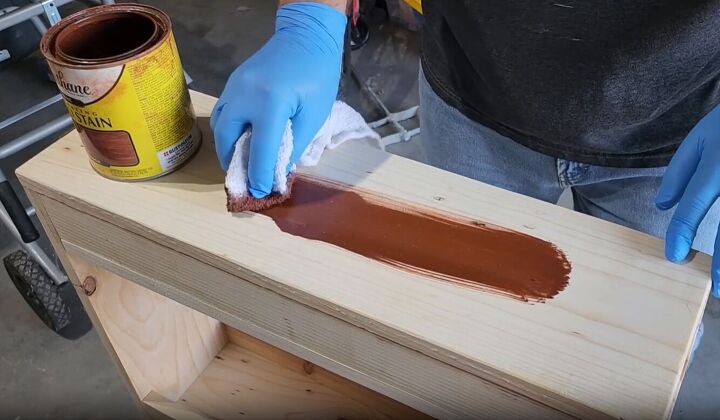
7. Stain or Paint the Laundry Room Trolley
Now that your storage container is assembled, it's time to add your favorite finish. You can either paint it or apply a stain. Personally, I prefer staining with a rag for an even application.
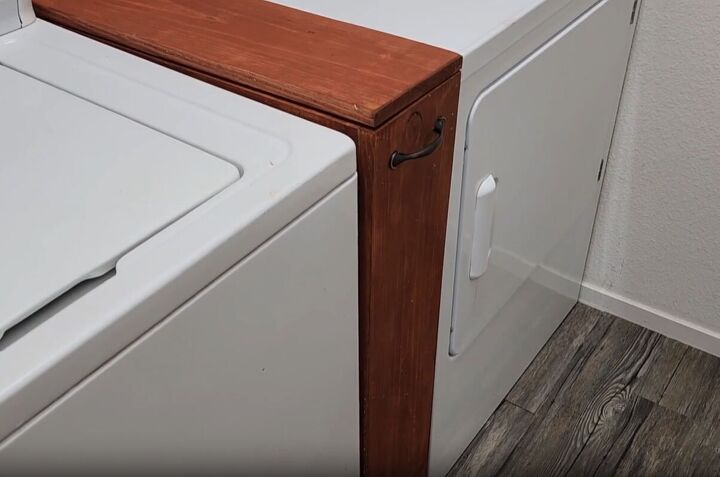
8. Add a handle
Attach a handle to the front of the trolley so you can easily pull it in and out.
Looking for more laundry room storage ideas?
How to Build a DIY Laundry Cart
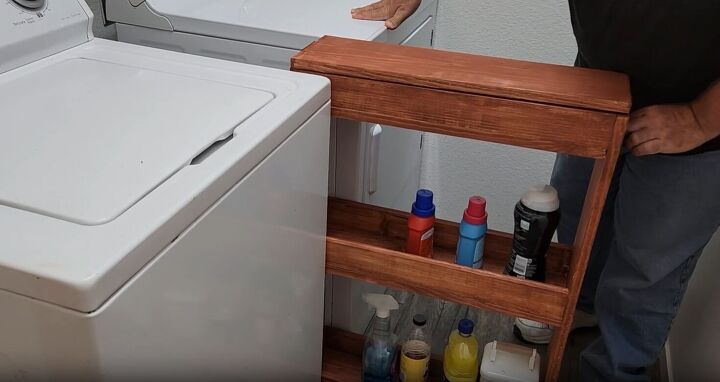
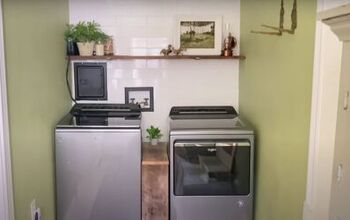
With the final touches complete, your DIY laundry cart is ready to serve its purpose. Simply place it between the washer and dryer, and with the added handle, you can easily pull it out to access your laundry essentials.
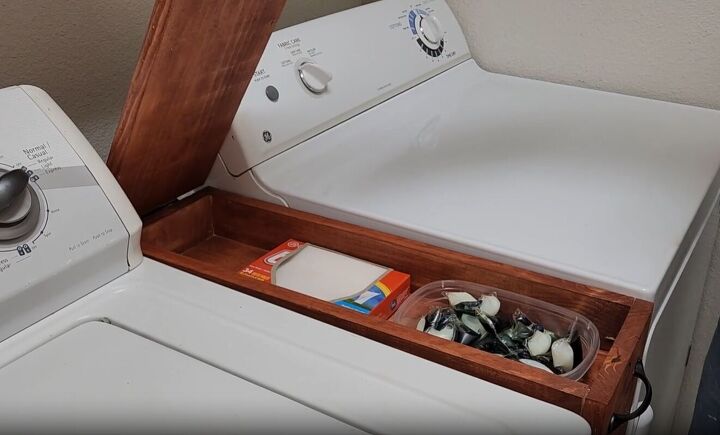
The hidden top shelf offers convenient storage for pods and dryer sheets, eliminating the need to pull the container out for every load.
I hope this project inspires you to create your own custom storage solution and keep your laundry room organized and clutter-free! Please share your creations and tips in the comments below!
Comments
Join the conversation
-
People post projects because it works for them, and hope that we can learn something positive about their project. It would work for me because I’m short too. So I appreciate your project and initiative. I am going to copy your great idea. Great job!! Press on!!
-
I would much rather buy the narrow plastic shelves on wheels that are made especially to sit between the washer and dryer.


Frequently asked questions
Have a question about this project?