


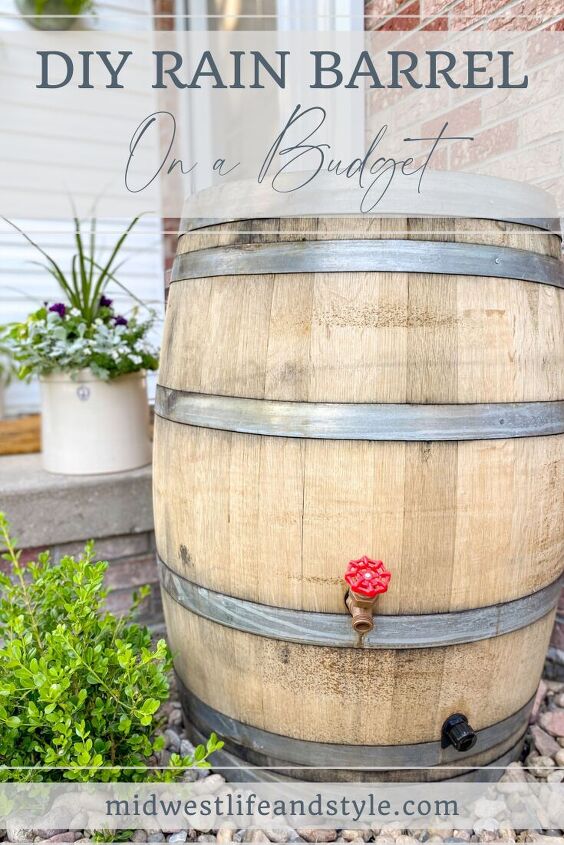
DIY Rain Barrel On A Budget
Summer has just begun, but I’ve already been hard at work on outdoor projects, including planting a garden and refreshing our front porch. Up next on my summer to-do list? A DIY rain barrel – done on a budget!
DIY Rain Barrel On a Budget
*This post contains affiliate links. When you make a purchase using these links, I earn a small commission (at no extra cost to you!) To learn more, you may read my Disclosure Policy. Thank you for supporting my blog!
DIY Rain Barrel On a Budget
I’ve wanted to build a rain barrel for a while, but the project had always seemed a bit intimidating. Anyone who has ever done a DIY project knows, the minute you think, “How hard can it be?” is the minute your project hits a snag. However, I can honestly say this DIY rain barrel project was incredibly easy! And, with some help from my husband, we finished it in a matter of just a few hours.

DIY Rain Barrel Supplies
With the exception of the wine barrel, DIY kit, and stone paver, we already had everything else on hand. Here are the tools and supplies you’ll need to build your own DIY rain barrel.
Supplies For A DIY Rain Barrel On a Budget
- Barrel
- Earth Minded™ DIY Rain Barrel Kit
- Safety Glasses
- Safety Gloves
- Drill
- Pencil
- Measuring Tape
- Phillips Screwdriver
- Level
- Stone Paver
- Pea Gravel or Soil
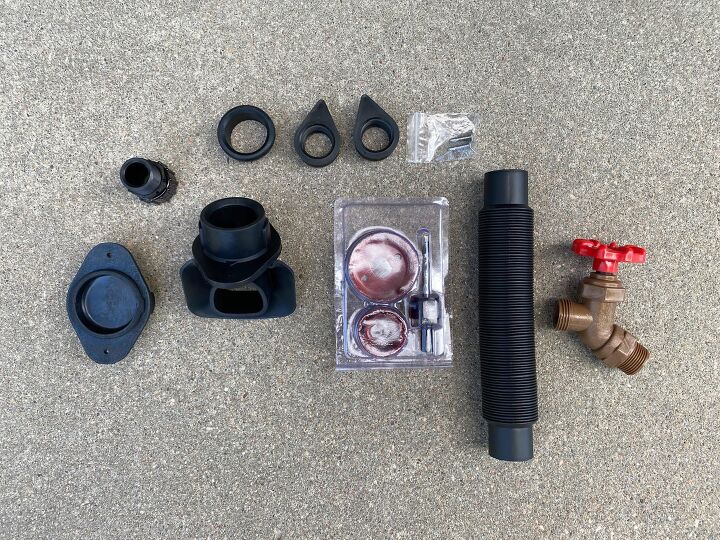
Beyond the supplies listed above, the kit includes everything you need to make the rain barrel; spigot, hose, diverter, even the hole saws!
DIY Rain Barrel Instructions
The instructions included in the kit are very detailed, but if you’re more of a visual learner, I found this YouTube video to be very helpful.
Instructions To Build A DIY A Rain Barrel On a Budget
1. Purchase Your Barrel
First thing’s first. You need to decide what kind of barrel you want to use for your project. You can purchase inexpensive plastic barrels from most any big-box store. Because our DIY rain barrel is at the front of our home, I knew I wanted something a little nicer.
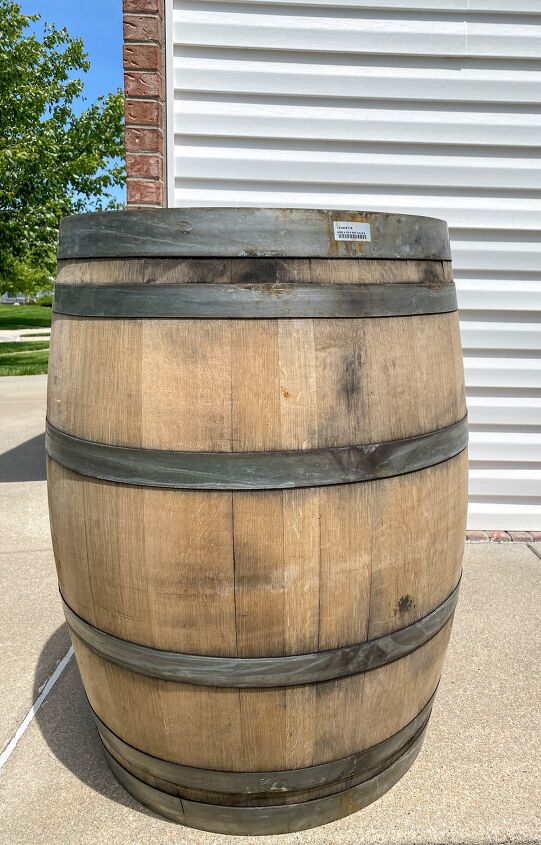
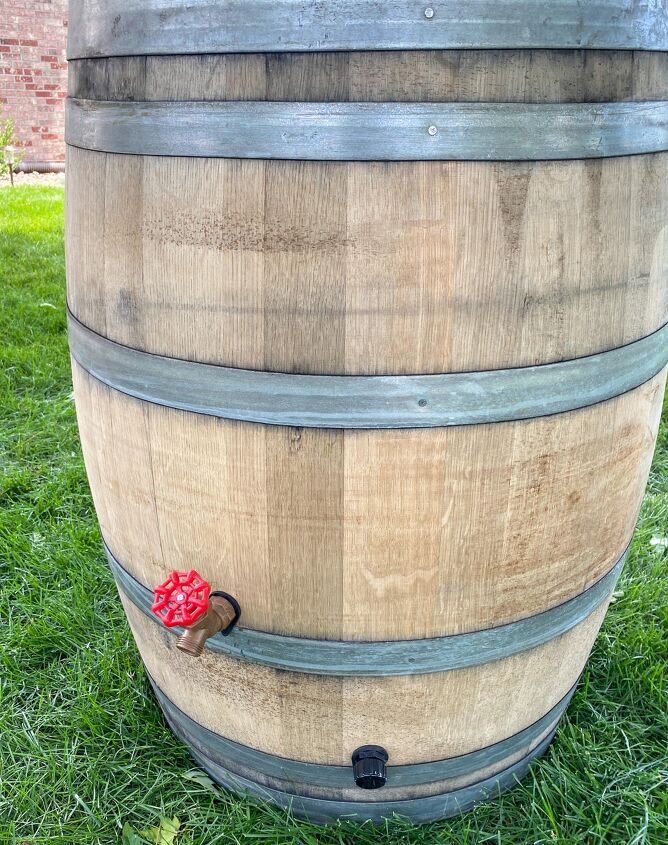
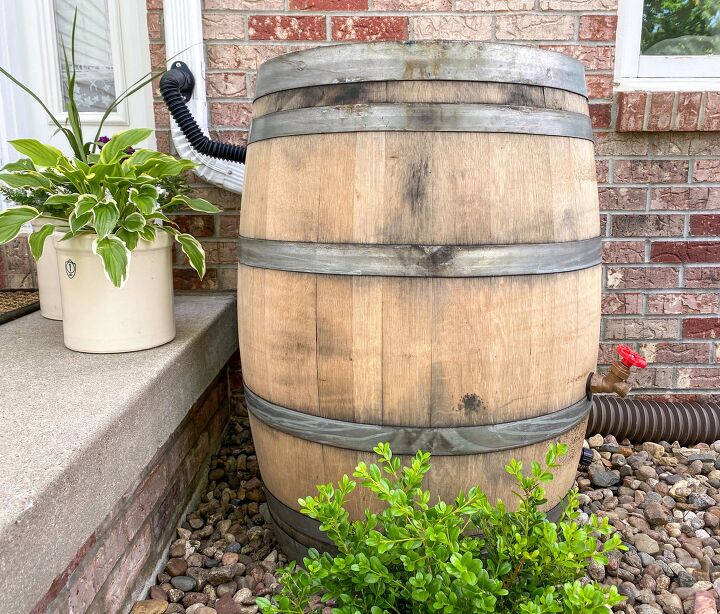
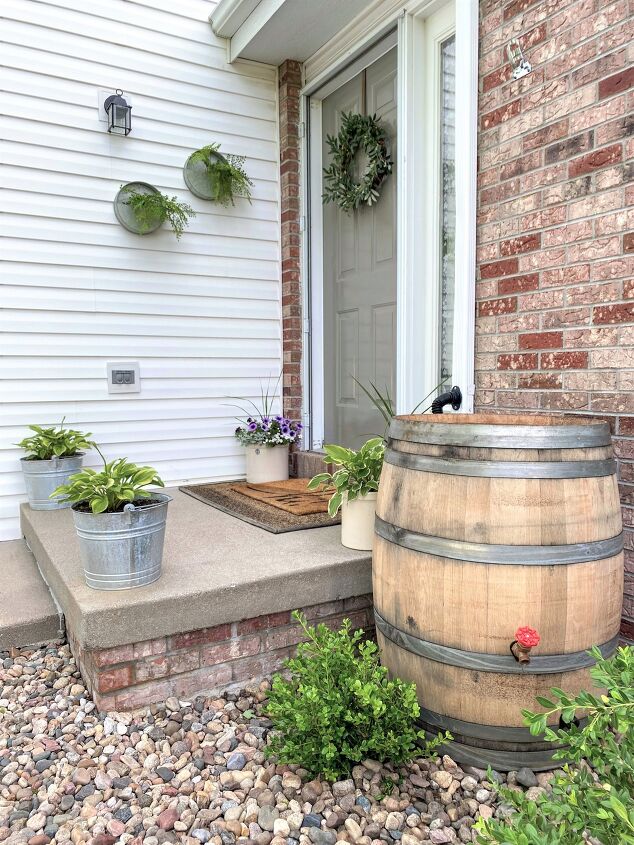
Luckily we have Midwest Barrel Company right here Lincoln! They have a great selection of barrels, including whiskey and wine barrels. Ultimately, we chose this white wine barrel. Isn’t she a beauty?
2. Select Your Location
Before assembling your rain barrel, select and prepare the location where it will be used. The barrel should be no further than 28″ from the downspout and the downspout must be a rectangular 2″x3″ or 3″x4″.
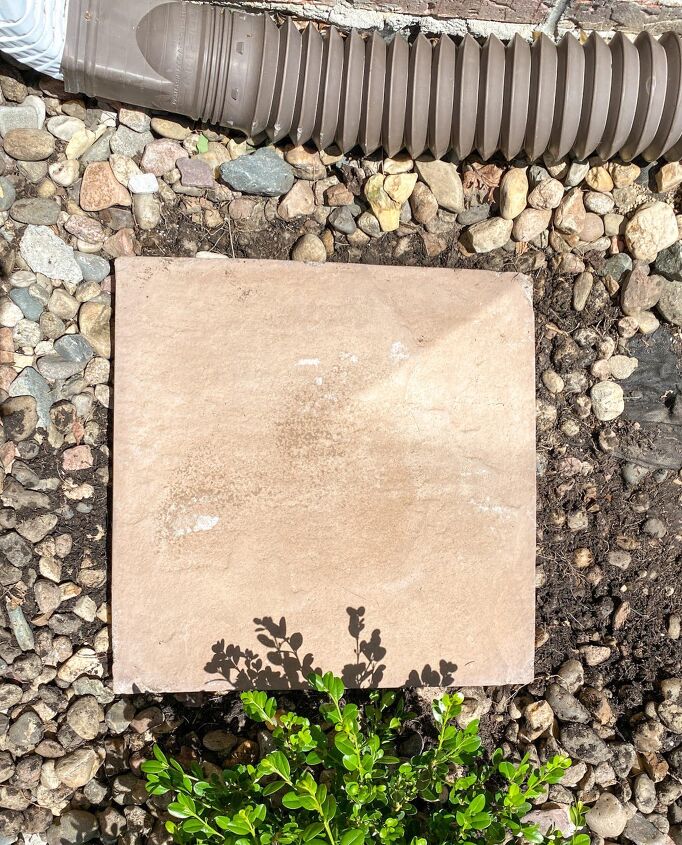
It’s also important to make sure the ground is level and firm before moving your barrel into place. To prep, we raked away the existing river rock and used a stone paver to create a base for the DIY rain barrel. In addition to the stone paver, we used some soil we had on hand from another project to help even things out and then checked our work with a level.
Once your base is prepared, mark the front of the barrel for the spigot and double check that the hose can reach from the rim of your barrel to your downspout.
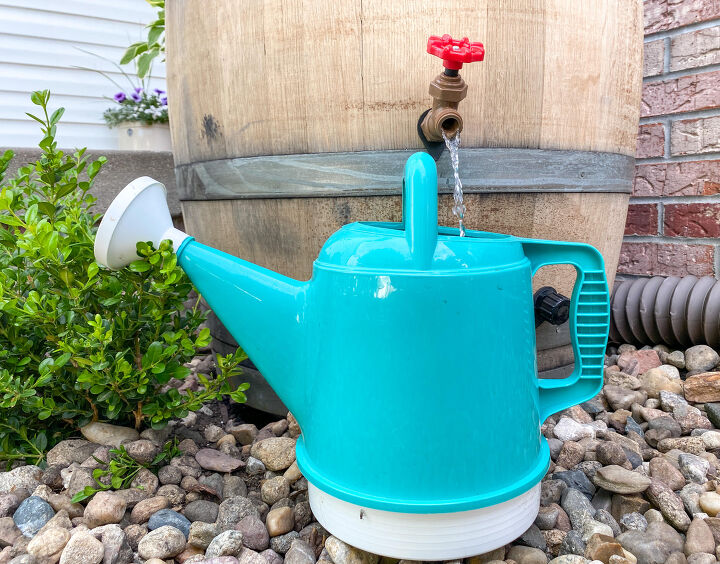
3. Install The Spigot and Drain
Break out the power tools! It’s time to install the spigot and the drain. I was the most nervous about this step. (Measure twice, cut drill once!) But, since the DIY rain barrel kit includes the hole saws, the process was simple.
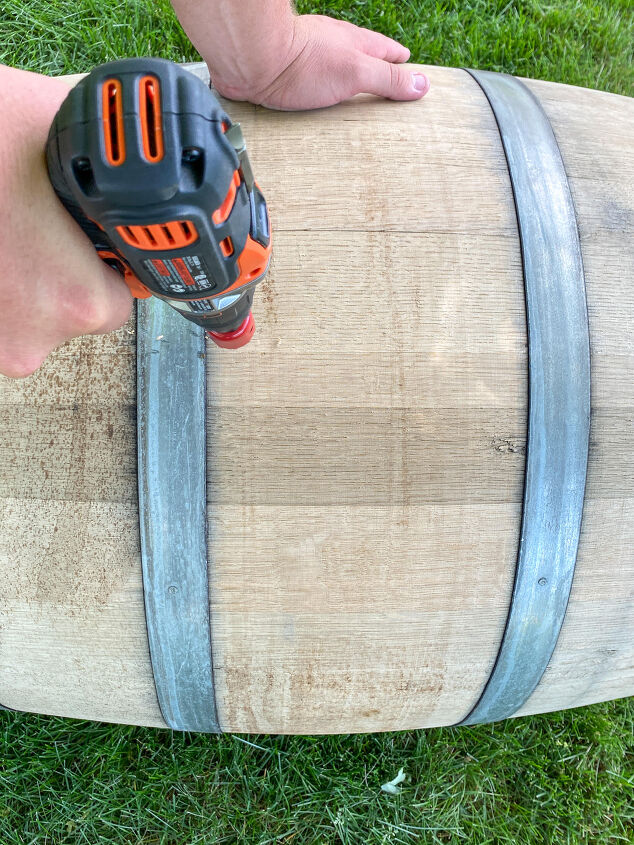
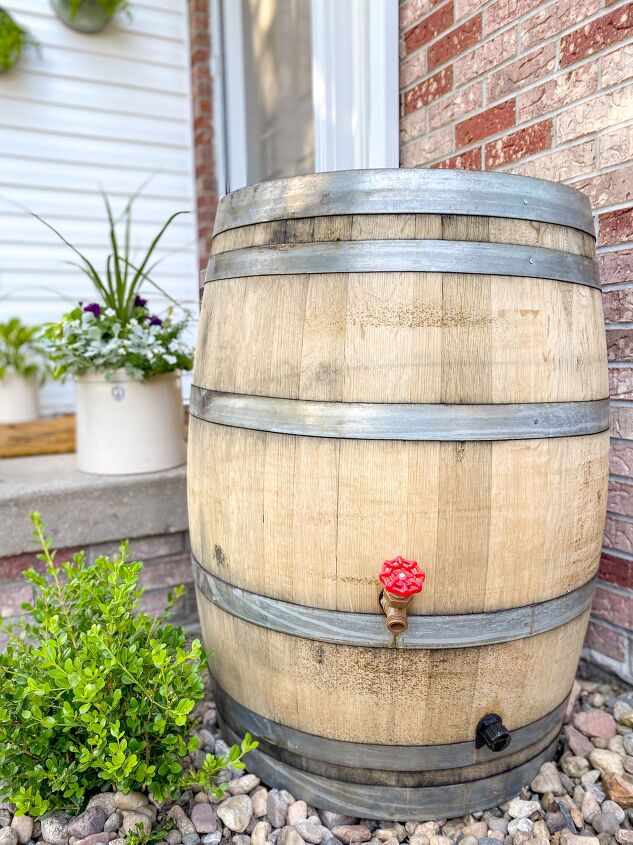
We followed “option B” in the kit directions, which includes notes to drill both a hole for the spigot and the drain. The spigot hole should go approximately 12″ from the bottom of your barrel, and the drain hole should go 3″ from the bottom. (Note, we had to adjust our holes slightly to account for the metal ribbing, but it didn’t cause any issues.)
After measuring and marking where your holes will go, use a drill and the small hole saw to drill the holes. Insert the rubber seals into both holes, and then install the spigot and the drain.
4. Install The Fill Hose Seal
With the front of the barrel complete, it’s time to move to the back side to install the fill hose seal. After measuring carefully, use the medium hole saw to drill a hole and insert the fill hose seal.
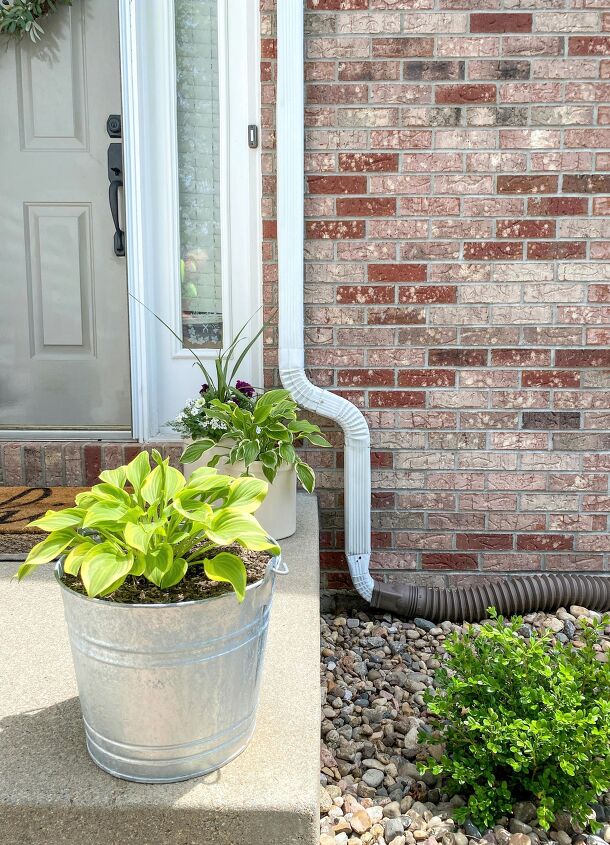
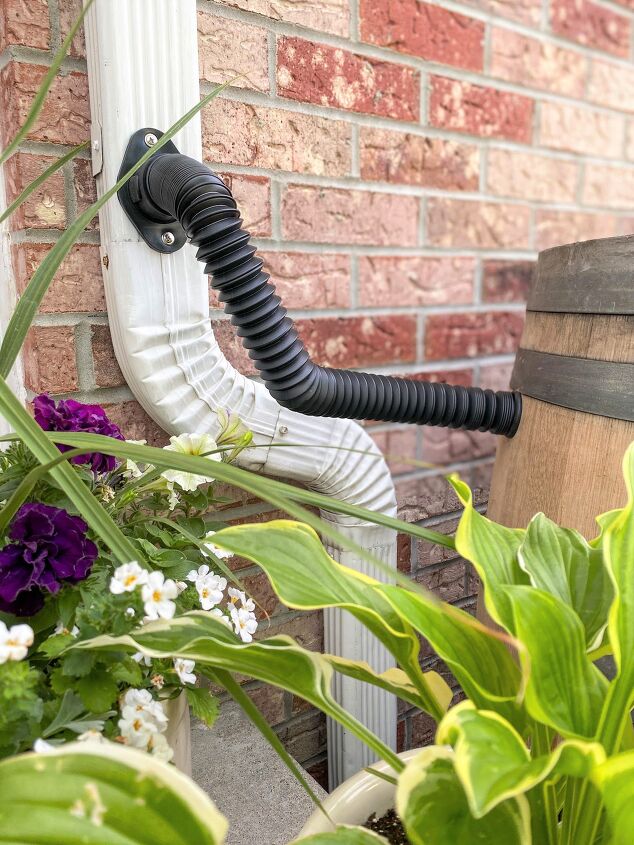
5. Prepare The Downspout and Install The Flexifit Diverter
Remember when I said I was nervous to drill into the barrel? I was even MORE nervous to drill a hole into our downspout! As you can see below, I’m happy to report we didn’t encounter any issues. Phew!
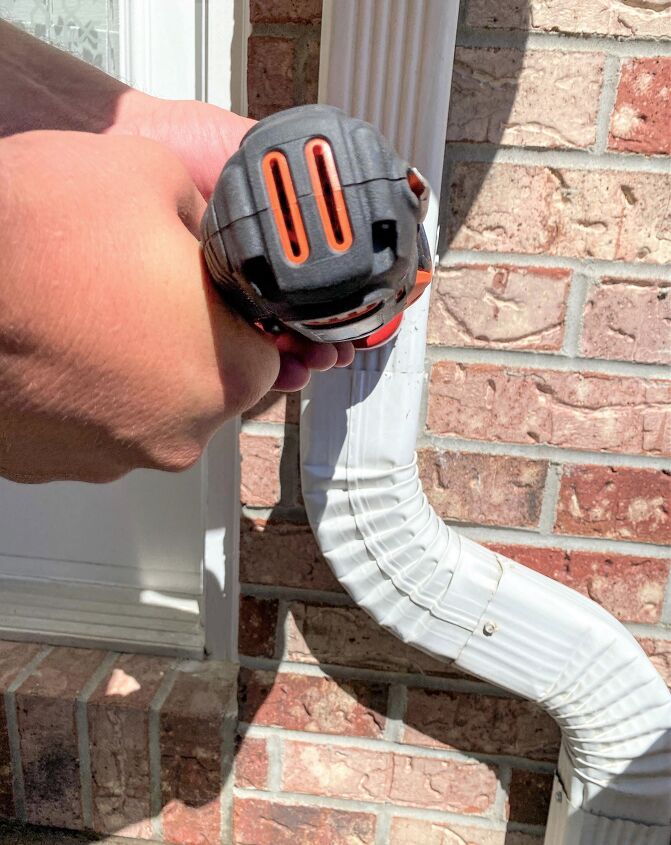
Before you do anything, carefully measure (and re-measure!) the location of the hole in your downspout. Then, use the large hole saw to cut the hole.
*Tip: Be sure to wear your safety glasses for this step.
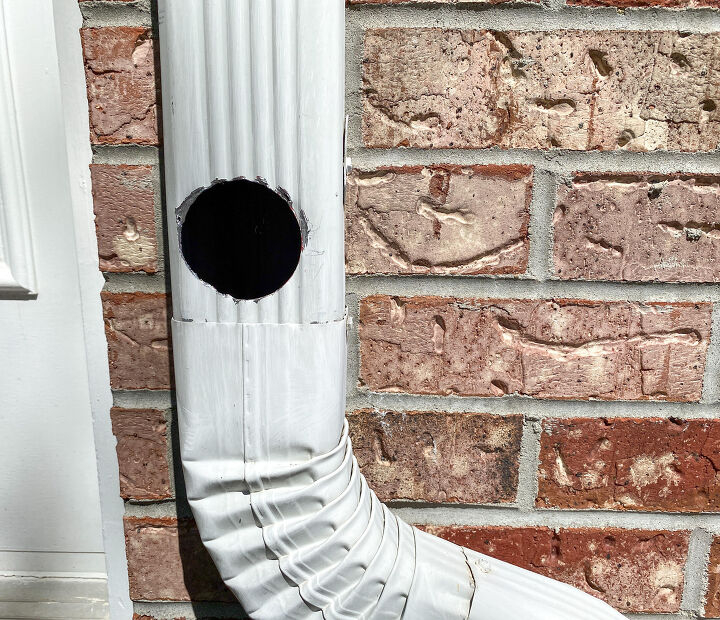
Once the hole is cut, insert the diverter into the hole. Then, using a Phillips head screwdriver, use 2 screws to firmly attach the diverter to the downspout.
6. Connect Your Barrel
Now it’s time for the last step, connecting your barrel. To complete your DIY rain barrel, connect the hose to the downspout diverter. Make sure to press firmly until the corrugated section of the hose is flush against the diverter. Then, extend your hose to the desired length and connect it to the fill hose seal on your barrel. Check to make sure the hose is flush with the seal, and your DIY rain barrel is all done!
Safety Tip: Do not drink water from the rain barrel.
Rainwater from your DIY rain barrel is great for your flowers and vegetables, but it is not recommended for consumption by pets or people.
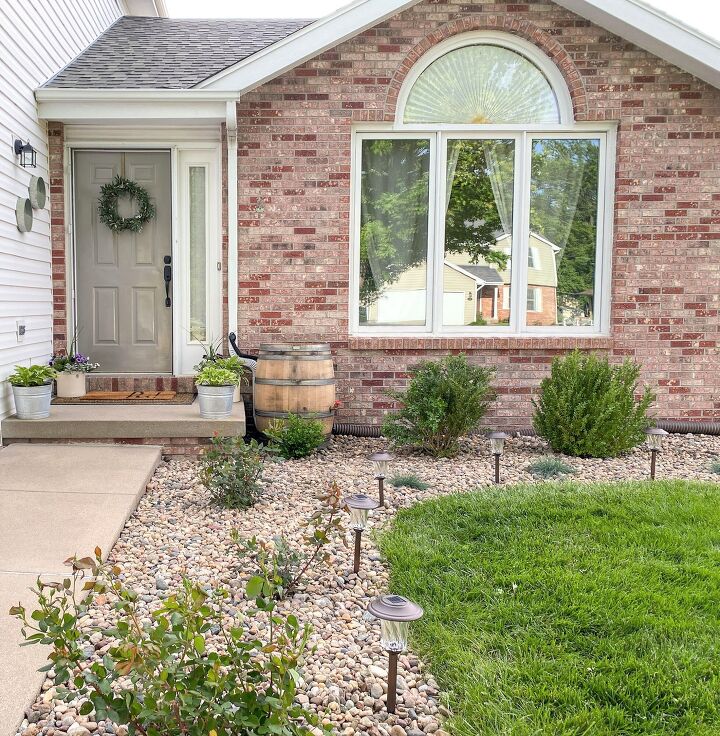
Here is the front of our home before the rain barrel was installed. Bare, bland, and lacking some serious curb appeal!
And the front of our house after the DIY rain barrel was finished. So much better, right?!? P.S. See that big brown drainpipe eyesore? We’ve got plans for that as part of phase II of our mini landscape makeover, but more on that later.
Now, let’s talk about the budget. Similar style rain barrels can cost anywhere between $100 – $260 or MORE, and most of them are made of some type of plastic. Whomp, whomp. The type of wine barrel we purchased was a bit more expensive, but we preferred it to the look of some of the other barrels. And for a few more bucks, our barrel is guaranteed to be waterproof. A tiny (but important!) detail and worth the extra money.
Here is the total cost for our DIY rain barrel project.
Cost Breakdown
- Wine Barrel — $106.18
- Stone Paver — $4.82
- Earth Minded™ DIY Rain Barrel Kit — $29.99
- Soil — $0 (had extra on hand from another project)
Total Project Cost = $140.95
How To Winterize Your DIY Rain Barrel
It may be hot now, but a rain barrel can be damaged if the water is allowed to freeze in it during the winter months. To protect your DIY rain barrel, it’s important to know how to winterize it.
To winterize, first, remove the screws from the downspout and remove the diverter. Next, completely drain the barrel making sure the water is drained away from the foundation of your house. Last, cover the hole in the downspout with the winter hole cover (included in your DIY kit) and secure it with screws.
We’re in love with the finished look and are already making plans to install a few more DIY rain barrels around the house to help conserve even more rainwater (and lower our utility bills!) What do you think of our little budget-friendly project? As always, thanks for stopping by and for supporting the blog. I appreciate it!
XO,

Did you enjoy this post? PIN it for later!
You may also like: DIY Upcycled Winter Wreath For Under $10Winter Hurricane Candle Holder With Epsom SaltBeautiful And Festive Christmas Napkin Rings In Under 10 Minutes


Comments
Join the conversation
-
Why couldn't you do the same thing with 30 gal steel garbage cans? It wouldn't be as esthetically pleasing, but would be cheaper. You could even connect 2 together using plumbing fittings. Unless you live in a harsh weather zone, you might not even have to empty the reservoirs, just use an overflow tap.
-
Ya better check local city code because in Peoria Illinois… collecting rain is ILLEGAL.. yeah, the water falling from the sky, collected on your property.. is not yours!! And now, corruption is leading to owning the air space above you…


Frequently asked questions
Have a question about this project?
I don’t understand the reason for the diverter. Can the downspout be directed right in to the barrel? Also doesn’t the rain just flow right past the diverter?
What is your idea of a budget? Surely way beyond mine, FFS?
I’ve been using rain barrels for 15 years. Saves a lot of water. One question, where is your over flow hose?