


How to Create a Pretty Diamond Pattern Accent Wall in Your Bedroom
I decided to make a DIY diamond-patterned accent wall in my master bedroom. Join me as I take you through the step-by-step process of designing and crafting a beautiful diamond-patterned accent wall with wood. It’s not as hard as it looks!
Materials and tools
- 1x3 wood boards (quantity depends on your wall dimensions)
- Measuring tape
- Pencil
- Miter saw
- Nail gun and nails
- Wood filler
- Sandpaper (medium and fine grit)
- Caulk and caulking gun
- Paint (matching your bedroom's color scheme)
- Paintbrushes and paint rollers
- Painter's tape (optional)
- Protective gloves
Steps

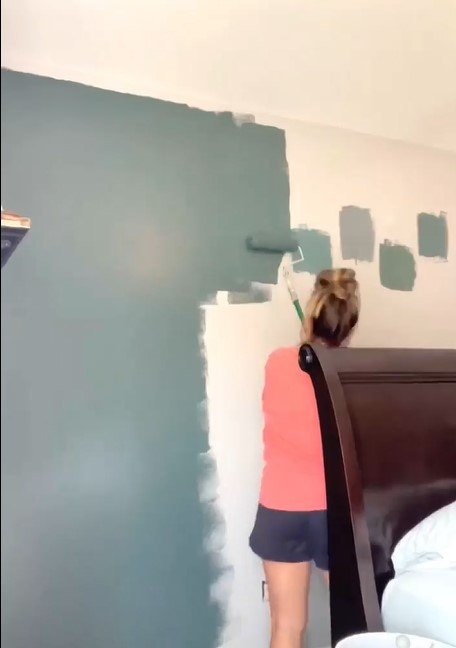
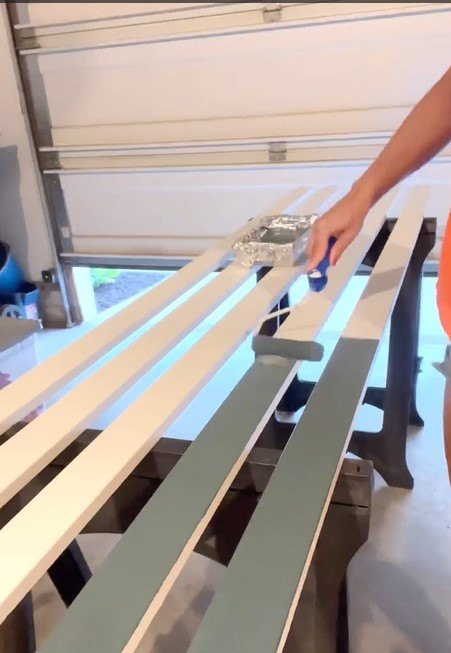
1. Prep and paint the wall
Measure and cut the one-by-three boards according to the dimensions of your wall using a miter saw. These boards will form the diamond pattern.
Paint the wall with the base color you've chosen for your room. This will serve as the background for the accent wall.
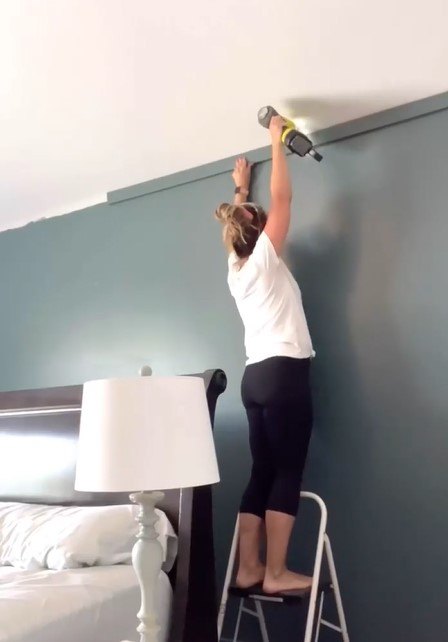
2. Frame the border
Frame the border of the accent wall by attaching the 1x3 boards around the edges. Use a nail gun to secure the boards in place.
This framing will provide a clean and polished look to your accent wall design.
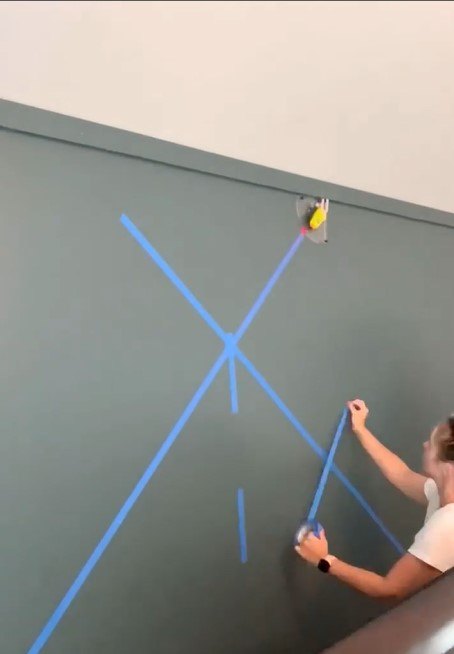
3. Create the diamond pattern
To create the diamond pattern, start by marking the center of the wall using a pencil. Use measuring tape and pencil to mark the points where the one-by-three boards will intersect to form the diamond pattern. This step may require some trial and error to achieve the desired spacing and angles.
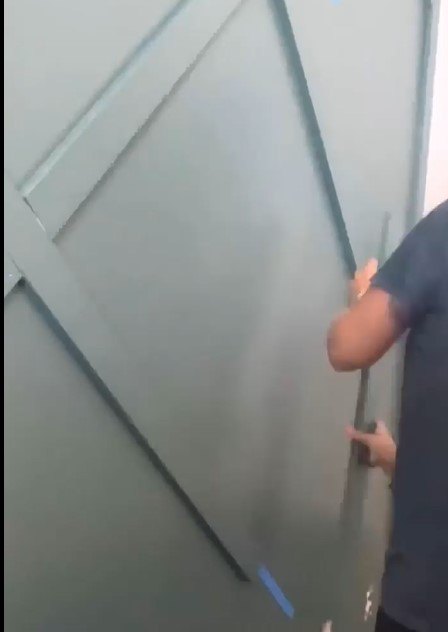
4. Install the boards
Initially, you can use painter's tape to outline the diamond pattern on the wall. However, I found it easier to eyeball and directly nail up the boards to create the pattern.
Starting from the center and working your way outwards, nail the 1x3 boards to the wall. Take your time to ensure each board is aligned correctly and securely attached.
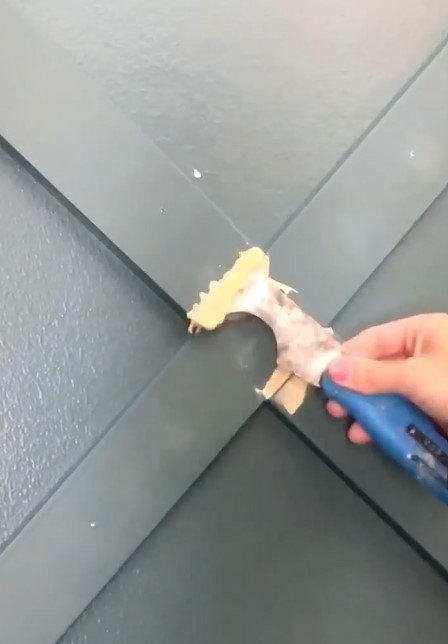
5. Add wood filler
After attaching all the boards, fill in any cracks or nail holes with wood filler. Allow it to dry and sand the surface to create a smooth finish.
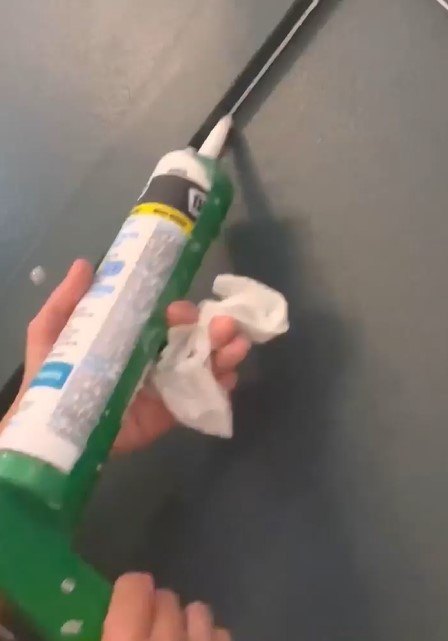
Apply caulk along the edges and joints to give the accent wall a seamless appearance.
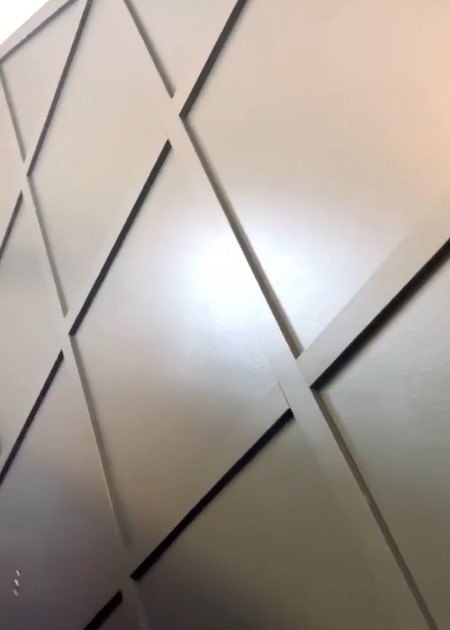
6. Paint a final coat
Apply one last coat of paint to the entire accent wall, including the framed border and the diamond pattern. Allow the paint to dry completely.
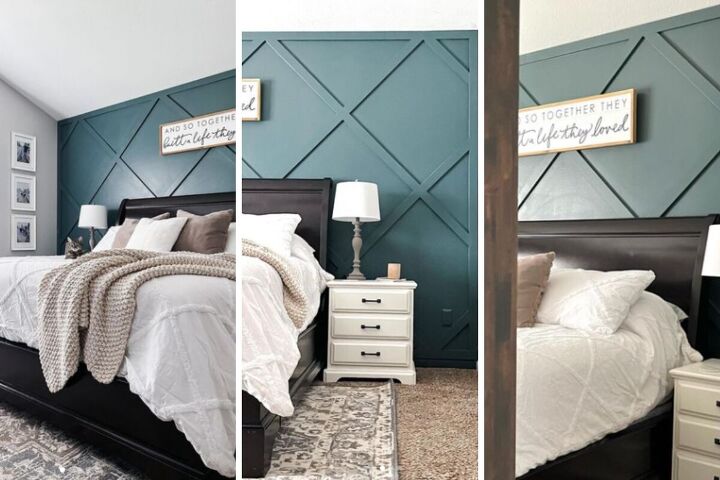
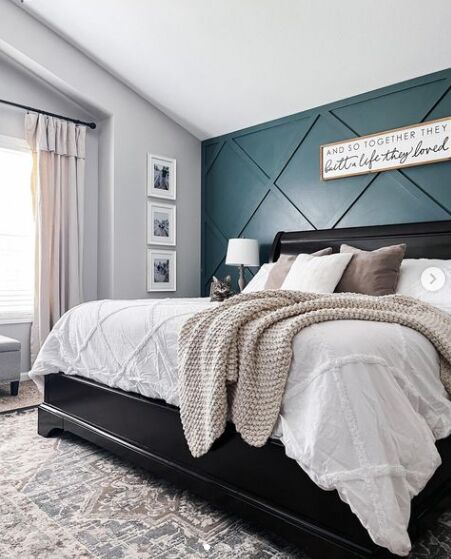
Diamond pattern accent wall
This stunning and unique diamond accent wall has completely transformed our master bedroom. It took a little elbow grease to create this diamond pattern wood accent wall but it was worth it in the end. Let me know if you think this treatment could add depth and personality to your space.
Follow @midmimomdiy on Instagram for more DIY ideas.
Comments
Join the conversation
-
I love it. Great job. I love the color. I wish I could do that on any room in my house, but I rent.


Frequently asked questions
Have a question about this project?