


Create a Floating Book Wall
As part of my son’s Harry Potter-inspired room design, I created a floating book wall. You could do this with any theme, but for magic, it works exceptionally well!

Materials:
- Floating Shelves to attach to the wall
- Wall Anchors + Screws
- Books on Shelves (I used 18)
- Open "Flying" Books (I used 3)
- Artwork to Hang
- Items to Decorate for Your Theme
- Glue for Pages of Open Books
Step 1: Get Books
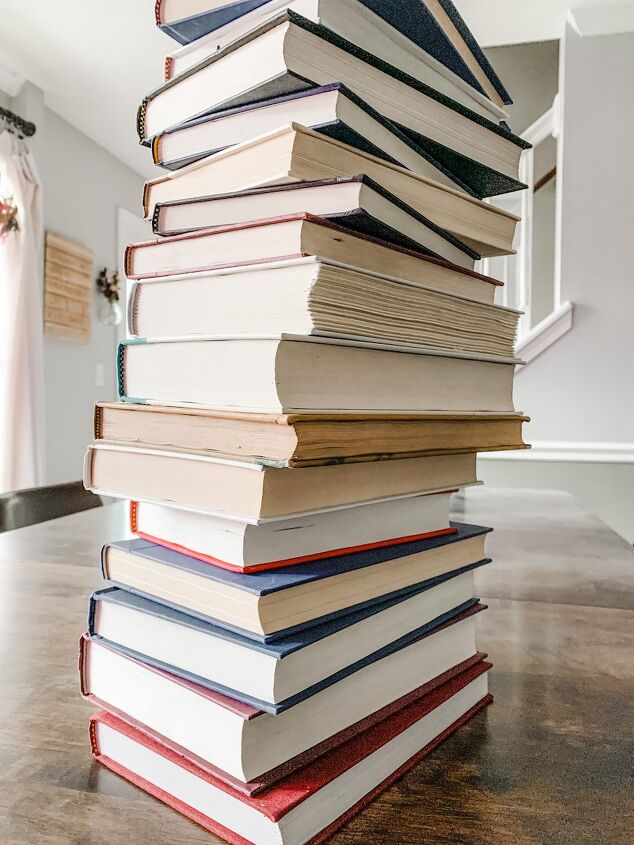
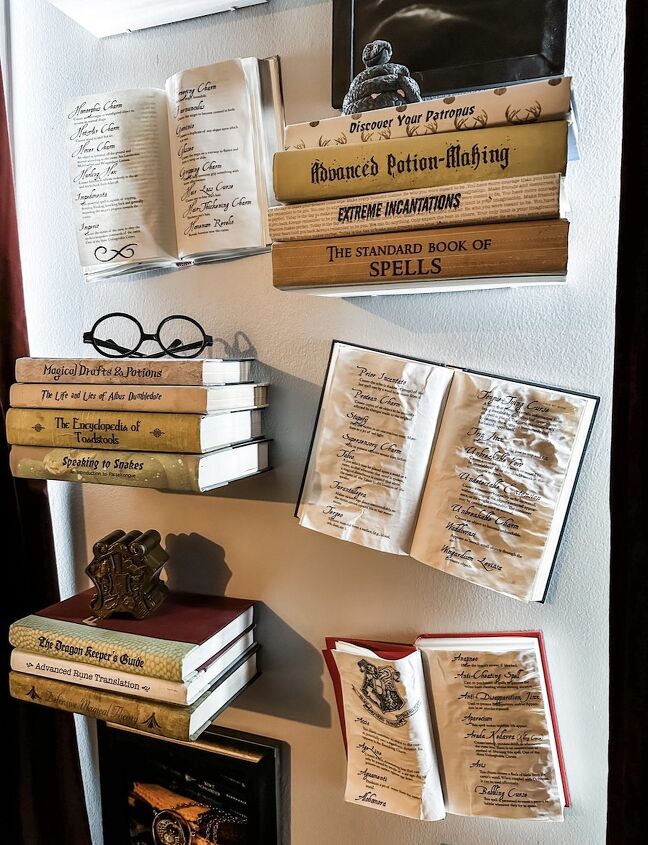
I used old books for this project that had been covered to create a Harry Potter Inspired Library. You can either go with a theme like that, color coordinate your floating book wall, or simply put your favorites on display! For the floating book wall shelves, I used 18 books–in either 3 or 4 books per stack. I also hung 3 books "open" that appear to be flying, which is optional, depending on your theme.
For sizing, you don’t want books that are huge, but substantial enough. If you're using the spines as part of the decoration, they have to be big enough to show up. Since you’re stacking them, you want sizes that are similar, but not all the same. If you're planning to remove the cover to show off the color of the books, be aware of how all of your books will look together.
Step 2: Layout Planning & Installation
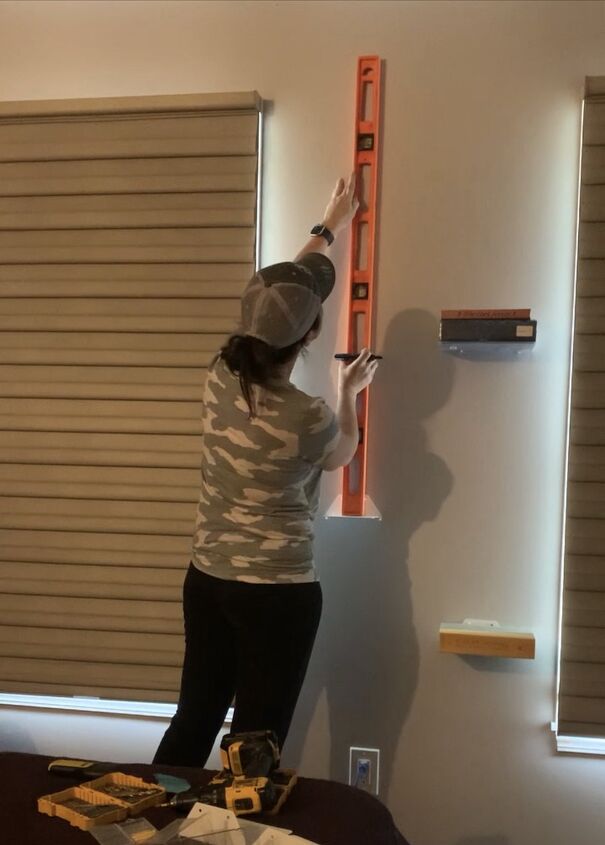
Do you want your books in a vertical column? Or, would you like them to alternate? Do you want even spacing? Consider the wall area where you are placing them. What will fit the space best? I chose to alternate left and right, using the narrow space between the windows in my son's room. I hung the first two shelves, offset of each other by approximately the height of a stack of 4 books, then I measured up the wall–also identifying where I would place the "open" books.
Tips for Hanging Floating Book Wall Shelves
- Finds studs for easy installation
- Check level to install shelf brackets evenly
- Use wall anchors when studs are not available
- Add books to each shelf you install, then stand back and see how it looks
- If adding open books to spaces between shelves, make sure you leave enough room
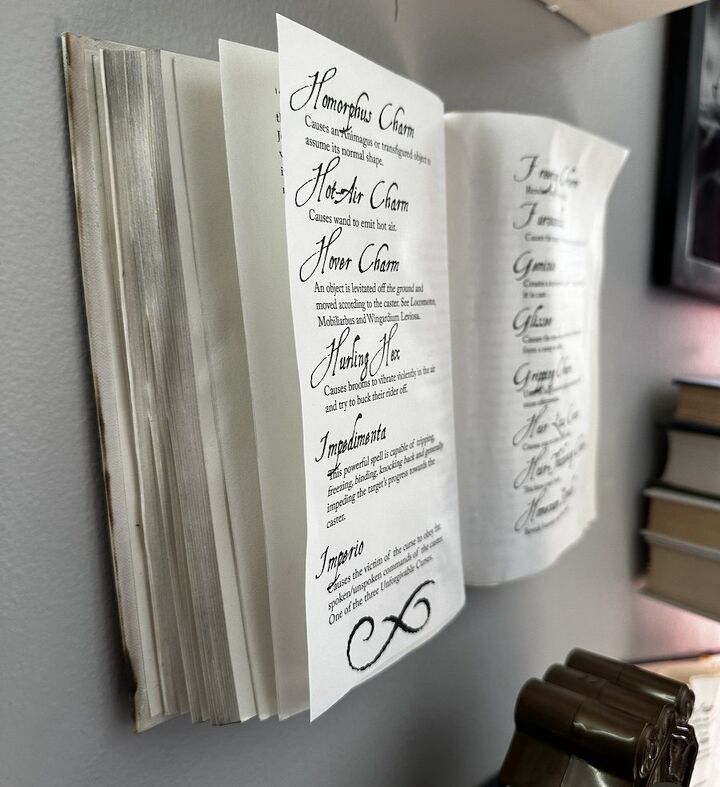
Step 3: Hang the Open Books
If you'd like to add "open" books on your floating book wall, there's a process. This process will ruin the book. If you're trying to hang a book open without ruining it, you may want to search for methods where you can use fishing line to hold the pages open while the book floats. Here is the method I used for hanging the spellbooks...
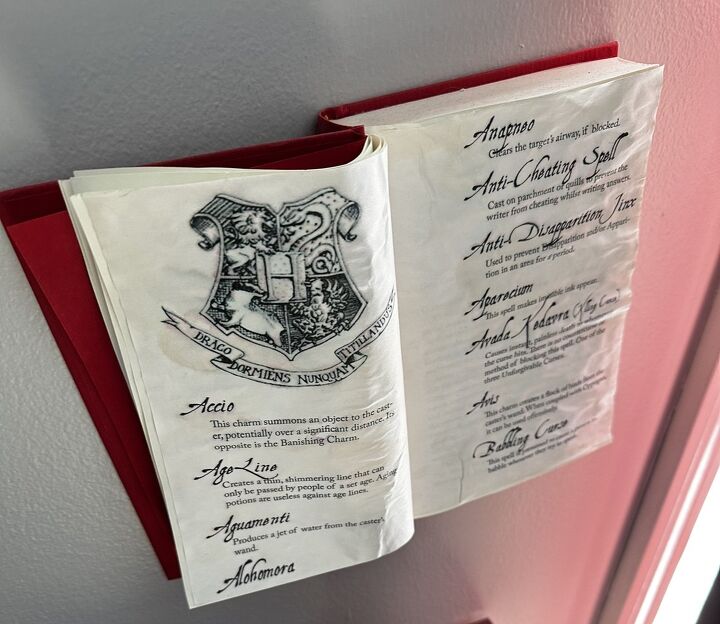
I placed the book against the wall in the spot and position I wanted it, with pages open to about the middle. I determined where I would need to screw the back cover in, then used my drill to drill the hole through all the pages & the cover. Once I drilled that hole, I held the book up again in the position on the wall, and I put the drill through the hole in the cover, and into the drywall. Removing the book, I added a wall anchor. I made sure the book was in place correctly before making it fit tight. Then, I did the same thing to the front cover. To hide the screws, I left a few pages on each side of the middle untouched. Then, I glued them to the pages that were screwed in place. For the Harry Potter spell books, I also added vintage-looking pages into the middle of the books.
Step 4: Decorate!
Of course, I had an easy theme to decorate! I printed off some Harry Potter photos to frame. On top of the stacks of books were items that we had on hand, or that were thrifted.

The Harry Potter room reveal wouldn't have been the same without this floating book wall! What do you think? Are you an avid reader, ready to take on a creative way to display books? I'd love to see your projects!
*Since I had already created the books for the project, the only purchase was the 5 shelves for $32.
Harry Potter DIY Decor


Frequently asked questions
Have a question about this project?