


Easy Crackle With Elmer's Clear Glue. Plus Cool LED Lights

I made this bottle for two reasons. The first is to show that you can crackle without a base color. It will allow the color of the bottle to shine through. The second is to show how easy it is to add LED lights and turn the bottle into a night light/lamp.
You can watch this easy-to-follow step-by-step video or keep scrolling for instructions. Let's get started!
The first thing you want to do before you start is: test your paint to see if it crackles.
I find that most paints crackle, but some don't. For example, most metallic paint will not crack using Elmer's glue technique. I find that sticking to matte or chalk paint works best.
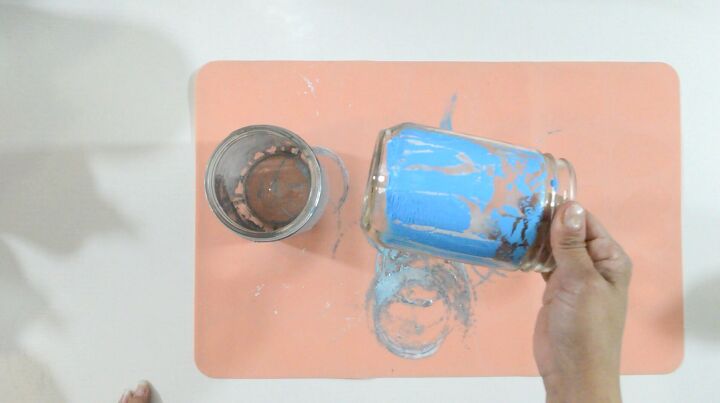
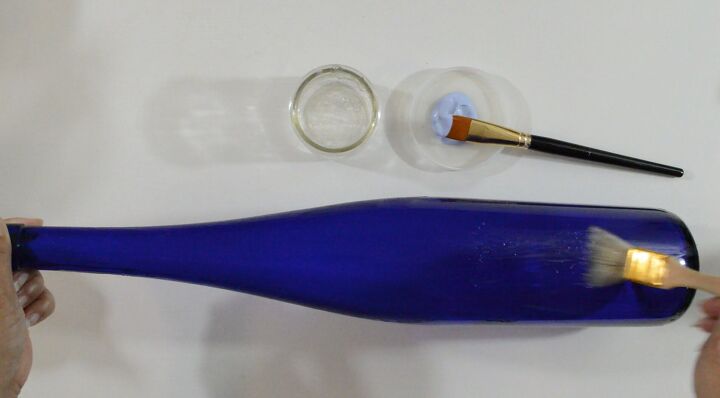
I always test my paint on a glass tester jar to make sure.
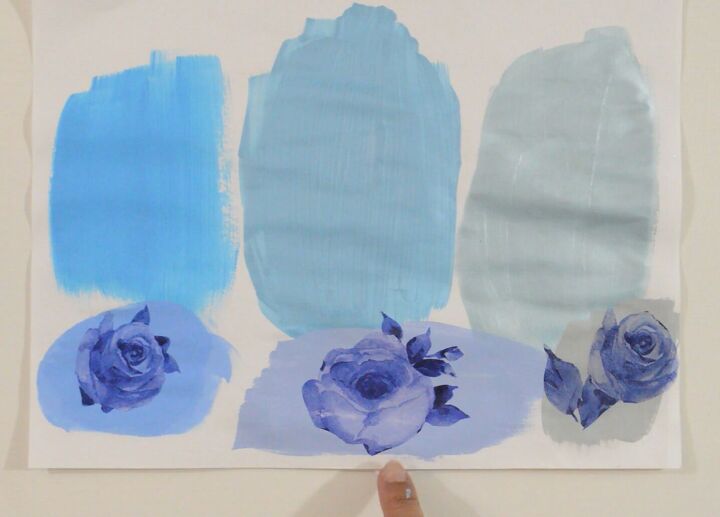
Next, you want to test whatever napkin design you will decoupage onto the bottle.
You're testing to see if the napkin will still show up over the color paint you chose.
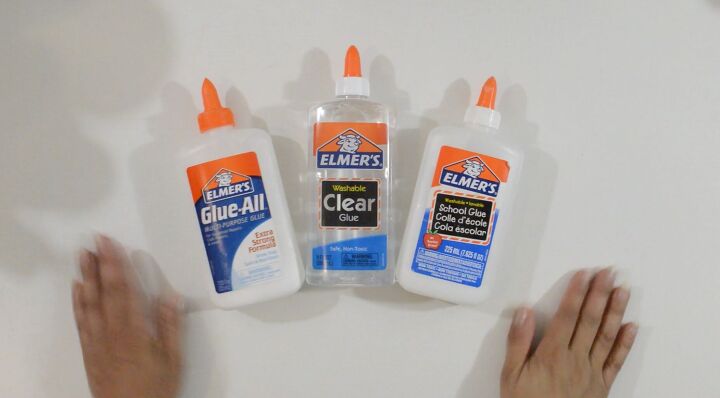
To create the cracks, I used the clear Elmer's glue, but you'll be happy to know that it works with the white one as well.
I found the clear one to be the easiest to use with this technique.
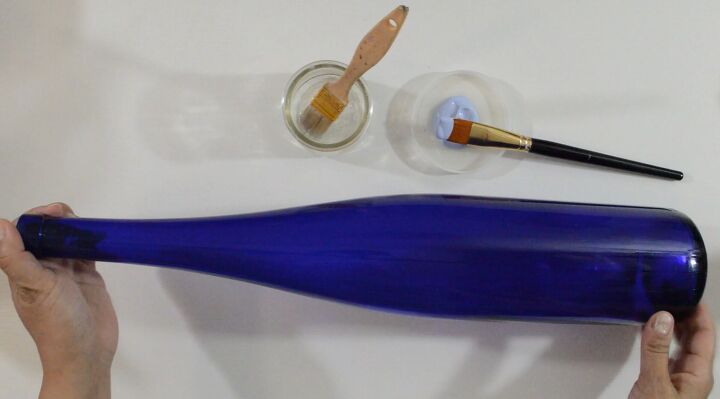
Make sure your bottle is clean and dry before adding the cracks.
You also want to have your Elmer's glue in one container with a separate brush.
And the paint that will go over that, in another with a separate brush.
Start by adding Elmer's glue. You want to do this in sections. Cover one side of the bottle with a layer of glue. I found that spreading it as much as I could before adding anymore worked best.
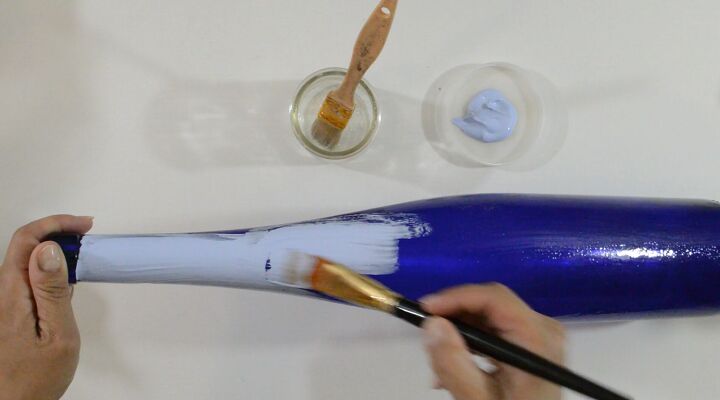
While the glue is still wet, start adding the layer of paint on top.
TIPS:
1.) You want to load the brush with a lot of paint.
2.) When applying it, you want to glide it over the glue in one motion. Do not brush it back and forth.
3.) Try not to go over the same spot too many times. The less, the better.
4.) Once you see that your brush runs out of paint, do not try and spread what you have already placed. Load the brush again and continue until the first side of the bottle is covered.

This picture demonstrates the cracks beginning to form before I was done.
Once you finish, place it in front of a fan to dry. You can use a hairdryer, but I don't know how the heating setting would work. I know the cool setting will work.
Once it's dry, do the same thing to the remaining half of the bottle.
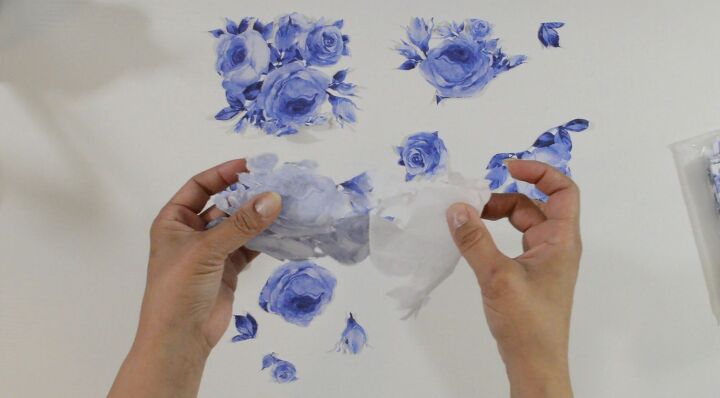
While the second half dries, I cut up all the designs from my napkin.
I used these pretty blue roses.
Once you've cut them out, separate all the plies of paper.
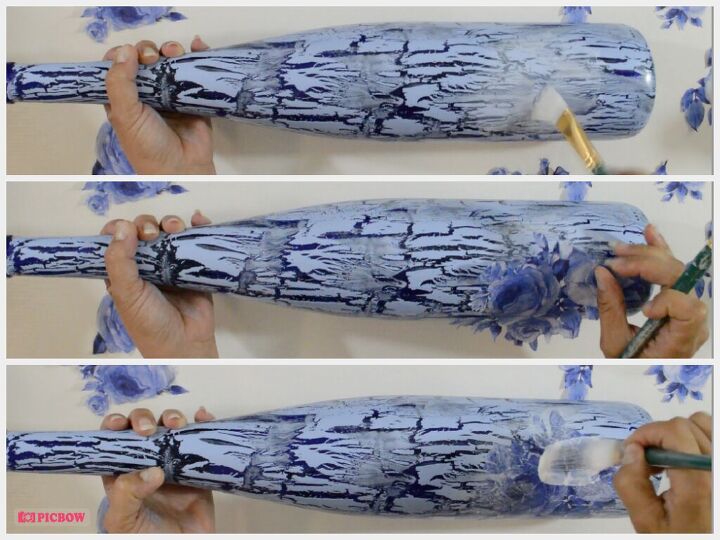
Now I used the decoupage technique to glue all the roses onto the bottle.
1.) Place some Mod Podge on the spot you want to place the rose.
2.) Using a crumpled-up piece of cling wrap, smooth it down to the bottle.
3.) Lastly, give it one last layer of Mod Podge to seal.
Continue this process all over the bottle until you're satisfied with the design.
TIP: If you are new to decoupage, do one and let it dry before placing the next. This will prevent accidentally ruining one.
Once that dries, you could leave it as is or add highlights. I like to add highlights to mine because it does make a difference in the overall design. I also added glitter glue to the leaves of the roses.
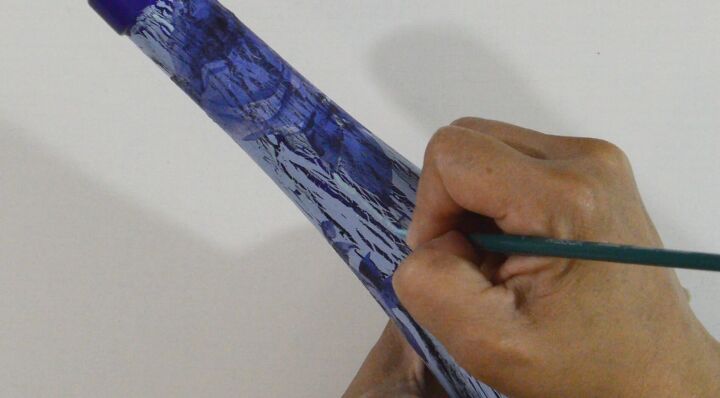
I used a thin brush and metallic light blue. I added thin lines next to most of the cracks.
You want to seal the entire bottle with another layer of Mod Podge before adding any glitter glue.
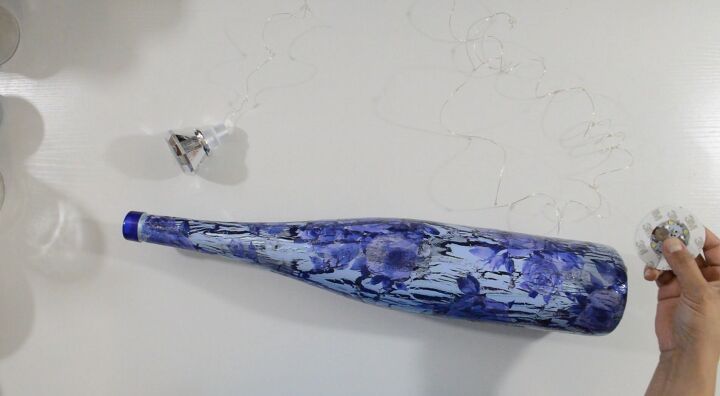
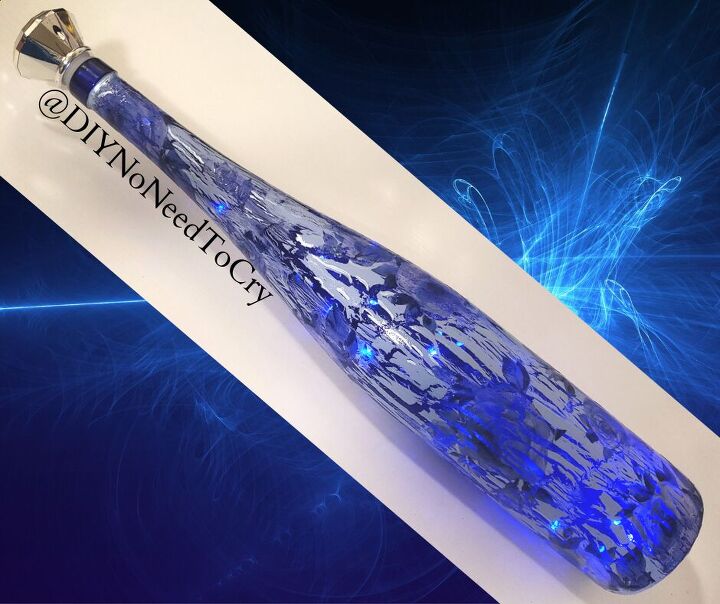
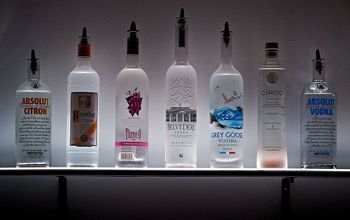
Lastly, I added two kinds of LED lights. One is a diamond shape cork with fairy lights attached to it. The other was a round flat battery-operated one with three settings. I took off the tape and stuck it to the bottom.
I got them both off of Amazon. I paid $29 for a pack of 6 fairy light corks and 12 round flat ones. I do a lot of bottle crafts, so it was worth it for me. You can find them sold individually and it will be less.
This project is easy; to medium to make. These techniques are not difficult. However, they do have a learning curve. If you follow the tips I have provided, you should get it in no time.
Crackle with Elmer's glue: practice on a jar
To Decoupage: practice on a jar, or you can check out my more detailed video on decoupaging.
I hope this inspired you in some way to upcycle something of your own.
Comments
Join the conversation
-
I can't find the flat round LED lights on Amazon that look like the ones you used or perhaps it's just the angle of the pix?
-
I love this idea and will try it on paper/painting too. I read that if you apply the glue thicker it will make larger cracks..and thinner thin cracks..


Frequently asked questions
Have a question about this project?
If I don't want to add the lights, would this work on glass vases?
What was the plastic wrap for? I don't quite get that part..