


Cardboard Containers Repurposed Into Hanging Lamp/Light

by
Jennifer
8 Materials
$9.50
2 Days
Medium
I will make something out of nothing  !
!
! When I saw the cardboard containers I knew I would use them for something but wasn't sure what that something was at the time. Three containers and only two lids... hmmm. Well I bought them anyway, only $1.99 at the thrift store. They sat for awhile, then I started to play around with them. I thought about storage... been done, what about ... no that won't work, so many ideas that are not working out . Then I came up with this...
. Then I came up with this...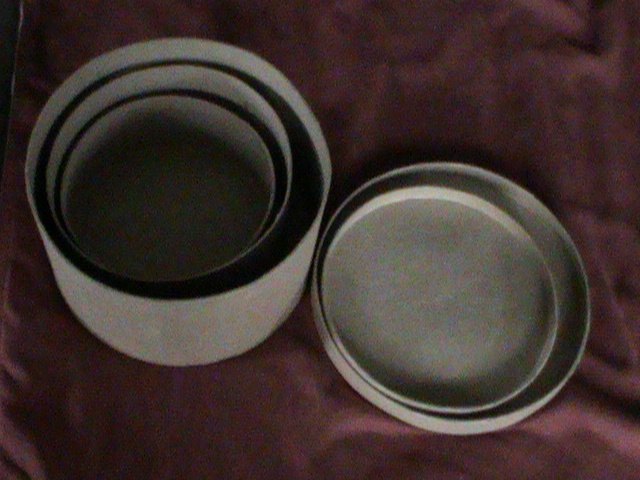
Three containers and just two lids . I'll save the lids for another idea I have and use the containers for now.
. I'll save the lids for another idea I have and use the containers for now.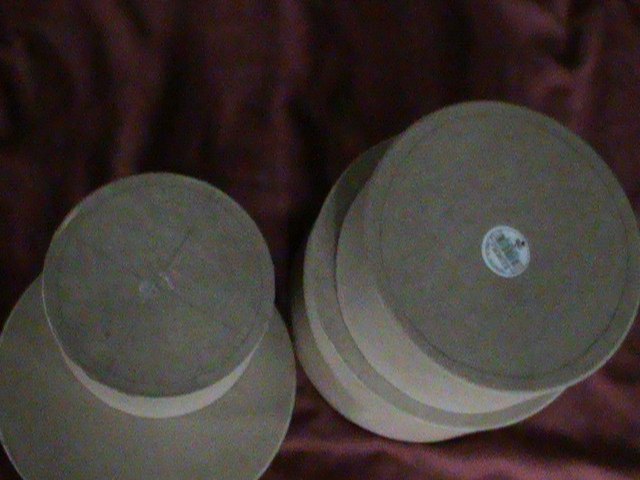
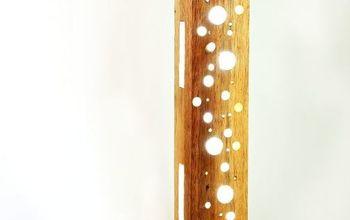
I cut out the bottom from the inside by scoring several times with a box cutter to get a clean edge. Now I have cardboard cylinders. On to painting with my fav color... blue! I was going to ombre but it has been done so much I just went another way.
but it has been done so much I just went another way.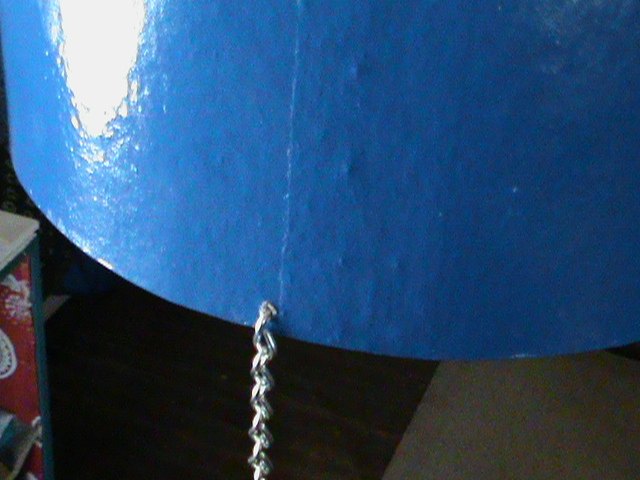
I put holes in the cardboard with a huge needle. I was going to drill but thought I might mess them up somehow or shred the cardboard. The needle worked fine. Measure the circle then mark a triangle on each cylinder then mark for a hole about 1/8 of an inch down the side. I did three points but you could do four if needed. I pulled apart some chain I already had at six links each. This made enough space between each layer for light to shine through.
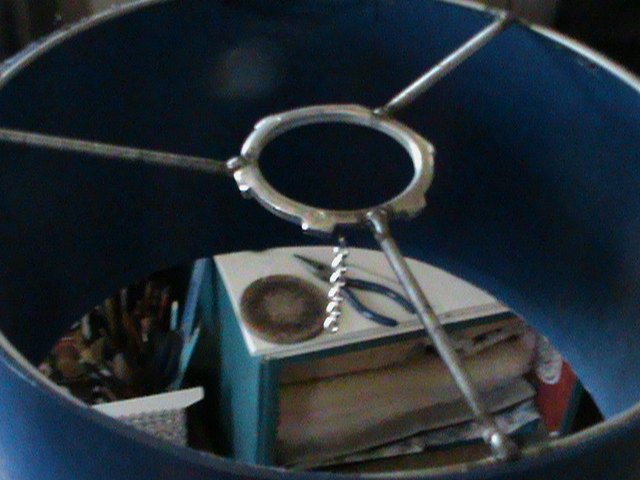
I didn't have the part you would need for the shade to hang onto so I made it. The ring is from an old lampshade I had already torn apart. I still needed to make the rest of it or buy a shade and tear it apart. Well I'm not doing that so I will make my own. I wielded the pieces together with help from my better half and not too bad for my first time wielding . I used E6000 to glue it inside the cylinder.
. I used E6000 to glue it inside the cylinder. 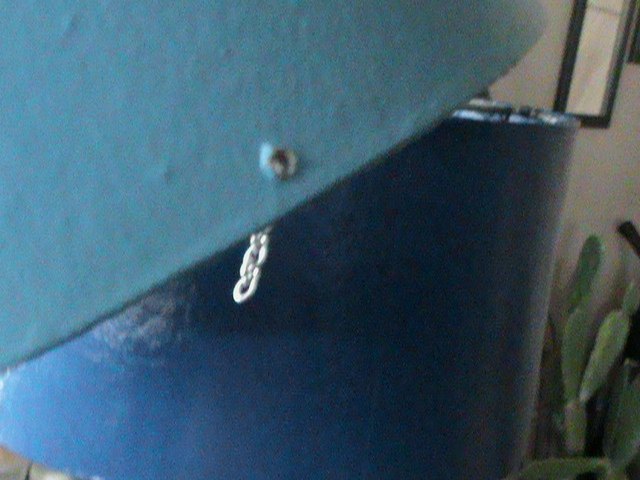
I attached the cylinders together with the chain links.
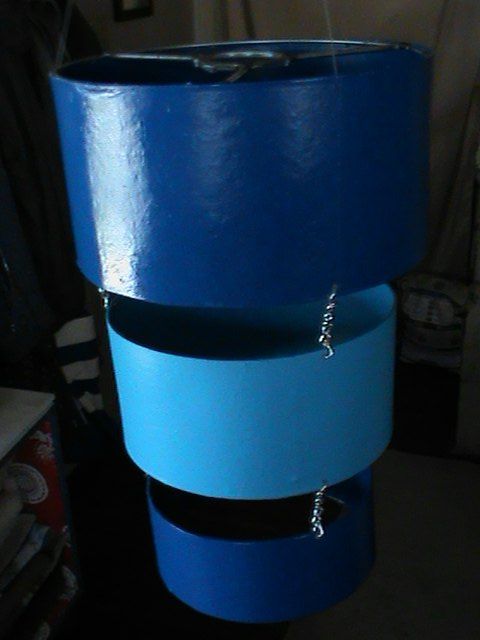
That's done ... next
... next 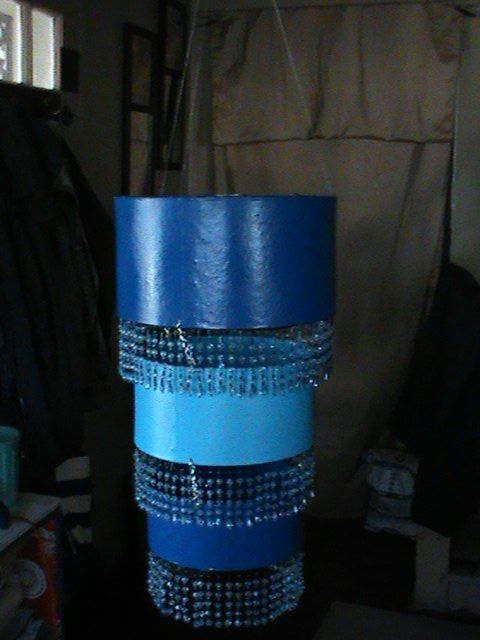
Oh I need sparkly and shiny. I already had the beaded fringe to add. So far so good! Still needs more of something .
.
.
I added the zigzag trim (already had) to finish . All that's left is the light to be strung through ( I got the light from Amazon in a 2 pack for about $13.00) and all finished. The light hangs by the cord and I don't like that so I will probably add some of the chain to the cord so it will hang from the chain not the cord.
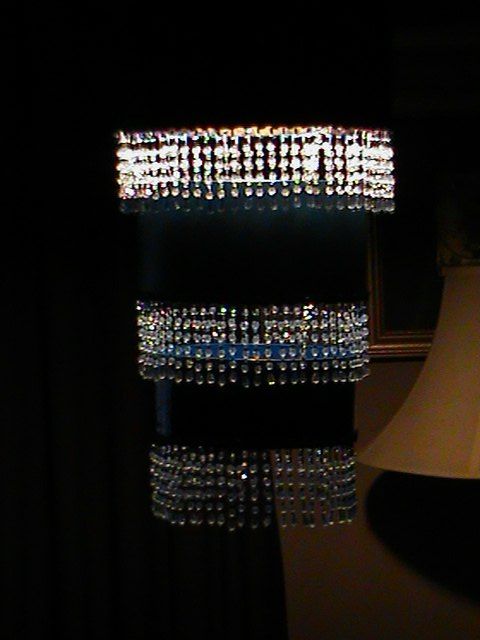
It casts a beautiful glow on the walls but I couldn't get a good picture of that glow. I will hopefully be selling this soon !
!
!Thanks for looking and I hope this helps someone out who doesn't think they can do it  because if I can you can!
because if I can you can!Thanks for looking!
Comments
Join the conversation
4 of 8 comments
-
You are my new favorite HomeTalker Jennifer. I love how you write, I love your honesty and I loooooove your creative mind. Can I stalk you?
-
Magnificent! Very creative idea. I will forego the welding aspect of this project, but I will definitely try the rest. Such potential for various designs. Thank you for sharing your creativity Jennifer! Best of luch in your endeavors.


Frequently asked questions
Have a question about this project?