


15 Snowman Crafts to Make For Some Frosty Christmas Fun

Are you ready to bring some frosty fun into your home this winter? Get ready to dive into the world of DIY snowman crafts!
These adorable snowmen are easy to make and will add a touch of snowy cheer to your holiday decor. From simple projects to more intricate creations, there's a snowman craft for everyone.
So grab your supplies and let's get crafting!
For even more ideas, see Hometalk's ultimate guide to DIY Christmas decor here.
Snowman crafts
- 1. Bed spring snowman
- 2. Log snowmen
- 3. Wood pallet snowman
- 4. Splatter screen snowman
- 5. Salt and pepper shaker snowmen
- 6. Flower pot snowman and Santa
- 7. Melted snowman ornaments
- 8. Frosty the Snowman planter
- 9. Salt and pepper shaker snowmen
- 10. Light-up snowman ornaments
- 11. Light-up snowman canvas
- 12. Light-up snowman ornament
- 13. Baseball snowman
- 14. Life-size expanding foam snowman
- 15. Glass bowl snowman
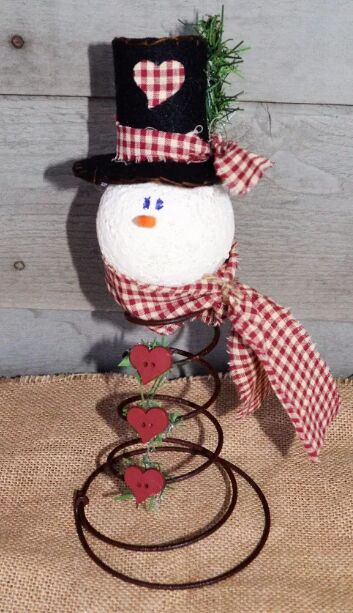
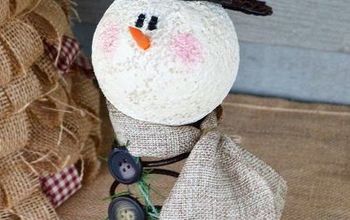
1. Bed spring snowman
Turn an old bed spring into a snowman for your winter decor with this tutorial by Tara Shahan Hensley. If you don't have a bed spring, don't worry, you can make one.
Gather supplies like fabric scraps, buttons, and Christmas garlands. Create the bed spring using 16 gauge wire, then coat a Styrofoam ball with Mod Podge and paint it cream.
Make a hat from black felt, embellish it, and attach it to the snowman. Add eyes, a carrot nose, and a scarf. Finally, decorate with buttons and garland. Meet Rusty the Snowman!
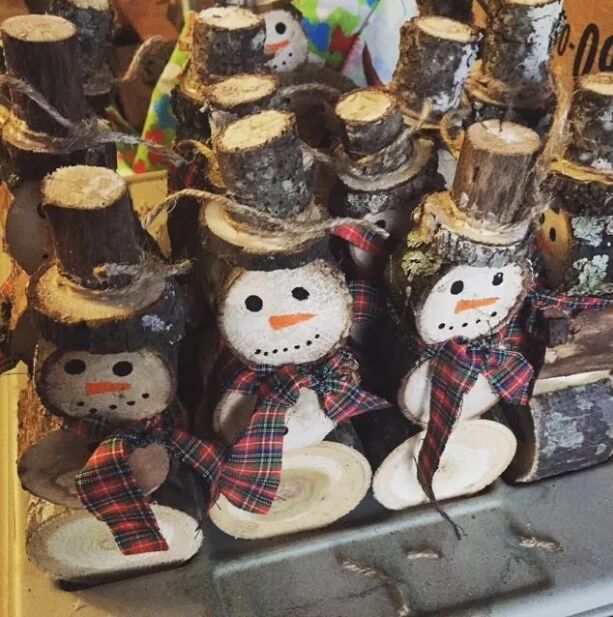
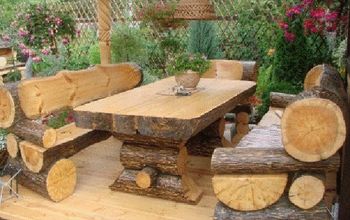
2. Log snowmen
Next, Cindy Hagemann shows us how to craft a set of snowmen from logs. Cut down trees and limbs ranging from 1" to 4" in diameter. Use a chop saw to create slices, varying from 1" to 3" in thickness.
Glue the slices together, ensuring stability by sawing off ends to create a flat surface. Paint on facial features and buttons, then add a fabric scarf. These handmade snowmen stand at about 8 inches in height.
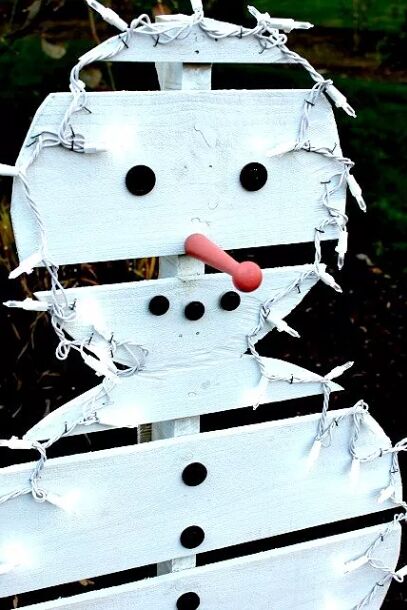
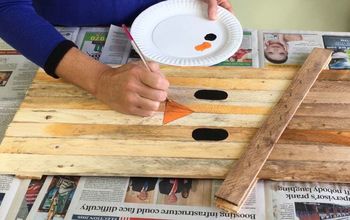
3. Wood pallet snowman
Create an adorable wood pallet snowman for your holiday decor by following these instructions from Linda B. Start by obtaining wood pallets, which can be found at stores like Home Depot.
Use round shapes like a garbage can lid and a wet vac bucket to trace the snowman shape. Cut out the snowman following the traced lines. Spray paint the snowman and attach white lights around the edge. Add buttons for the eyes and a wooden peg for the nose.
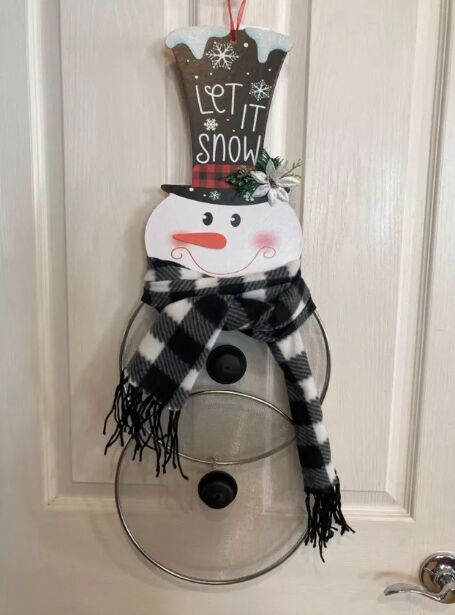
4. Splatter screen snowman
Create a splatter screen snowman door hanger for the holidays with a budget-friendly project by Shelly L Nemeth. Gather a snowman sign, two splatter screens, a scarf, silver pipe cleaners, a glue gun, and any embellishments you'd like.
Attach the splatter screens together using pipe cleaners, securing them in a few places. Add decorative elements like paper on the hat band and greens with a flower. Attach the head to the screens using pipe cleaners and hang the snowman wherever you like.
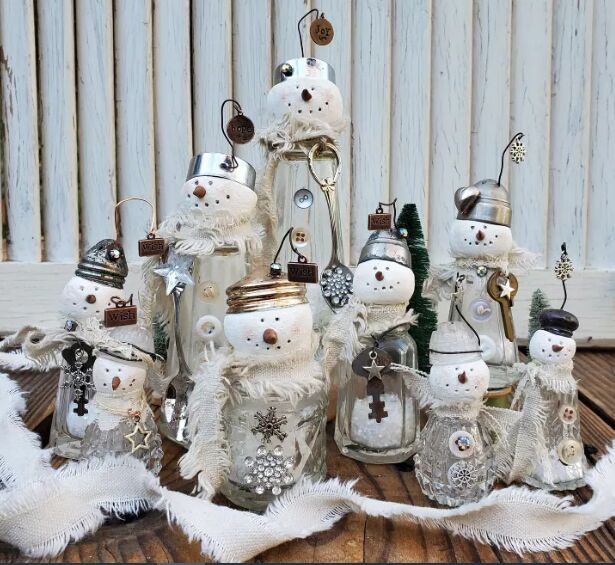
5. Salt and pepper shaker snowmen
Learn how to create snowmen using upcycled salt and pepper shakers and Sugru moldable glue.
Fill the shakers with glitter to mimic snow. Mold the clay into a head and place it atop the shaker, adding a hat for character. Poke eyes, mouth, and nose holes, and let it dry. Use Sugru to securely attach the head, hat, and other decorations.
Add a Sugru-made carrot nose. Finish with fabric or ribbon scarves, vintage lace, and additional embellishments. Add a rosy touch to the cheeks for a final adorable detail.
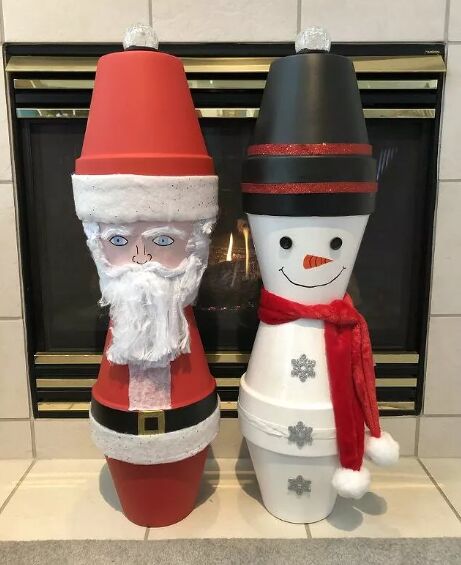
6. Flower pot snowman and Santa
Next, Chas' Crazy Creations shows us how to create holiday decor using terra cotta flower pots.
For the Santa, paint three pots red, one with a black top, and another in Ballet Slipper color. Use silicone to assemble them. Decorate with gold-painted belt buckle, batting for embellishments, and fake cobweb for hair and beard. Draw eyes, nose, and rosy cheeks.
For the snowman, paint three pots white and one with chalkboard paint. Add sparkle, ribbon, and snowflake ornaments. Use buttons for eyes, draw a carrot nose, and smiley face. Attach scarves and solar lights to their hats for a festive touch!
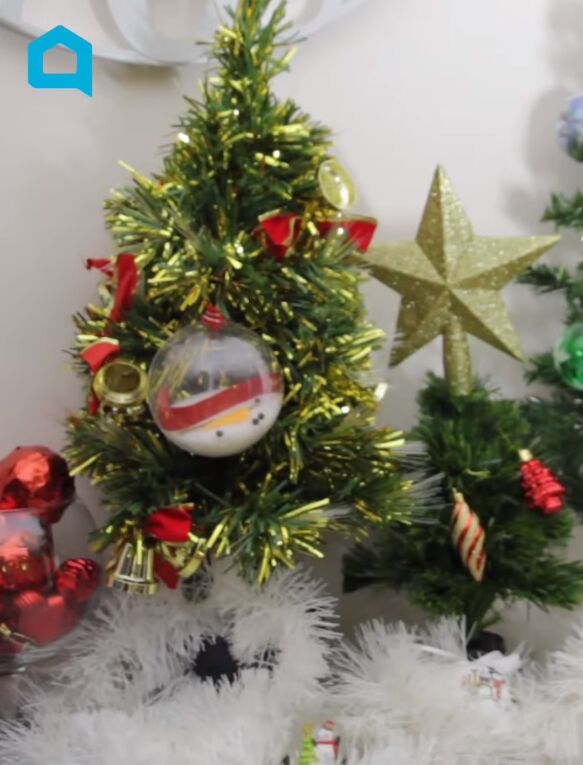
7. Melted snowman ornaments
Shawna Bailey shares how to create melted snowman ornaments using simple materials - this is a great craft for kids. You'll need a plastic or glass ornament, rock salt, sticks, peppercorns, and felt in orange and red.
Fill the ornament with salt to represent melted snow. Add sticks for arms, peppercorns for eyes and buttons, and craft a carrot nose and scarf from the felt. Shake it up to see the snowman take different forms.

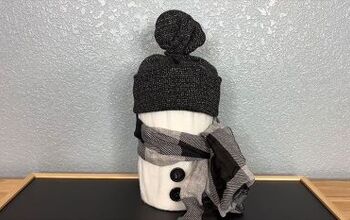
8. Frosty the Snowman planter
Transform a white vase into a Frosty the Snowman planter with these simple steps from The Crafty Pumpkins.
Gather a white vase, floral foam, Christmas greenery, pine cones, Christmas berries, a "Let it Snow" pick, a Frosty hat pick, floral shears, newspaper, orange and white vinyl, and a Cricut machine.
Create Frosty's face using vinyl or acrylic paint. Fill the vase with newspaper and floral foam, then arrange greenery and picks. Finish by adding the Frosty hat and berries.
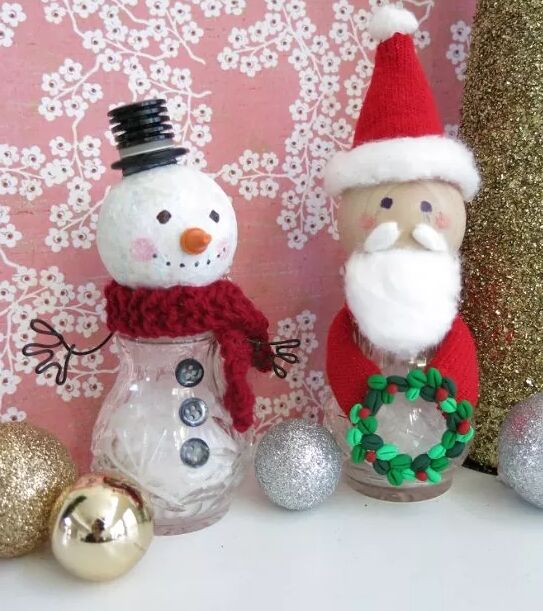
9. Salt and pepper shaker snowman and Santa
Here's another way to repurpose old salt and pepper shakers into Christmas figures. With some creative ingenuity, Donna demonstrates the transformation of scratched glass shakers into a snowman and Santa.
Utilize materials on hand like round drawer pulls, a toilet paper roll, buttons, and an old sock. Craft a cardboard collar for the figure, then add layers of paper mache for texture.
Draw on features with a Sharpie and use an orange crayon for the snowman's nose. Attach bendable wire arms and decorative buttons. Fill the shaker with fake snow for a festive touch. Finish with a button-top hat and knitted scarf.
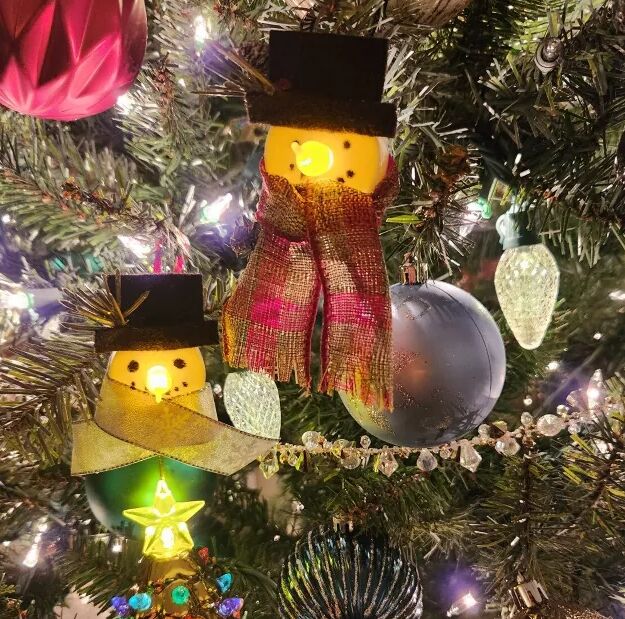
10. Light-up snowman ornaments
Learn how to create light-up snowman Christmas tree ornaments by using battery-operated tea lights, as shown by Taylor | Casually Coastal Designs.
Attach a black felt hat by gluing together a square and rectangle, then affixing it to the tea light. Add a ribbon scarf by securing one end to the back and overlapping it onto the snowman's face.
Attach a piece of small red ribbon at the back for hanging. Draw on the face with a white Sharpie. For an extra touch, add a sprig of evergreen to the hat.
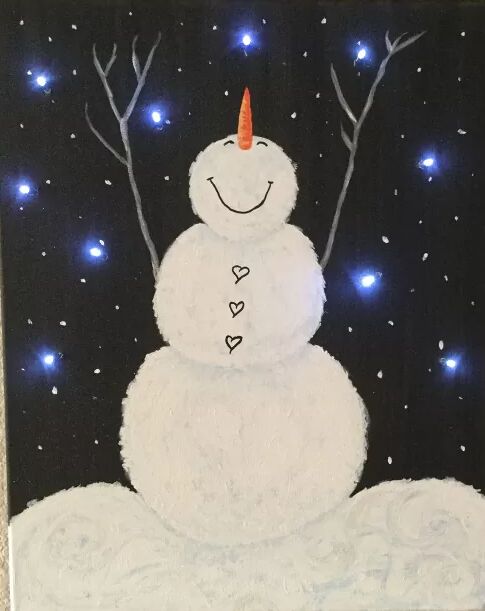
11. Light-up snowman canvas
Introducing Chas' Crazy Creations once again, and this time she's here to guide you on creating illuminated canvas art for your kids (or even the young at heart) this festive season.
Start by either painting a canvas or printing out images on paper using a laser printer. Cut them out and affix them to the canvas using Mod Podge. Once the images are securely in place, apply another layer of Mod Podge over the entire canvas and allow it to dry.
Next, carefully plan the placement of battery-operated lights on the front of the canvas. Use an ice pick to create small holes and secure the lights at the back of the frame.
This personalized and illuminated masterpiece will infuse a magical touch into your holiday decor. Plus, it doubles as a wonderful DIY Christmas gift for someone special in your life.
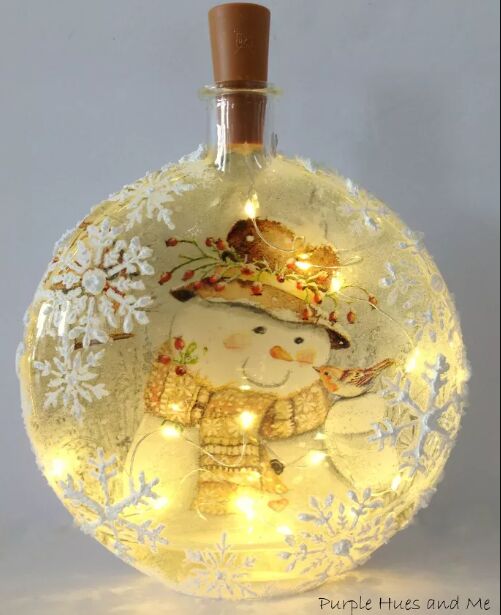
12. Light-up snowman ornament
For another light-up DIY idea, learn how to transform a clean glass bottle into an illuminated snowman ornament using reverse decoupage. Start by cleaning the bottle and placing it on a winter-themed napkin. Wet the edges and carefully tear out the napkin, separating the layers.
Apply Mod Podge to the bottle and affix the napkin, smoothing out any wrinkles. Once dry, use sandpaper for a polished finish.
Enhance the napkin's visibility with white chalk paint and add dimension with Snow-Tex and snowflake stencils. Insert cork twinkle lights for a cozy night light during winter evenings.
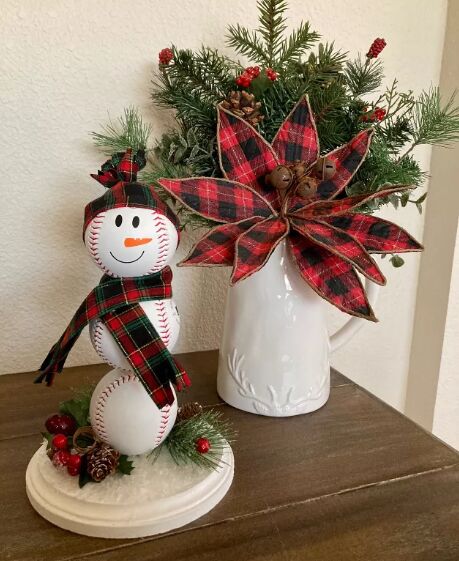
13. Baseball snowman
This DIY project by The Crafty Pumpkins recreates a baseball snowman using materials like wooden rounds, baseballs, paint, fabric, and greenery, aiming to create a cost-effective version of a similar, pricier store-bought design.
The process involves painting the wooden base, gluing baseballs together, adding faux snow, crafting a face using vinyl or freehand, creating a scarf and hat from Christmas fabric, and embellishing the base with greenery. The final result is a cute, personalized baseball snowman that's both festive and budget-friendly.
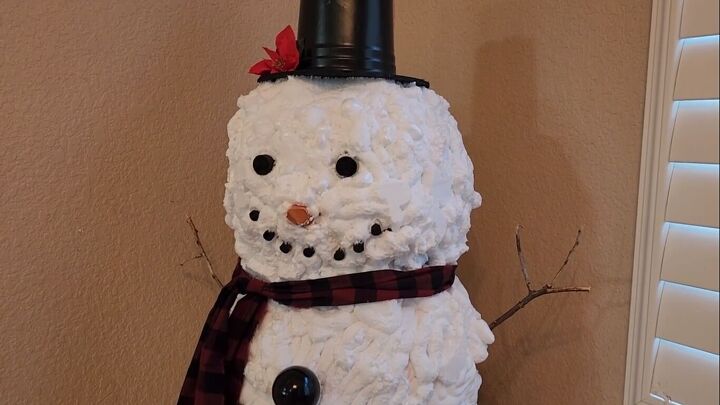
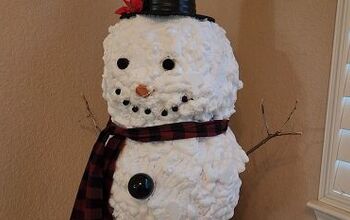
14. Life-size expanding foam snowman
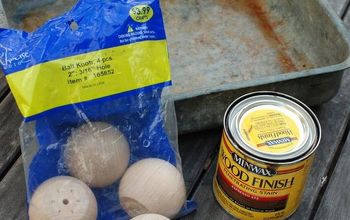
This DIY snowman project by Mitch Couch uses rubber balls and expanding foam from Walmart to create a life-size fake snowman.
Starting with a plywood base, the rubber balls are secured with expanding foam, creating a snowy texture. Ornaments are added for buttons, and layers of foam build the snowman's body. The face is crafted using painted round pegs, and a top hat made from a wooden round and a planter finishes the look
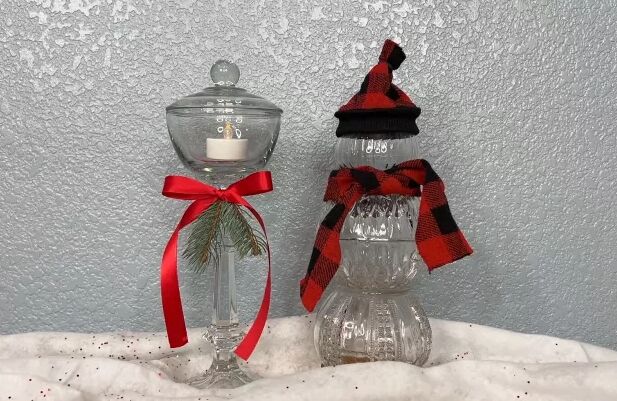
15. Glass bowl snowman
This project from Chas' Crazy Creations repurposes thrifted glassware into festive holiday decor. To create a glass bowl snowman, stack candy dishes and a vase, topping them with a votive holder for the head.
A sock makes the snowman's hat and scarf. For a matching candle holder, glue a candy dish to a glass taper candle holder, adding embellishments like ribbon and pine.
Snowman crafts
Congratulations on creating your own little snowman family! These charming crafts are sure to bring smiles and warmth to your winter days. Whether you display them indoors or out, they've added a special touch to your seasonal decor.
Let us know your favorite snowman crafts in the comments below.


Frequently asked questions
Have a question about this project?