


How To Make Unique Christmas Tree Ornaments Using Resin, Clay & Moulds

Christmas is only a couple of weeks away!
🎄⛄🎅⛄🎄
One of my favorite parts about the Christmas season, the Christmas crafts!
The kids can even help with these ones!
Get creative and enjoy the family crafting time 🥰
I've included both written directions as well as videos
I used a wide variety of Redesign With Prima Decor Moulds for this project, but you really only need a couple of your favorite designs to create some unique ornaments ♥️
Redesign With Prima offers dozens of different designs for their decor moulds. They are well worth having on hand! You can, in a moment's notice, create unique appliques for any project, even for cakes! Yes! They are food safe too! 🥰
The price consists of a few paint colors, moulds and waxes along with all of the other necessities. You can make dozens of ornaments and still have a lot of product leftover for more projects. And, the moulds last forever ♥️

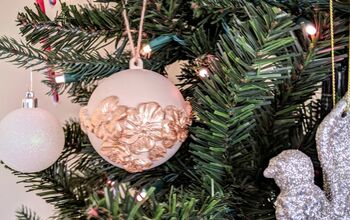
I used paper clay on the round ornaments

These ornaments are resin
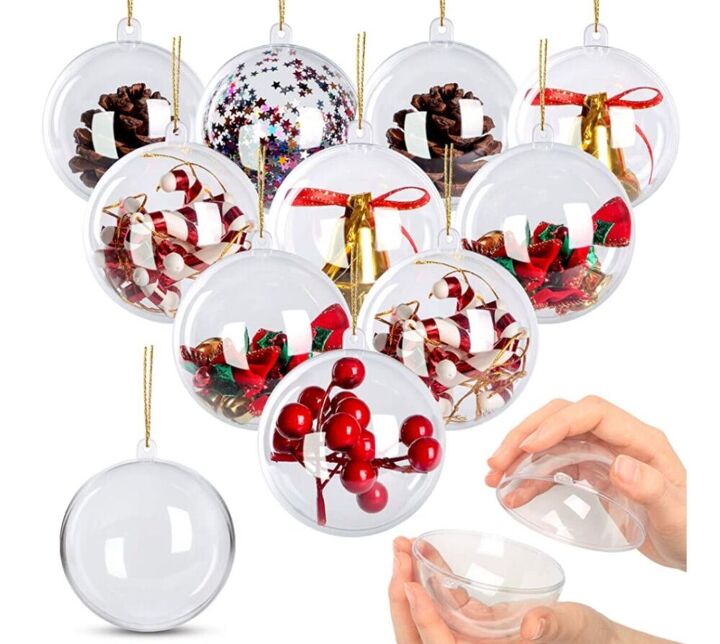
Amazon has great deals on the plastic ornaments. I got a 10 pack of 3.15" diameter 2 part round plastic ornaments for about $13
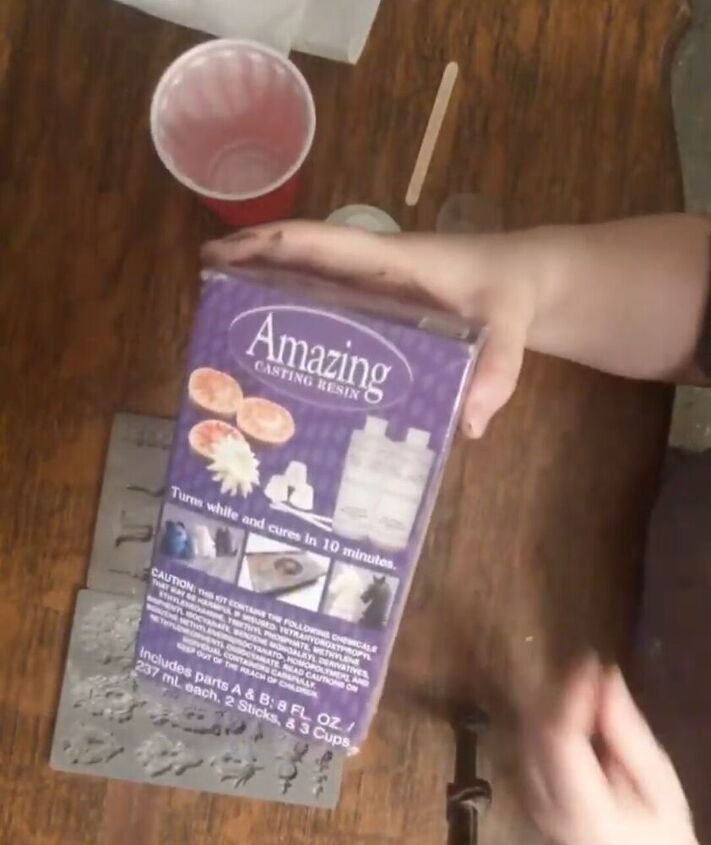
Amazing casting resin is one of those products you always want to have on hand! This brand makes 2 different kinds, the clear one takes the usual 24 hours to dry, but the one that cures white can be handled in about 10 minutes! You can easily tell which is which because the quick curing kind is one part clear and one part yellow, where as the kind that takes 24 hours to cure, both parts are clear. So look for that when purchasing your resin
We'll start with the round ornaments. Here's what you'll need
*Ornaments
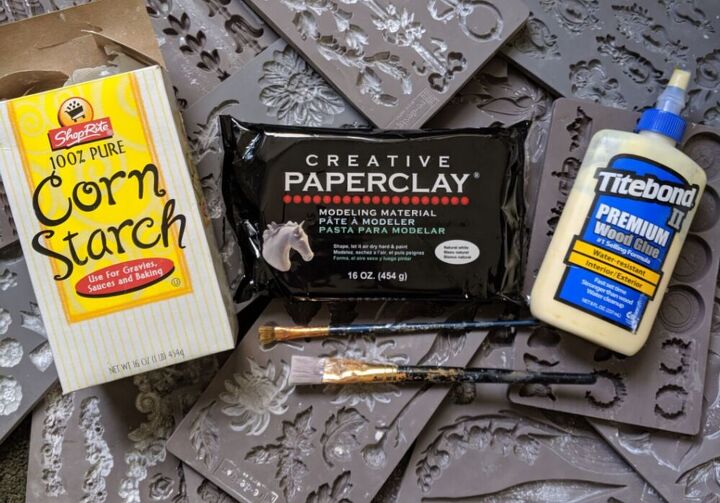
*Creative Paper Clay
*Corn Starch
*Wood Glue
*2 small paintbrushes
*Paint of your choice
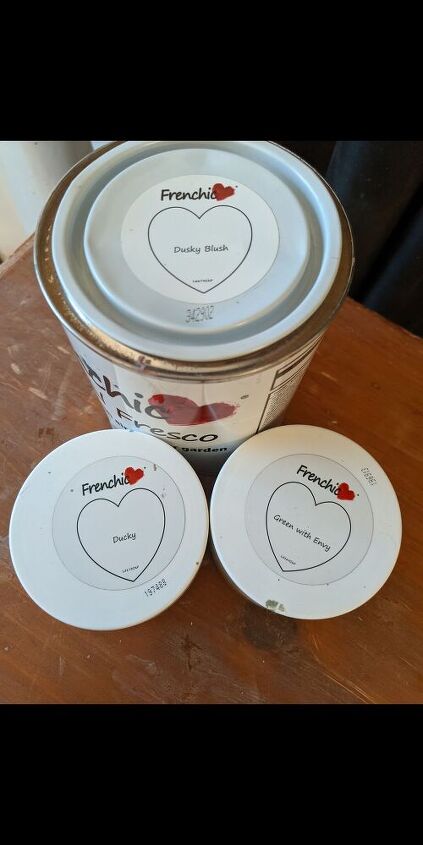
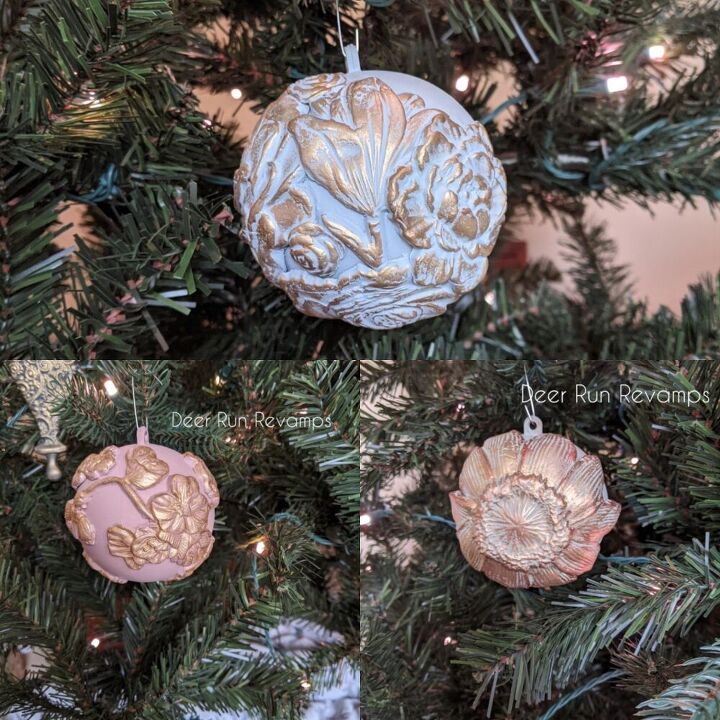
I used Frenchic Furniture Paint for this entire project, and for the 3 round ornaments that I did, I used Dusky Blush, Ducky and Green With Envy
*Your favorite Redesign With Prima Decor Mould(s)
I used a variety of different moulds... Cherry Blossoms, Forest Flora, Forest Treasures, Wilderness Rose, and Fragrant Roses
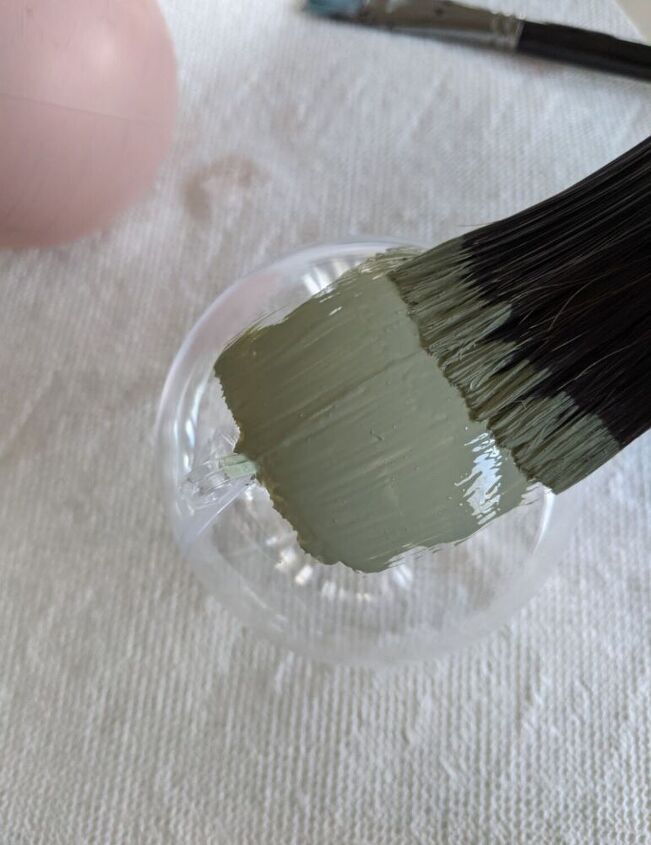
Paint your ornaments
Frenchic Furniture Paint's Lazy Range and Al Fresco Range have a primer and topcoat built in and offer amazing coverage...amongst many other things that make this paint my number one choice.
They also make wall and trim paint. This paint is comparable to the Al Fresco Range, which is our extremely durable indoor/outdoor paint. These paints are scrubbable and very rarely ever need more than 2 coats for complete coverage 😁
I used
Dusky Blush (pink) Al Fresco Range
Green With Envy (green) wall & trim
Ducky (blue) wall & trim
1-2 coats is all you'll need this step. Once painted, allow to dry completely
Now, apply your appliques
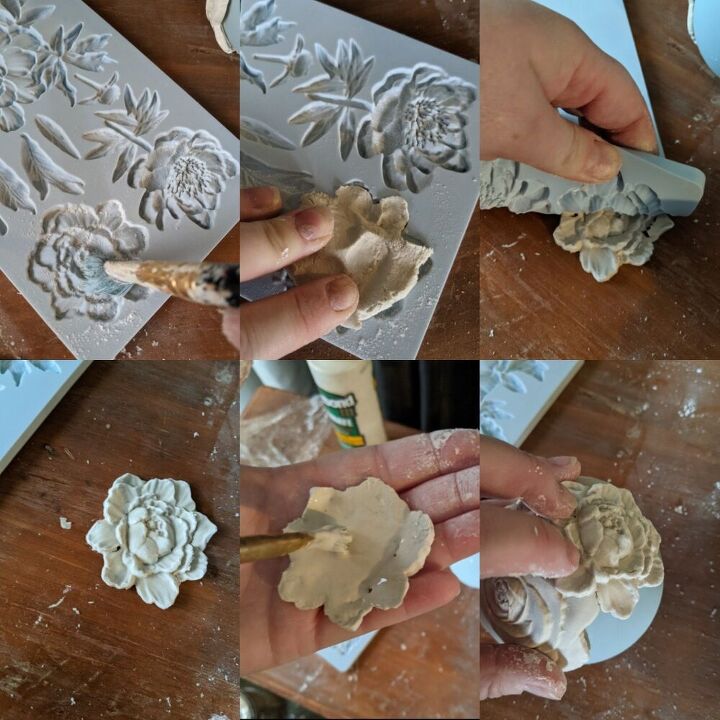
Here's how to make the Paperclay appliques
1. Dust the decor mould with corn starch
This allows the clay to easily pop out of the mould. Dust off any excess cornstarch. You don't want it piling up in the details, you want just enough to form that barrier between the clay and silicone mould
2. Press the clay into the mould
As you're pressing the clay into the mould, be sure to remove any excess hanging over the sides. Press down well and get that clay into all of the details, and make sure that it is level and even
3. Flip the silicone mould over and slowly peel it back so that the clay applique pops out
You may have to gently help the clay out of the mould
4. Turn the applique over and apply a thin layer to the back
Make sure that the edges have a very thin layer, you don't want the glue to ooze out when you press it into the surface, but the edges are the most important area to adhere to the surface
5. Ever so gently press the applique onto the surface
You can overlap the Paperclay appliques. Just be sure that it's adhered to both the applique under it and the surface on the other side (if it's touching the surface)
Continue this process until you're happy with you're design
Paperclay takes about 24 hours to dry.
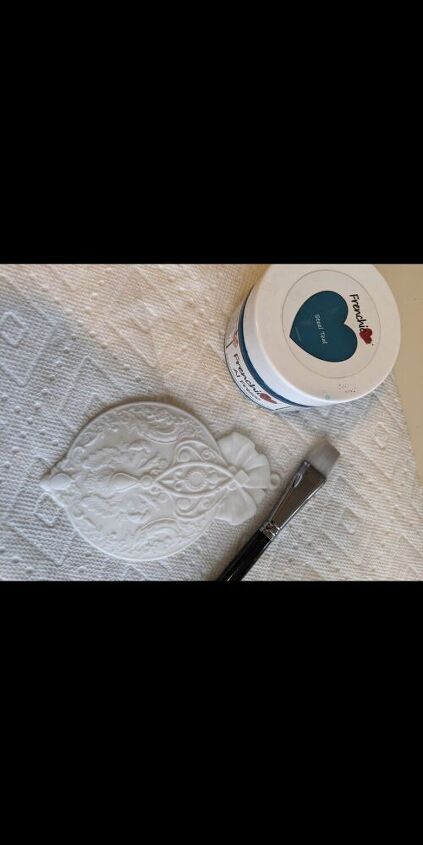
Once the appliques are dry, or at least almost dry, apply your last coat of paint, making sure that the entire applique(s) is covered, including all of the books and crannies
Now is the fun part, making them look all pretty 😍
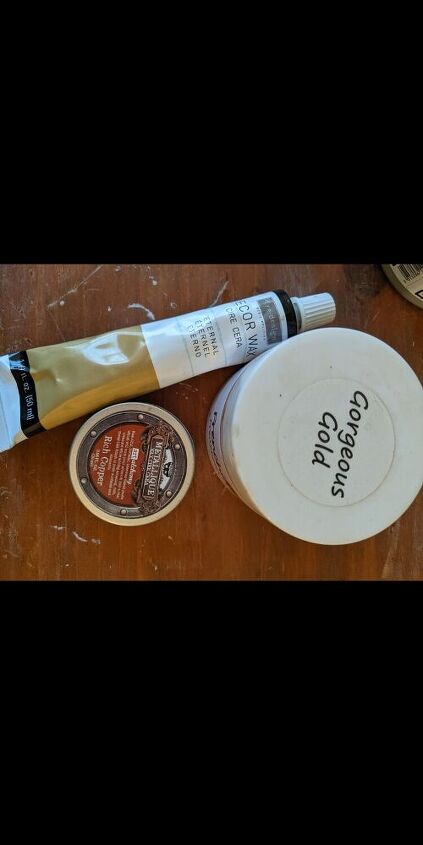
I used Redesign With Prima's Decor Wax, Art Alchemy copper wax, and Frenchic's Gold Frensheen
Frensheen is a highly pigmented metallic powder that you mix with any medium. You can mix it with wax, paint, glaze, or my personal favorite, any waterbased sealer.
Add about a tablespoon of gold Frensheen into a clean, empty container with a lid, then add 4 tablespoons of a waterbased sealer of your choice (I personally prefer Frenchic's Finishing Coat), then mix well. If it's too thick, add more sealer, if it's too thin, add more Frensheen. A little bit goes a long way, so that little bit that you mixed up will last quite some time.
Using either your finger (my choice) or a small brush, lightly brush the tops of the appliques with the wax or Frensheen ♥️
This is a start to finish video on how to make the round ornaments 🥰
Now, onto the resin ornaments
This part is for adults only
Wear gloves when handling resin
*How to photos and video are from another project, but it's the same directions and concept, just a different design.
Again, you want a variety of Redesign With Prima Decor Moulds. They need to be clean and free of any dust or debri.
Choose moulds that have standalone designs that you love
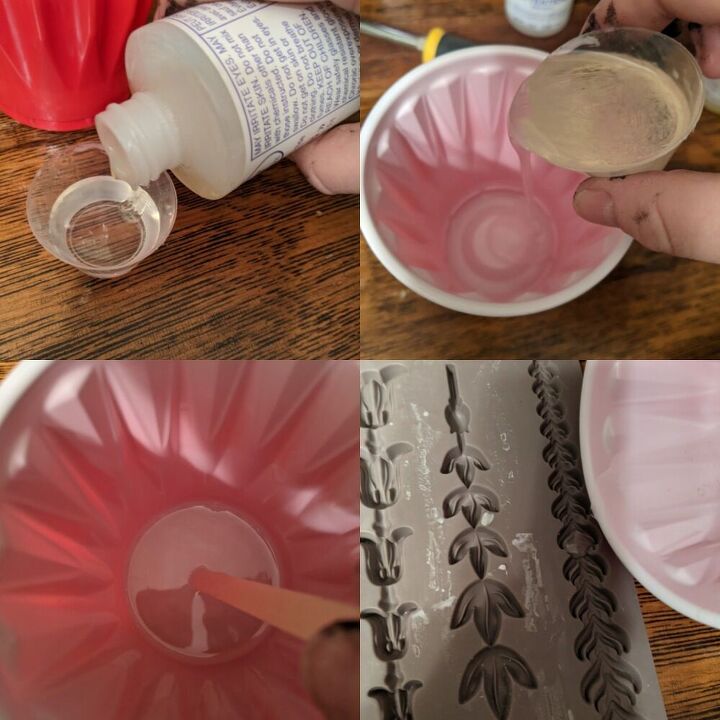
The resin comes with small dosage cups for measuring and a couple of popsicle sticks for mixing.
When using the quick dry casting resin, you don't want to mix much up at a time. It will literally start to cure as you pour it into the moulds if you take too long, so be quick yet careful not to overfil.
Using a disposable cup and stirrer, mix up your resin. It's always an equal amount of both parts. I usually never go over 50ml (full dosage cup) at a time to keep it from curing on me and wasting it
Mix extremely well, for a full 45-60 seconds at least. If it's not mixed well, it will not cure correctly and you'll have a mess on your hands.
Once mixed, carefully pour it into your clean moulds. You can use the popsicle stick to push the resin into the smaller details rather than trying to pour it in
Allow the resin to set. It gets very warm as it begins to cure, and it will start to turn white.
It takes about 10 minutes until you can pop them out, but it could take longer depending on humidity and temperature
Once the entire applique is white, you can try to pop it out. If it's still sticking to the sides, it needs longer. When it's ready, it will easily release form the silicone mould
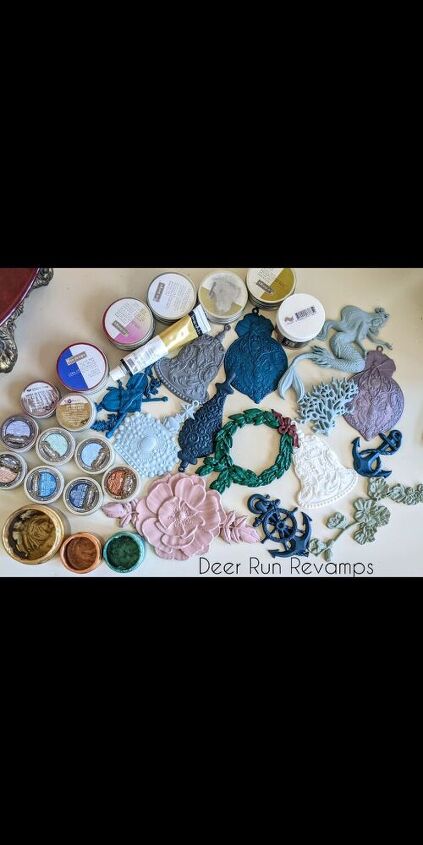
Time to paint 🖌️
Paint the resin appliques in a variety of colors
Again, I used Frenchic Furniture Paint
Steel Teal (teal) Al Fresco Range
Velvet Crush (purple) Wall & Trim
Victory Lane (Christmas green) Al Fresco
Greyhound (gray) Al Fresco
Wise Old Sage (sage) Al Fresco
After Midnight (navy) Al Fresco
Wedding Cake (off white) Lazy Range
Dusky Blush (pink) Al Fresco
Scotch Mist (light greenish blue) Lazy Range
For the moulds, I used
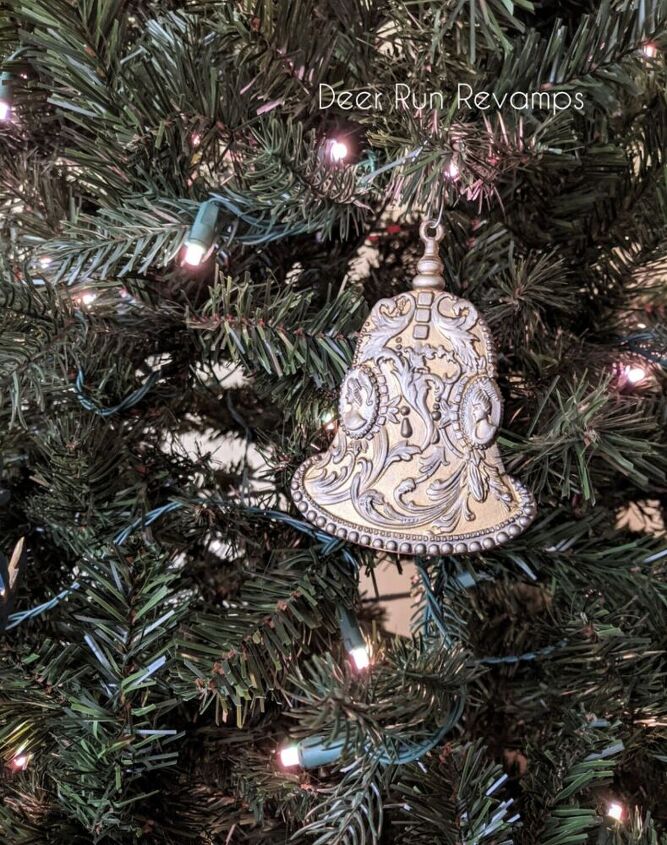
Silver bells (bells)
Victorian Adornments (look a bit like bells)
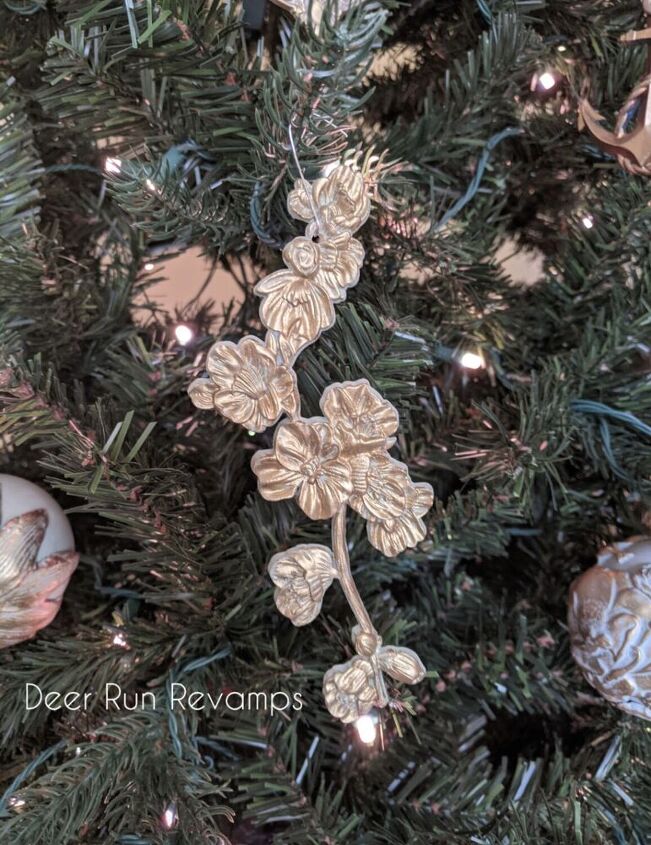
Cherry Blossoms (the long floral applique)
Musical Journey (instrument)
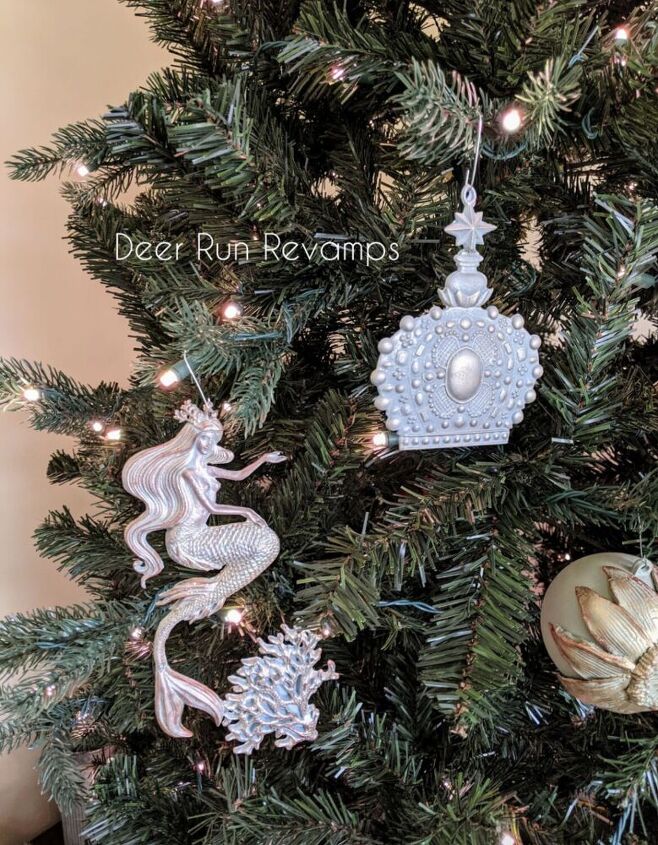
Royalty (wreath)
Sea Maven (mermaid)
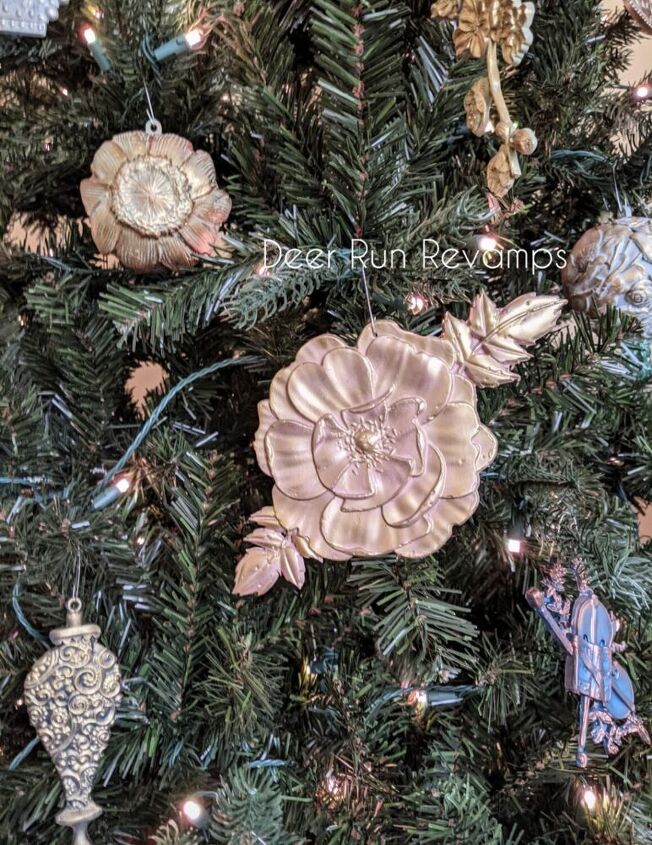
In Bloom (large flower)
I won't list each one in the materials section, I just wanted to allow you to see a few different options and examples. But please note that we do have all of them available in our Etsy shop, just follow the link for any of the Frenchic or Redesign With Prima products in the materials section below and it will take you to our Etsy store. We also have a link to our Esty shop at the very end of the tutorial ♥️♥️
Once they're painted, apply the waxes and Frensheen just like before.
I used a wide variety of different metallics. But just choose your favorite combinations
All of my waxes are Redesign With Prima and Art Alchemy
They are all available in my Etsy shop along with the Frenchic products
This video shows you how to make appliques using the resin
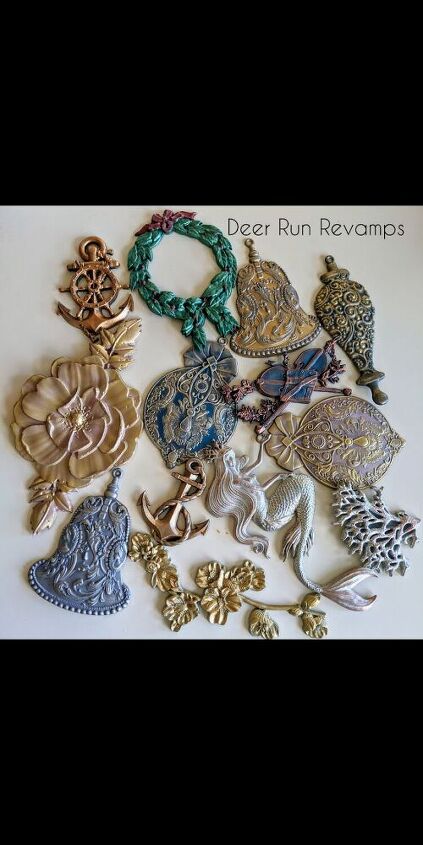
You can really see the difference the metallic waxes and glazes make 😍
Most deisgns will have a small hole that you can slide a hook into, but if they don't, use a dremel to poke a hole into the resin.
Then place a hook through and hang on your tree 🥰

You can continue to be creative and add ribbons, twine, greenery, anything that your heart desires ♥️
There really is no limit here
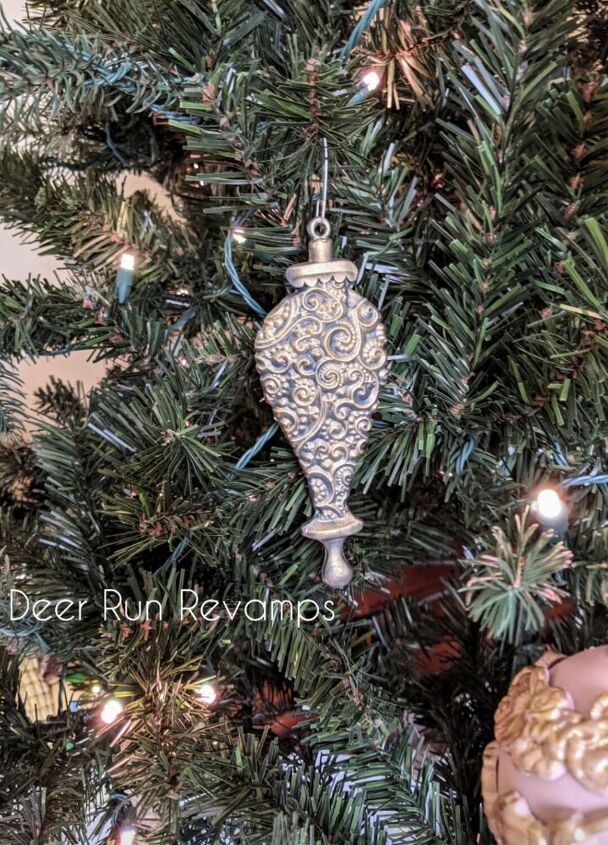

The detail in these appliques are truly stunning. Pictures just don't capture it all 😍

I used green Frensheen on this one
If you would like to get more ideas, see refinished furniture and get inspired, check out our Facebook page

Thank you so much for reading and watching! I appreciate it so very much ♥️
You can find all of these products and so much more in our Esty shop
https://www.etsy.com/shop/DeerRunRevamps
We ship within 24 hours via USPS 2-3 day priority mail, so there's still plenty of time to create these gorgeous ornaments and dress your tree ♥️
DIY Christmas Decorations
Resources for this project:
See all materials


Comments
Join the conversation
-
I have to try these!! Yours are exquisite.
-
These are lovely, thank you for sharing. If I might make a suggestion for the ornaments that hang awkwardly or not well from the attached hook, add a jump ring. You can make or buy.


Frequently asked questions
Have a question about this project?
Can you use paper clay in the individual molds or would they be too heavy?