


Locker Makeover: How to Transform Old Lockers, Step by Step
If you're craving some extra storage in your workspace without breaking the bank, I've got a fantastic DIY locker makeover tutorial for you.
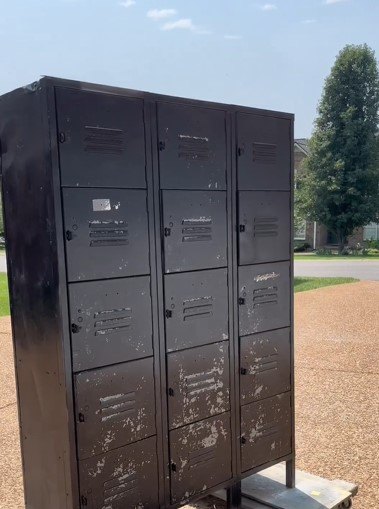
I recently snagged some metal lockers for just $50 on Facebook Marketplace. I'm going to show you how I transformed them from grimy to gorgeous. Let's dive into the step-by-step process:
Tools and materials
- Metal lockers (scored from Facebook Marketplace)
- Cleaning supplies (all-purpose cleaner, rags, scrub brush)
- Paint stripper
- Plastic putty knife
- Soap and water
- 180 grit sandpaper
- Primer for metal
- Magnolia Home spray paint (Magnolia Green)
- Protective gear (gloves, safety goggles, mask)
- Well-ventilated workspace
- Drop cloths or newspapers
Steps
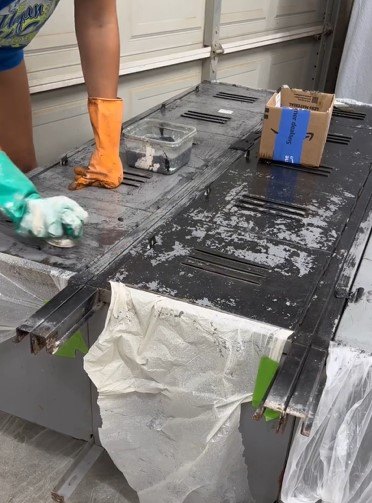
Step 1: Clean the lockers thoroughly
Before you start, make sure your lockers are free from dust, grime, and any debris. Take your time to scrub them inside and out using an all-purpose cleaner, a scrub brush, and some rags. This step is crucial for ensuring that your paint adheres properly.
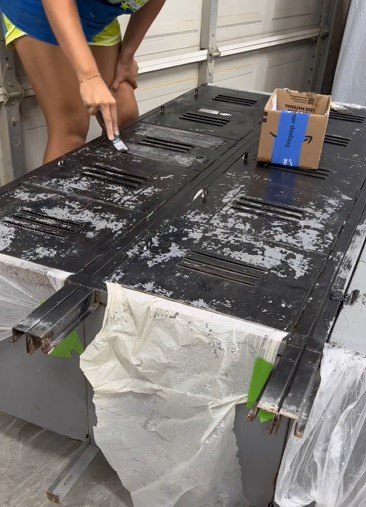
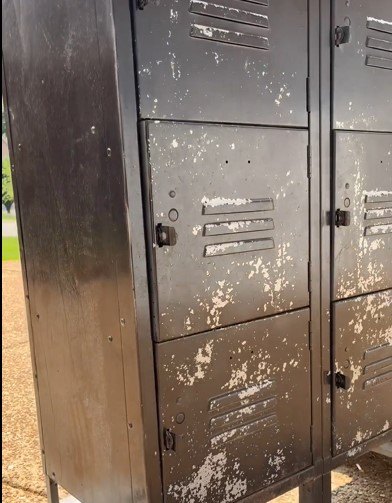
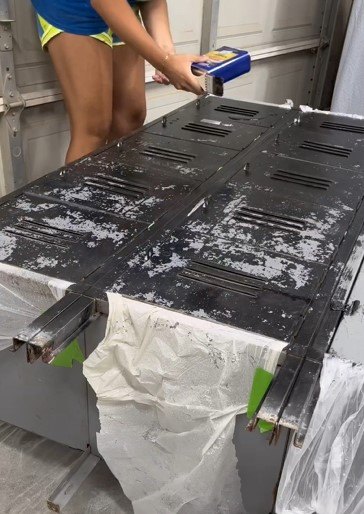
Step 2: Remove old paint
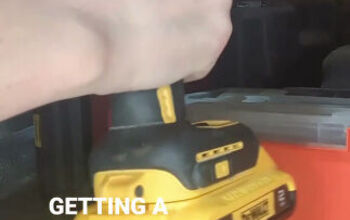
If your lockers have old, flaking paint like mine did, it's time to strip it off. Apply a generous layer of paint stripper over the surfaces, and let it sit for about 10 minutes. Then, gently scrape off the softened paint using a plastic putty knife.
Afterward, clean the lockers with soap and water to remove any residue.
Step 3: Prepare the surfaces
To help the new paint adhere better, scuff sand the entire surface of the lockers using 180 grit sandpaper. This step provides a slightly textured surface that allows the primer and paint to stick effectively.
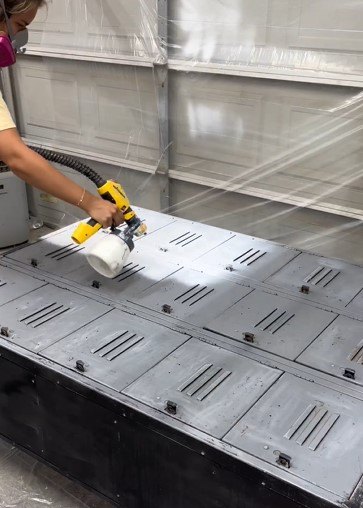
Step 4: Apply primer
Now it's time to prime the lockers. Use a primer for metal, applying it evenly over the sanded surfaces. Make sure to follow the manufacturer's instructions for drying times. Primer helps create a smooth, uniform base for your final paint color.
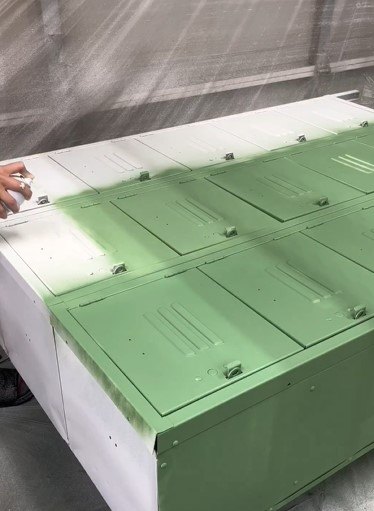
Step 5: Add color
I opted for a bold and fun color, Magnolia Green, from Magnolia Home's spray paint collection. Shake the spray vigorously according to the manufacturer's instructions.
In a well-ventilated area and with proper protective gear, evenly spray the lockers with the paint. Start with light coats and allow each coat to dry before applying the next. This helps prevent drips and ensures a smooth finish.
Once the paint is dry, inspect the lockers for any uneven spots or missed areas. If needed, touch up the paint for a seamless look. Give the lockers ample time to fully dry and cure before using them.
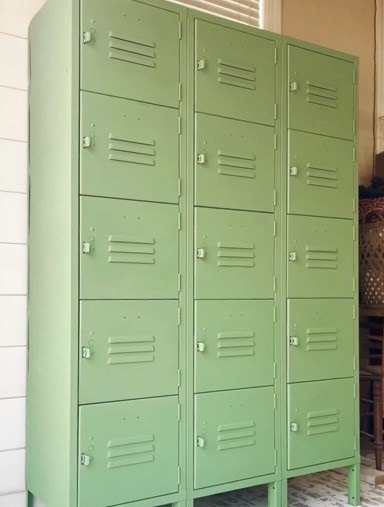
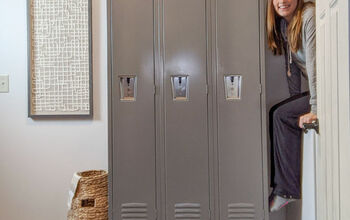
DIY locker makeover
These dreary old and metal lockers are now transformed into vibrant and functional storage.
This DIY locker makeover project allows you to get creative with colors and finishes, so feel free to experiment and make it your own. Let me see your DIY locker makeover ideas in the comments below!
Follow @rhettsrefinishes on Instagram for more DIY ideas.


Frequently asked questions
Have a question about this project?