


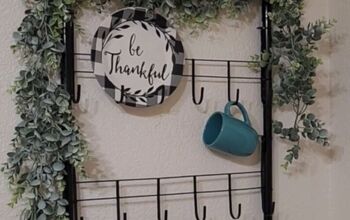
How to Make a DIY Plate Rack For Storage & Decor

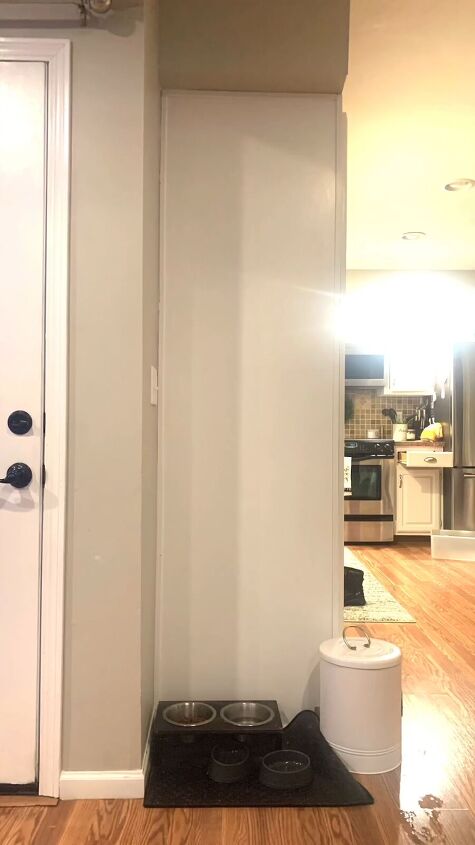
We did a fun little DIY plate rack project to add character and functionality to the kitchen. This was a fairly easy project. You can use this rack for plates, decor, cutting boards, or artwork. We skipped doing the bottom shelf because that’s where the dog’s bowls go, just in case you’re wondering.
Inside-cabinet Potlid Organizer
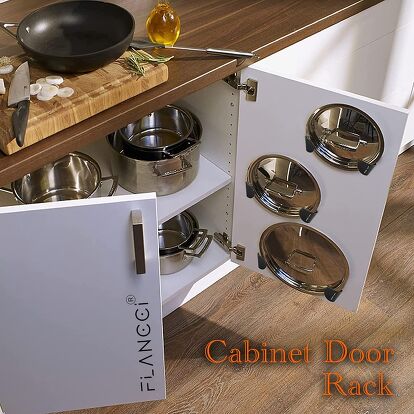
Add more storage inside your cabinets by maximizing your door space with this potlid hanger hack!
Tools and materials
- 6-inch shiplap
- 1x3s
- Wood glue
- Nails
- Caulk
- Wood filler
- Stain
- Paint
- Primer
- Level
- Saw
Table of contents
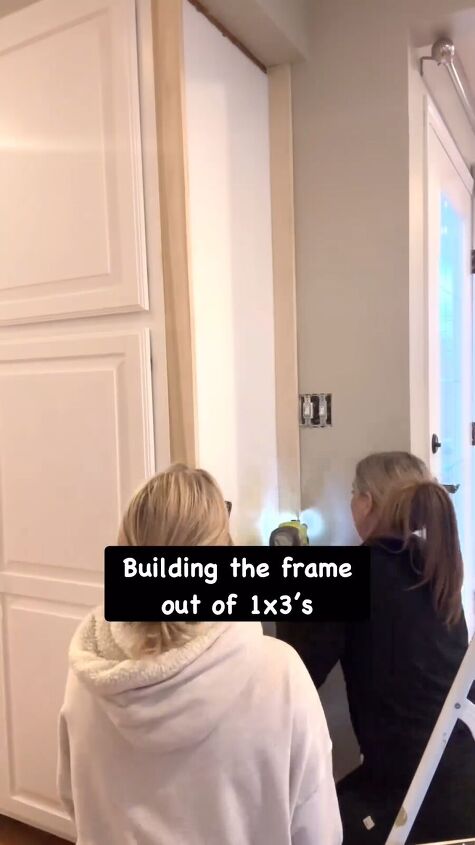
Step 1: Build the frame
Construct the frame using 1x3s. Ensure the frame is square and sturdy.
Step 2: Install shiplap to the wall
We made a mistake and attached the outside frame board after we installed the shiplap. The correct way is to install the shiplap first. We had to remove ours and reattach it since we didn’t do that step correctly. Learn from our mistakes! So first, attach the shiplap to the wall.
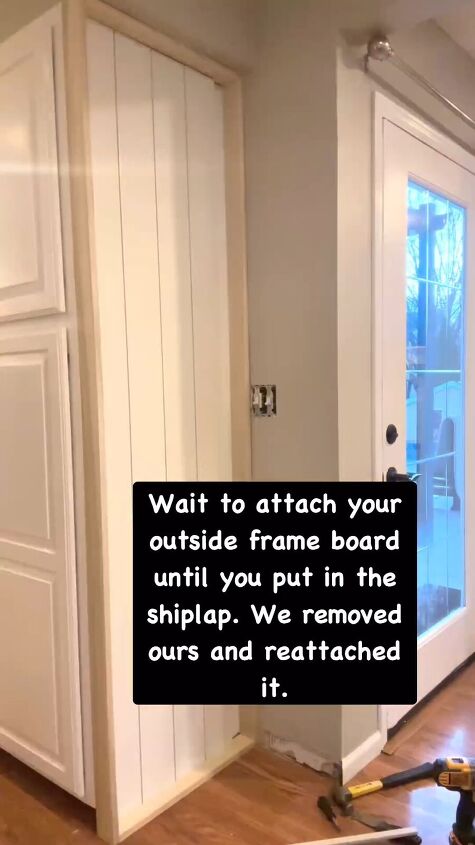
Step 3: Attach the outside frame board
Install the outside frame board after the shiplap is in place.
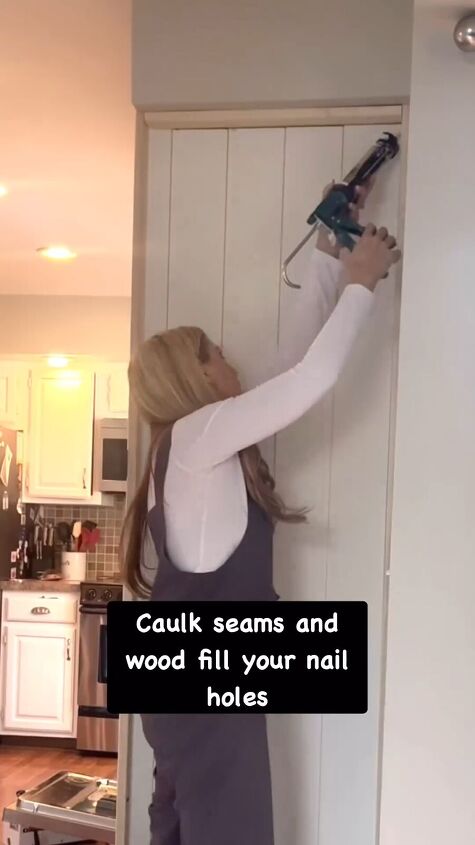
Step 4: Caulk and wood fill
Caulk any seams between the shiplap and frame. Use wood fill on any nail holes for a smooth finish.
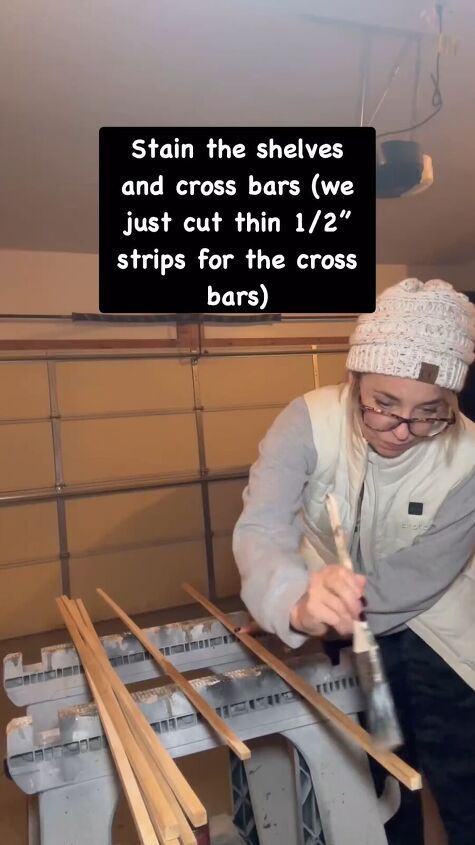
Step 5: Cut and stain shelves and crossbars
Cut thin ½-inch strips for the cross bars. Stain both the shelves and cross bars to the desired color.
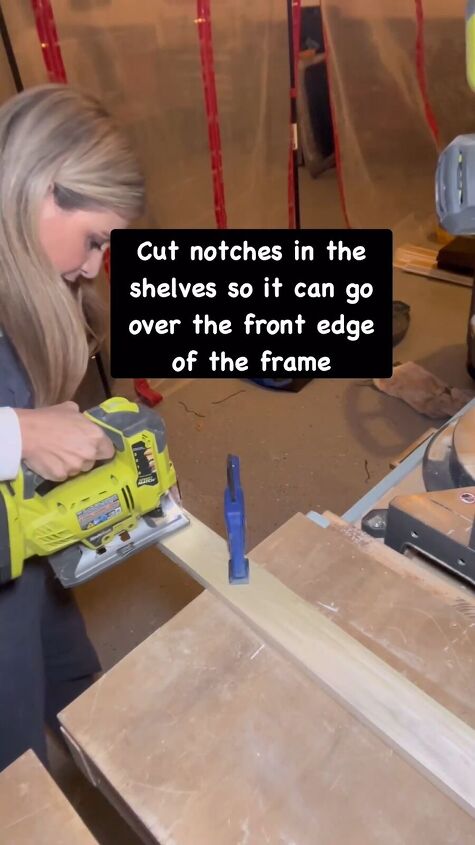
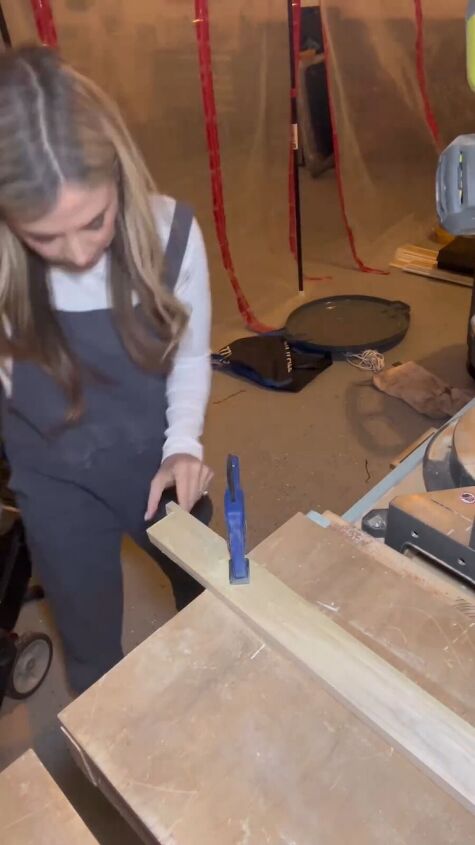
Step 6: Cut notches in shelves
Cut notches in the shelves to allow them to fit over the front edge of the frame.
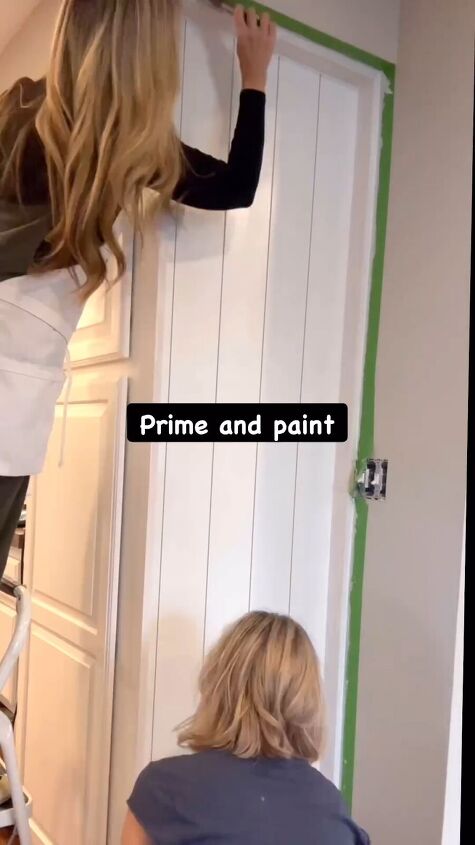
Step 7: Prime and paint
Prime and paint your wall and frame.
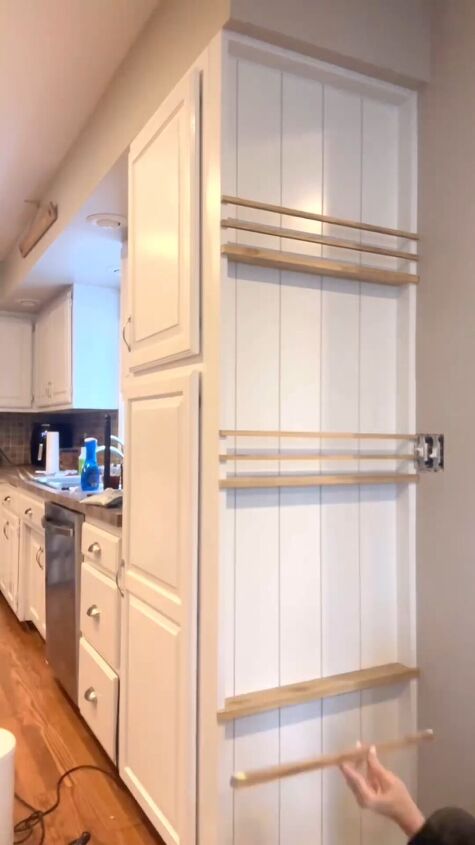
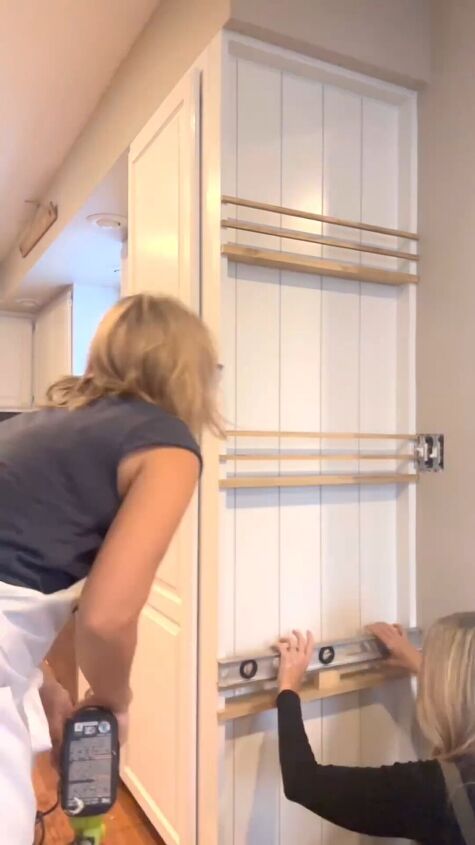
Step 8: Install shelves and crossbars
Use wood glue and nails to attach the shelves and cross bars to the frame. (See how the notched area of the shelf fits on the frame?) Use a level to make sure everything is straight during installation.
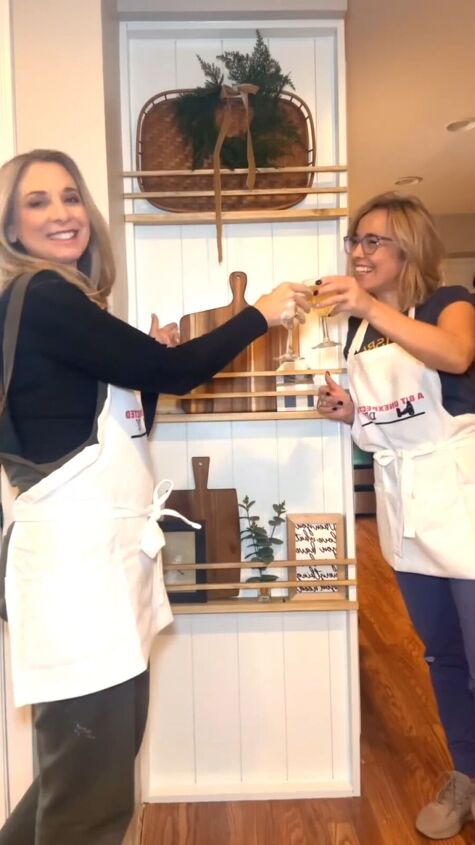
DIY plate rack
We are so happy with how this DIY plate rack turned out! Let us know if you agree in the comments below. Let us also know what you’d use this plate rack for in your home.
Follow @a_bit_unexpected_diy on Instagram for more DIY ideas.


Frequently asked questions
Have a question about this project?