


How to Make DIY Raised Garden Beds in a Few Simple Steps

Do you want to know how to build a raised garden bed for little money? You can make a DIY raised garden bed for about $100. Make them any size you want for your garden area.
Before we begin, make sure you have all the necessary materials and tools listed here. You can find these materials at your local hardware store or lumberyard. Ensure the wood is of good quality and free from any defects.
Tools and materials
- Six 2x4 Douglas Fir boards (8 feet long)
- Three 2x8 Douglas Fir boards (8 feet long)
- Four 1x3 boards (8 feet long)
- Wood screws
- Screwdriver or power drill
- Measuring tape
- Pencil
- Saw (hand saw or power saw)
Table of contents
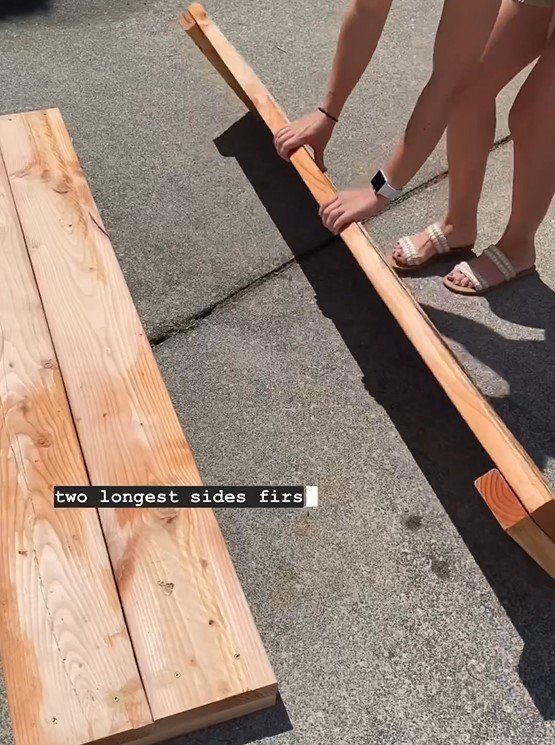
1. Measure and cut the longest sides
Using the measuring tape, mark the length you want for your raised garden bed on the 2x8 boards. For instance, if you want a 4-foot-long bed, measure and mark that length on two of the 2x8 boards. Carefully cut along the marked lines using the saw.
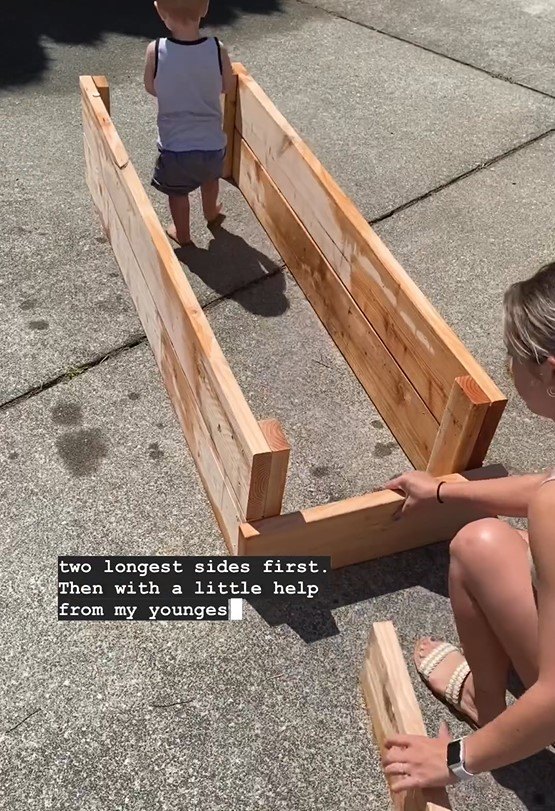
2. Assemble the longest sides
Take the two 2x8 boards you just cut and place them parallel to each other on the ground. These will be the longest sides of your garden bed. Now, take two 2x4 boards and position them vertically at each end of the 2x8 boards. The 2x4 boards should be flush with the edges of the 2x8s.
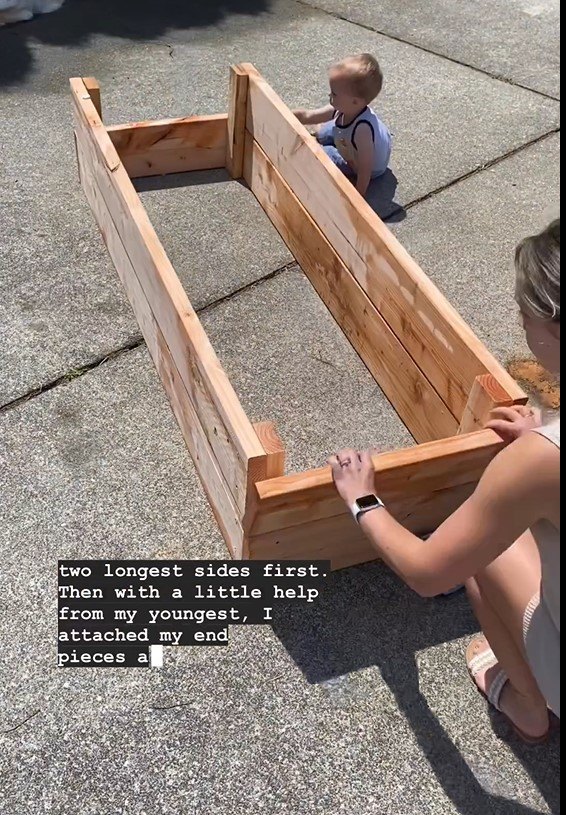
3. Attach the end pieces
With the help of another person, if possible, hold the end pieces (2x4 boards) in place. Pre-drill pilot holes through the 2x4 boards into the ends of the 2x8 boards. This will prevent the wood from splitting when you insert the screws. Then, use wood screws to secure the end pieces to the longer sides.
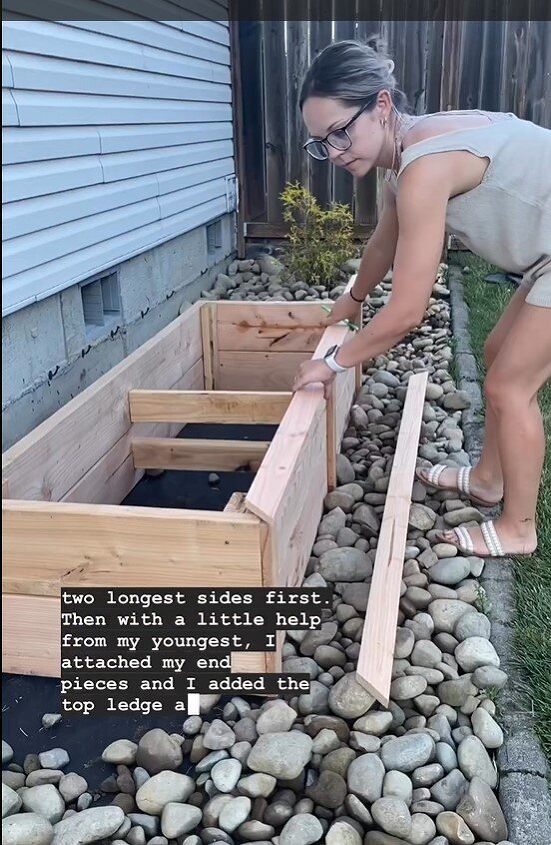
4. Attach the top
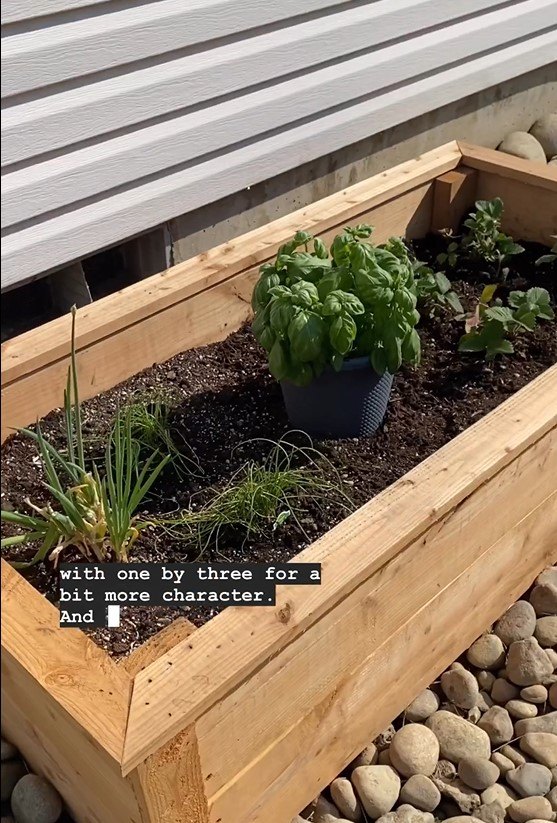
Take the remaining two 2x4 boards and place them horizontally on top of the longer sides, creating a rectangular frame. These boards will act as a top ledge to hold the soil in place. Secure them in position using wood screws. Be sure to frame out the corners to make them look finished.
5. Finishing touches
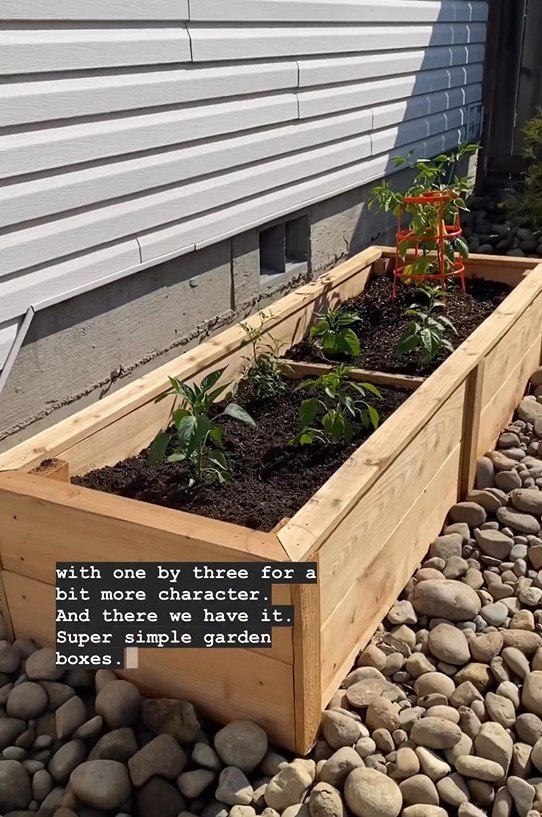
Check all the screws to make sure everything is tightly secured. Give the garden bed a once-over to ensure it's level and straight. If necessary, make adjustments. Fill it with nutrient-rich soil and start planting your favorite vegetables, flowers, or herbs.
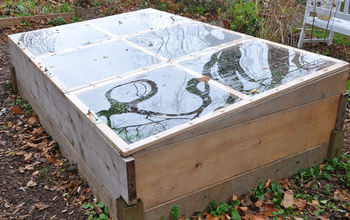
DIY raised garden beds
There you have it, a super simple and cost-effective way to create your very own raised garden beds. The beauty of making your own raised garden bed is that you can customize it to the exact size you want.
Follow the same steps above, but adjust the measurements according to your preference and garden space and let me know in the comments how it goes! Happy gardening!
For more ideas, follow @gatheratthebooths on Instagram


Frequently asked questions
Have a question about this project?