


How to Build a DIY Round Side Table in a Few Simple Steps

My goal is to make two DIY round side tables for under $150. There are cheaper DIY side table ideas but they will be quality pieces of furniture when I’m done. I’ve included the prices for my DIY side table build that were current at the time I made the table.
Tools and materials (prices at time of building):
- Two 24-inch wood rounds (available at Lowe's) - $19.98 each ($39.96 total)
- Two 2x2 8-foot boards for legs - $15.98 each ($31.96 total)
- Two 1x2 8-foot boards for crossbars - $5.98 each ($11.96 total)
- Wood glue - $4.98
- 1½-inch Kreg screws - $7.48
- Pocket hole plugs - $7.98
- Stain
- Saw (circular or miter saw)
- Drill with a Kreg Jig attachment
- Sandpaper or a sander
- Measuring tape
- Pencil
- Clamps
- Safety gear (safety glasses, ear protection, dust mask)
Steps
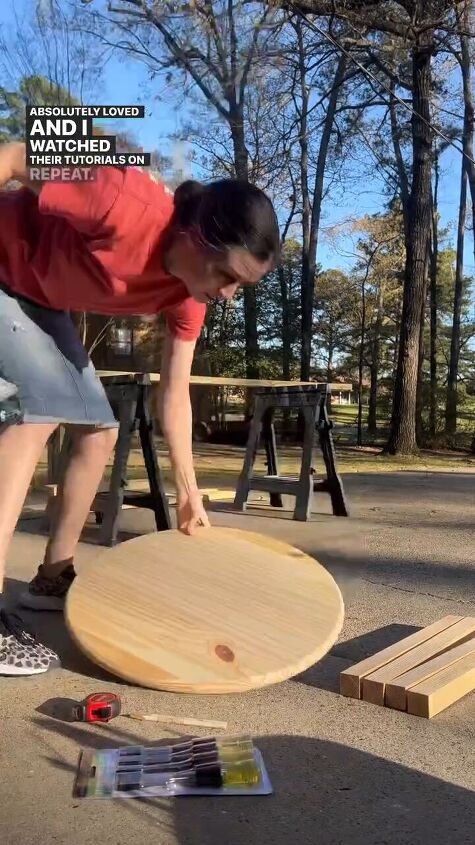
Step 1: Build the tabletops
Lay two of the semicircles flat side down on your work surface.
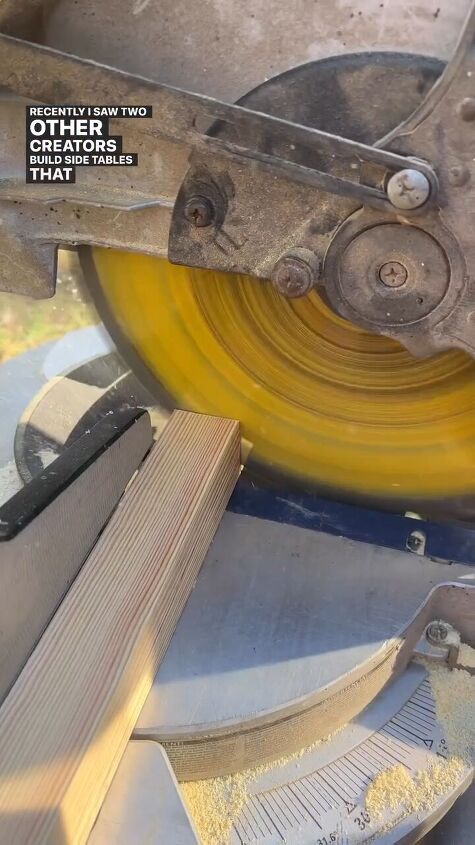
Step 2: Create the legs
Cut the two 2x2 8-foot boards into four equal pieces, each measuring 24 inches in length. These will be the table legs. Sand the legs to ensure a smooth finish.
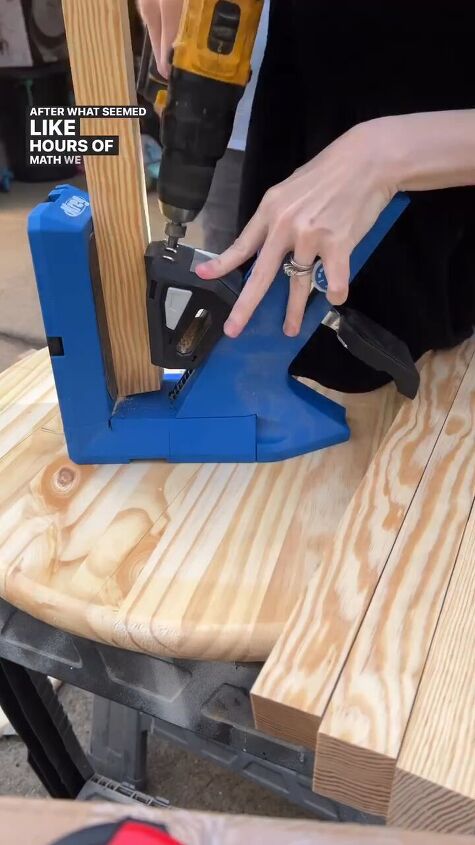
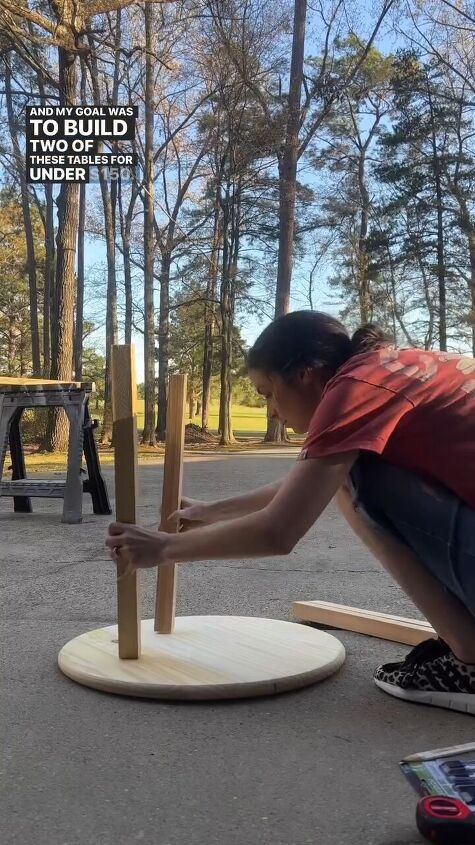
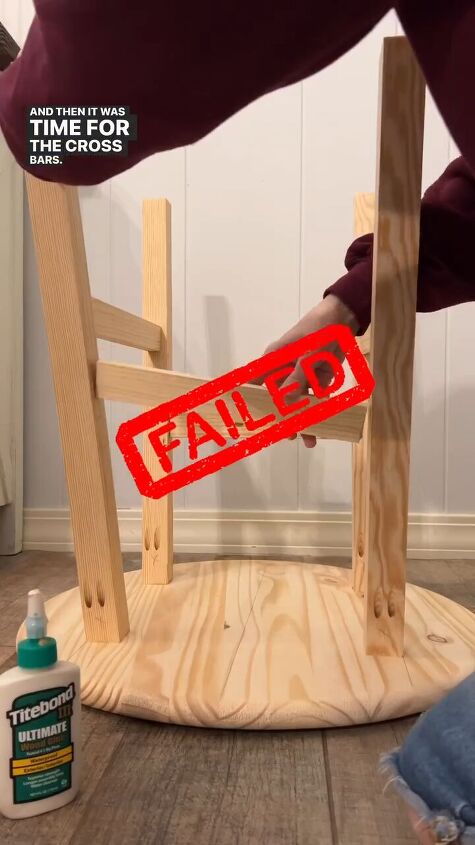
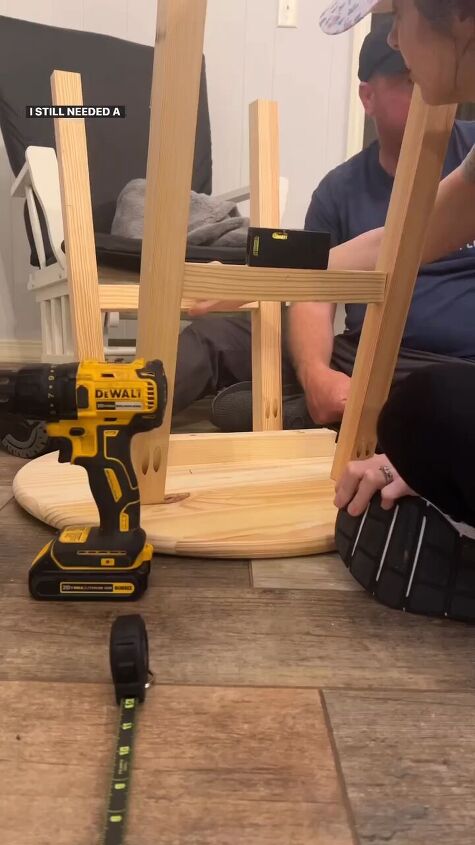
Step 3: Assemble the base with legs and crossbars
Position the tabletop upside down. Attach the legs to the underside of the tabletop using the 1½-inch Kreg screws. Use your Kreg jig attachment to make pocket holes in the legs for a secure connection.
Ensure that the legs are evenly spaced around the tabletop for stability. Add crossbars. (The first time we tried adding the crossbars, it failed so we did it again and it worked better.)
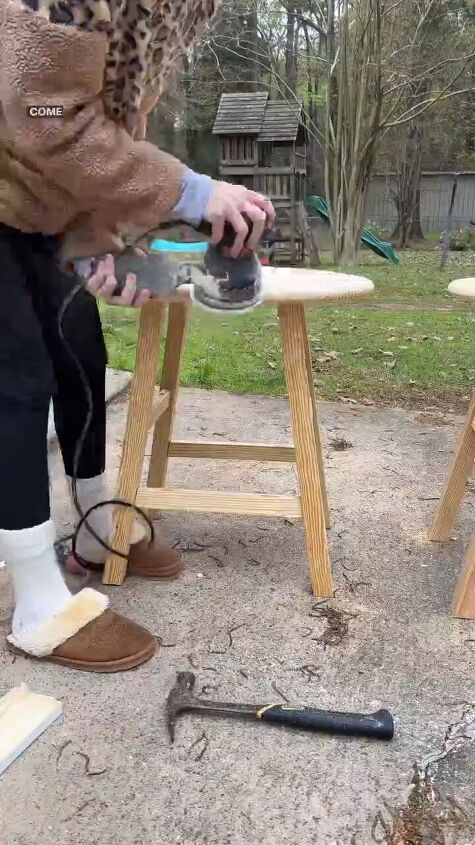
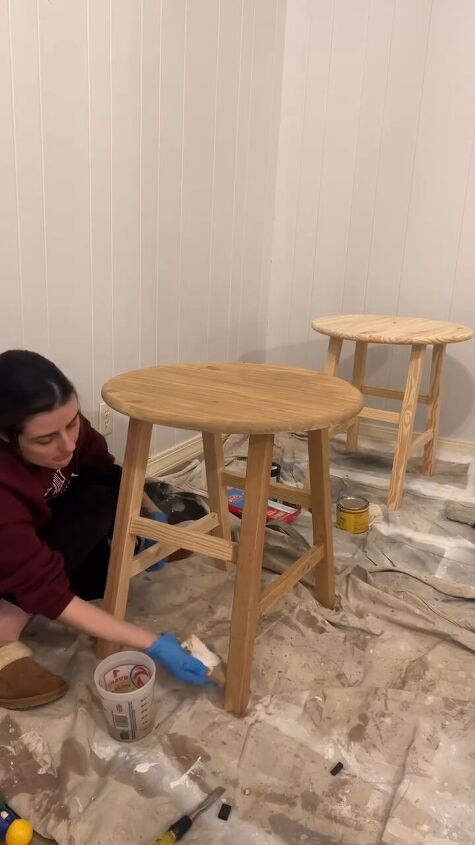
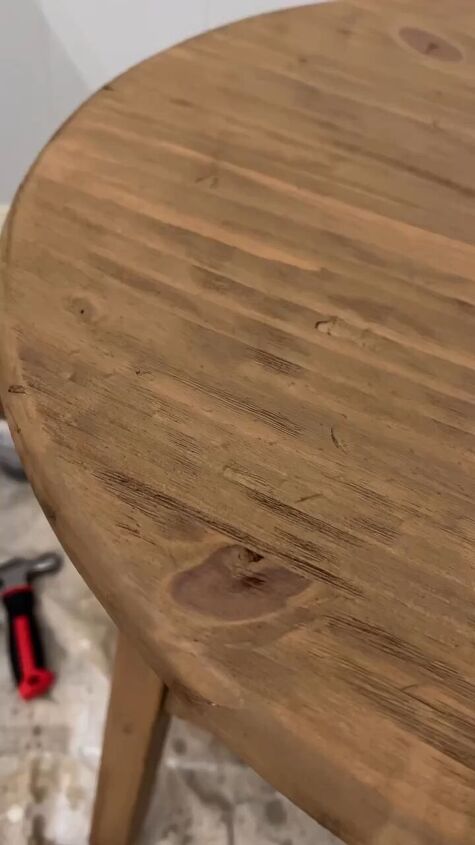
Step 4: Sand and stain
Sand the entire table to achieve a smooth finish and round the edges for a more polished look. Wipe off any dust and apply your choice of finish (stain, paint, or clear coat) following the manufacturer's instructions. Allow the finish to dry completely.
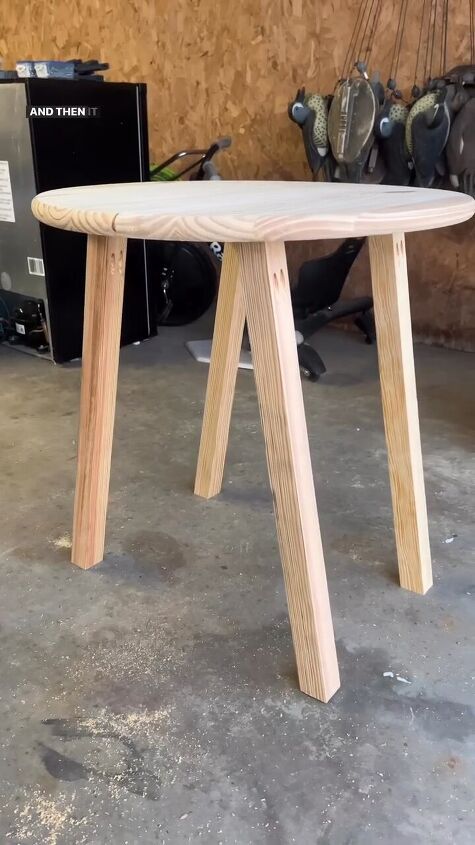
DIY round side tables
Our DIY round side tables are beautiful and now ready to use. They are functional furniture but also add a touch of style to our space. Let me know in the comments if you’ve made DIY side tables and how they turned out.
Follow @hannah.is.home on Instagram for more DIY ideas.
Comments
Join the conversation
-
Thank you Hannah. I think they turned out lovely you did a great job. All those angles. I would never of gotten it straight but you did a great job. Thank you. Stay safe and have a good day.


Frequently asked questions
Have a question about this project?