


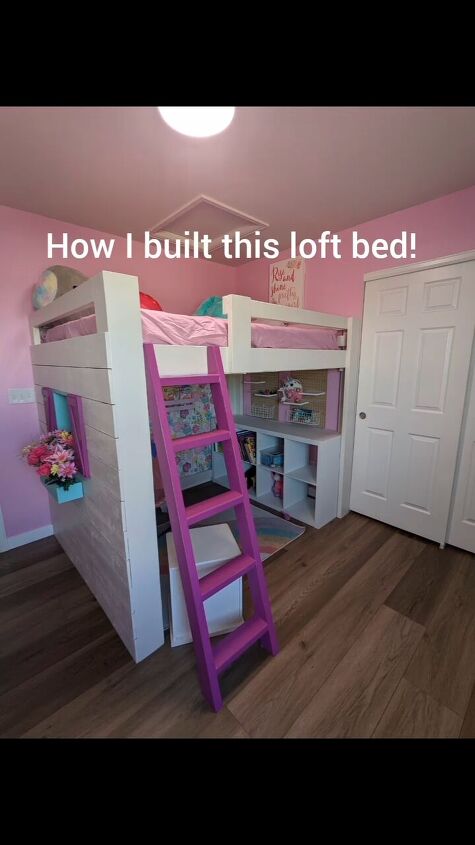
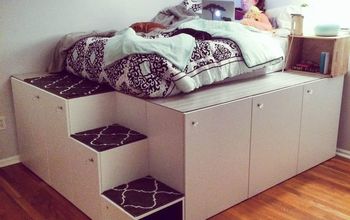
How to Build a DIY Loft Bed With a Ladder & Window Box
I built a DIY loft bed with a ladder that has a window box and flowers. Before you start building the loft bed, carefully plan the design and measurements.
Ensure that the loft bed will be safe and secure, especially if it will be used by children or adults. Consider the room's layout and where you want to place the bed. Here are the steps I used to build a loft bed with stairs.
Tools and materials
- 2x6 and 2x4 lumber for the bed legs
- 2x6 lumber for the bed base
- 2x2 lumber for attaching slats and framing the window
- 2x4 lumber for the railings
- Cedar fence pickets
- Wood glue
- Pocket hole screws or regular screws
- Saw
- Drill
- Pocket hole jig
- Level
- Measuring tape
- Screws
- Sandpaper
Steps
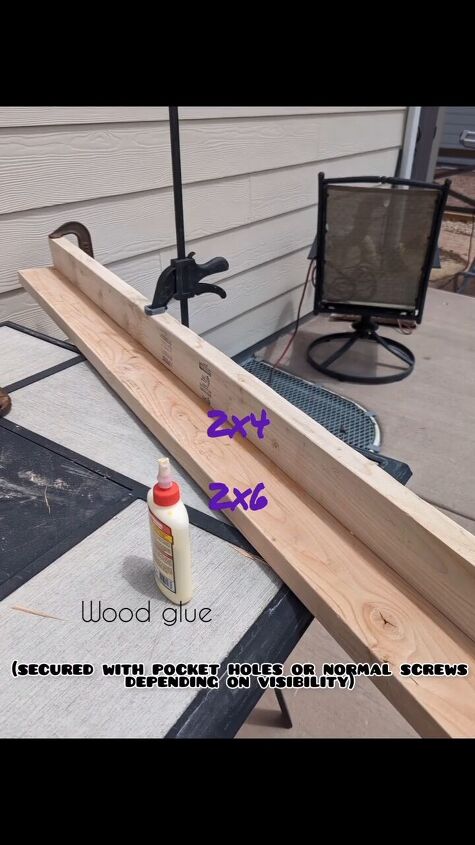
Step 1: Cutting the bed legs
Using 2x6 and 2x4 lumber, cut the bed legs to your desired height. Make sure all legs are cut to the same length for stability. Apply wood glue to the ends where the pieces will join and secure them using either pocket hole screws or regular screws, depending on visibility.
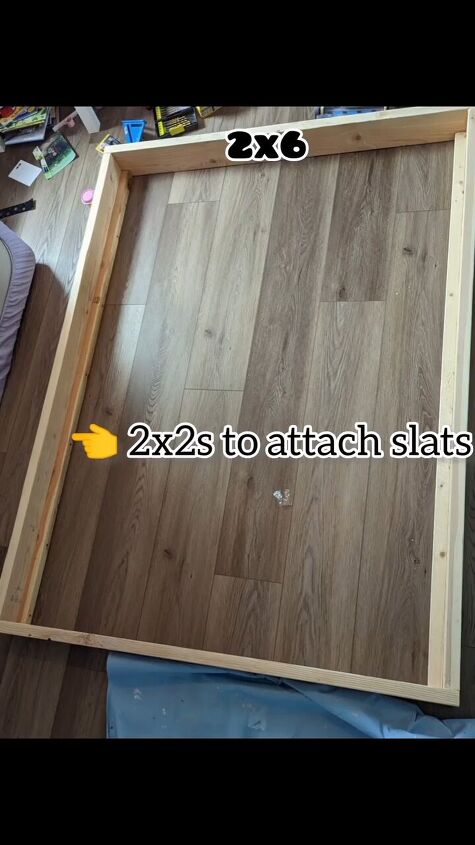
Step 2: Assemble the base and attach slats
Lay out the 2x6 lumber to create the base of the bed. Space them evenly to support the mattress. Attach the 2x2 blocks between the base slats to keep the base level and prevent sagging.
Using 2x2 lumber, attach slats horizontally across the base. These slats provide support for the mattress. Ensure they are evenly spaced and securely fastened.
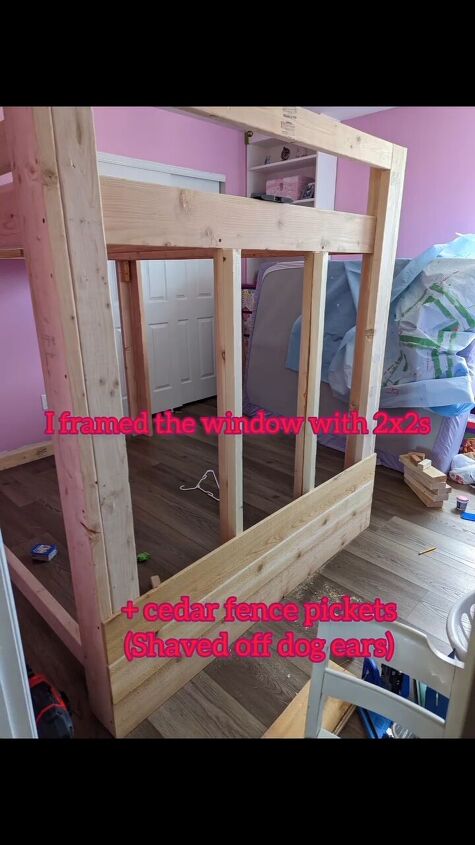
Step 3: Framing the window
If your loft bed is near a window, frame it using 2x2 lumber. Measure and cut the pieces to fit around the window, creating a secure frame. This step adds both aesthetic and safety benefits.
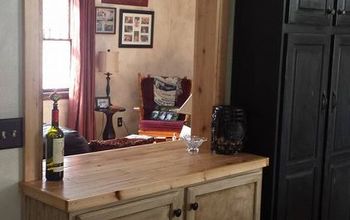
Consider using cedar fence pickets to add a unique touch to your loft bed. These can be used for the bed frame or other decorative elements. Cut and attach them as desired.
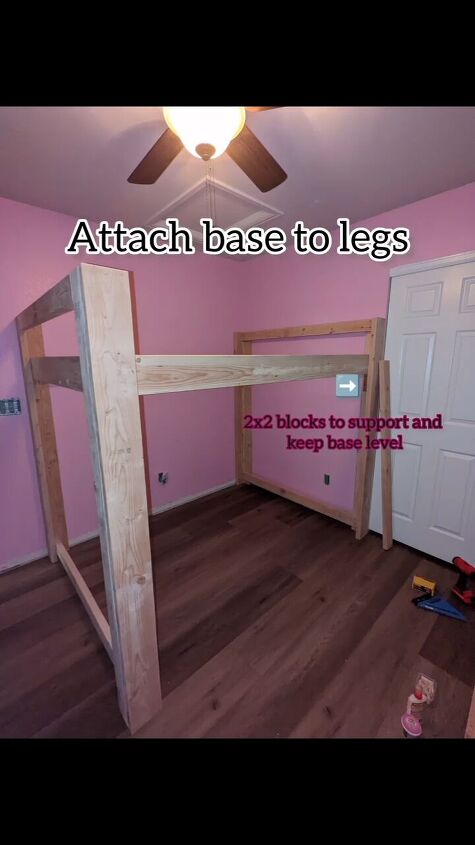
Step 4: Attach base to railings
For safety, build railings around the loft bed using 2x4 lumber. Measure and cut the pieces to the appropriate length. Secure them firmly to the bed frame, ensuring that they are level and provide adequate protection.
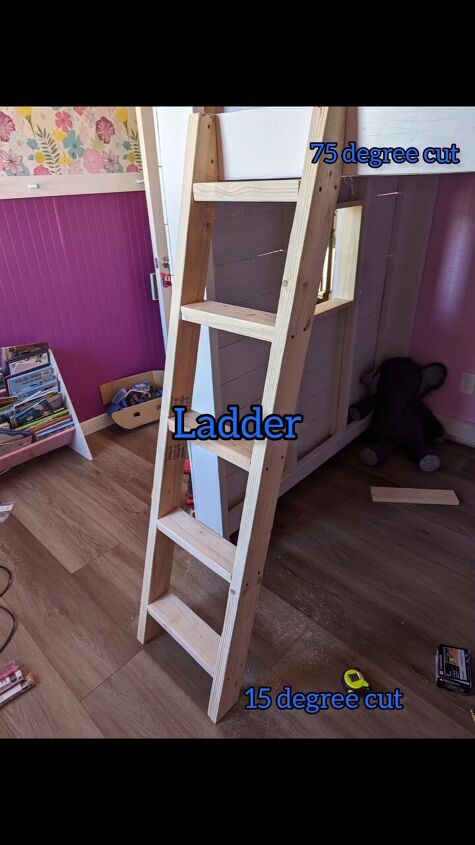
Step 5: Construct the ladder
Build a ladder to access the loft bed. Cut the ladder pieces with a 75-degree cut for the angle of ascent and a 15-degree cut at the top for a comfortable grip. Attach the ladder securely to the bed frame, ensuring it can support the weight of the user.
Step 6: Sand and finish
Sand the entire loft bed to smooth out any rough edges or surfaces. You can also choose to paint or stain the bed to match your room's decor.
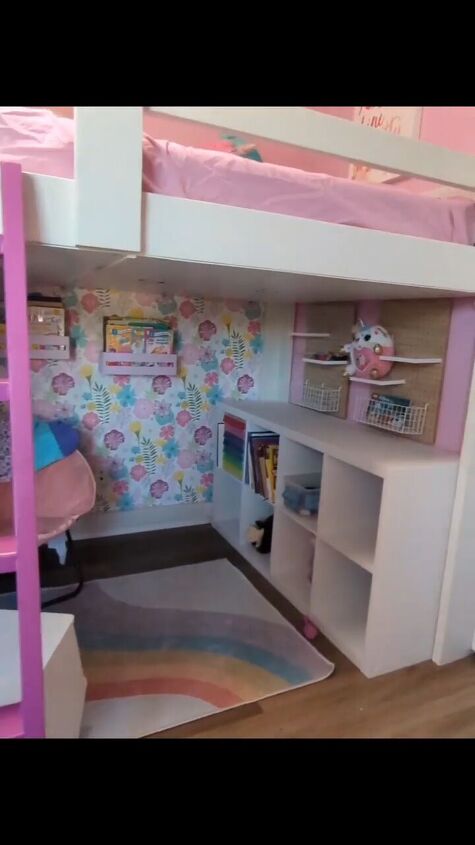
DIY loft bed
If you make a loft bed, before using it perform a safety check to ensure that all screws are tightened and the bed is stable. Test the ladder's stability as well.
You've successfully built a loft bed with decorative elements and ensured the safety of the railings and ladder. Let me hear about your experiences building a loft bed in the comments below.
Follow @diywitherinb on Instagram for more DIY ideas.
Comments
Join the conversation
-
I think that if you have any ideas, projects for renovating your attic, then now there are many opportunities and specialists to whom you can delegate these tasks. I recommend finding out more about Loft Conversion in London. Clapham Construction's official website has more information on what you can do with your loft space. It will also significantly increase the home's resale value.


Frequently asked questions
Have a question about this project?