


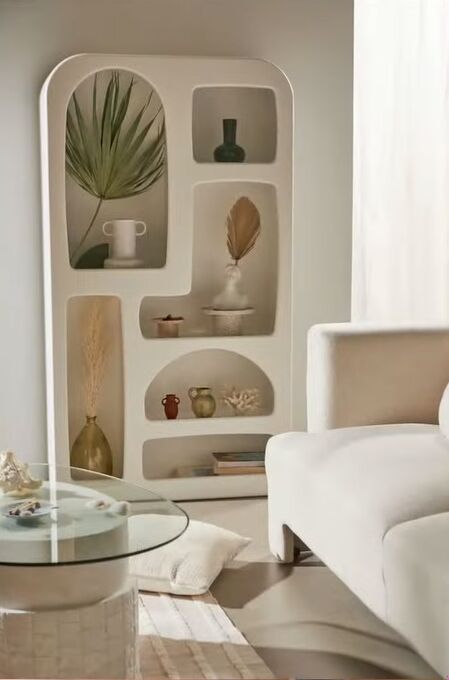
How to Turn an IKEA Unit Into a Cool DIY Isobel Bookshelf Dupe

In the last few months, so many of you asked me over and over to make a DIY Isobel bookshelf dupe, inspired by the Isobel bookshelf by Urban Outfitters. This bookshelf retails at $1,299, but we can totally DIY something similar for a fraction of the price.
Usually, I direct people to the amazing dupe that DIY Danie did, as I don’t want to repeat what she already made. However, one of you sent me an idea about using foam instead of cutting wooden pieces, so I realized I could do my own DIY Isobel bookshelf dupe using a completely different method and for even cheaper!
We're going to need only very simple ingredients to make the entire shelf library come to life: the KALLAX bookshelf that you're going to go and buy from IKEA, the cardboard that your KALLAX bookshelf comes in, plus some spray foam.
Tools and materials:
- IKEA KALLAX bookshelf
- Jigsaw
- Cardboard box
- Tape
- Spray foam
- Hand saw
- White spray paint
- Spackling, hole filler, or joint compound
- Electric sander
- Mask
- Glasses or goggles
Table of contents
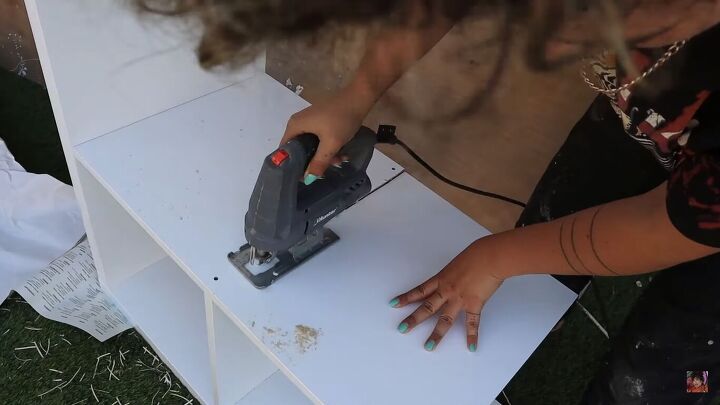
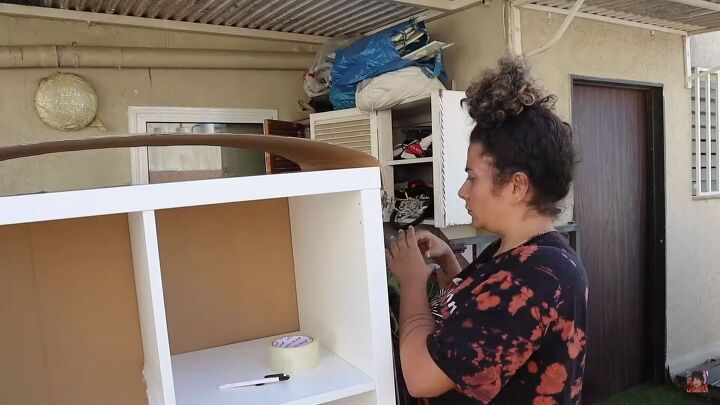
1. Assemble the KALLAX bookshelf
First, assemble the bookshelf. You can keep the shelves as they are, or cut them for an asymmetrical look. Some versions of the KALLAX bookshelf have asymmetric shelving already.
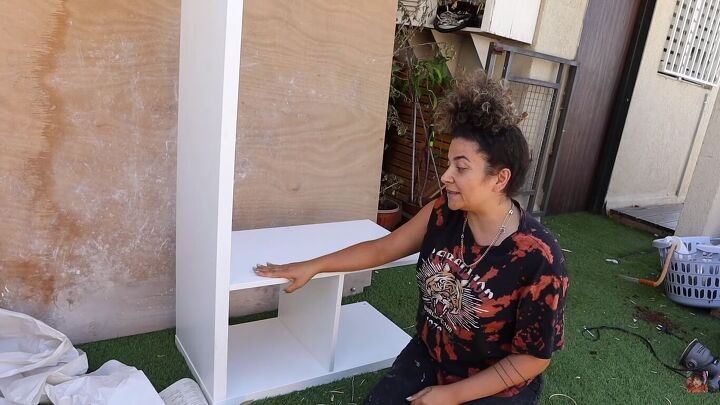
I cut away half of the first shelf and the top shelf with a jigsaw. If you’re cutting some of the shelves, remember not to cut where the holes are because they’re used to connect the shelf pieces together.
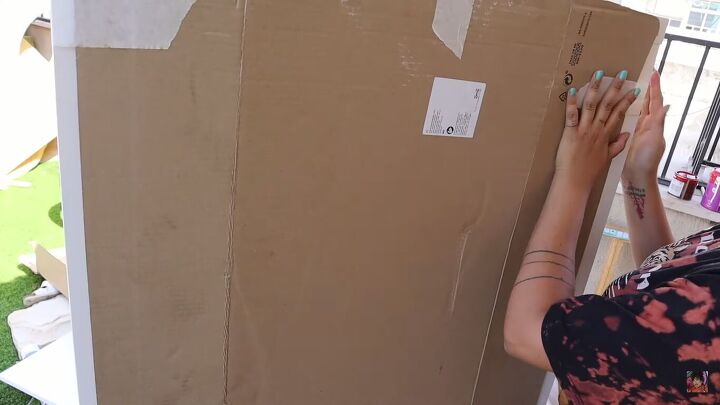
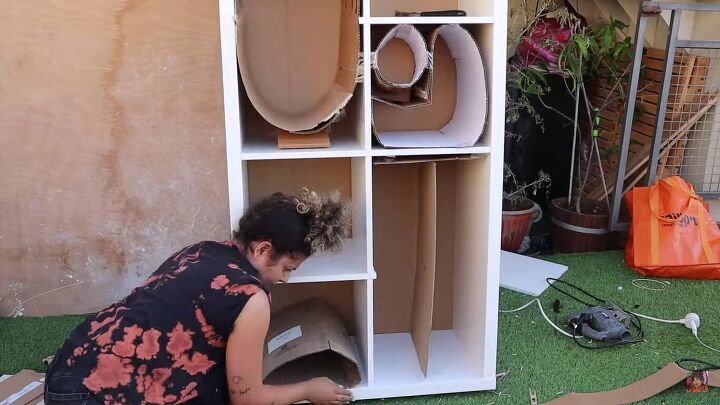
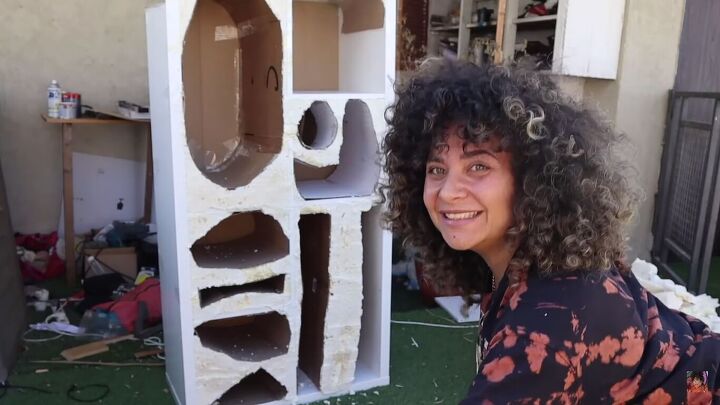
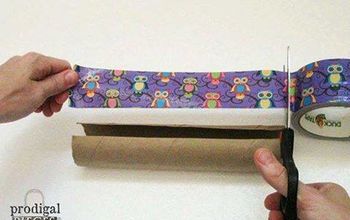
2. Add cardboard
Take a large side of the cardboard box that the KALLAX bookshelf came in, and tape it to the back of the bookshelf.
Next, we’re going to create a rounded shape using other pieces of the cardboard box. For the arched top, roll the cardboard piece until it has a bent shape. Then place it on top of the shelving unit, taping down the ends.
For inside the shelves, you can really get creative. I wanted to make the large unit round, but the smaller units mostly square, and split the other large shelf in two… basically, think about what you want to store in the shelving unit and create shapes accordingly. Bend and tape cardboard to make the shapes.
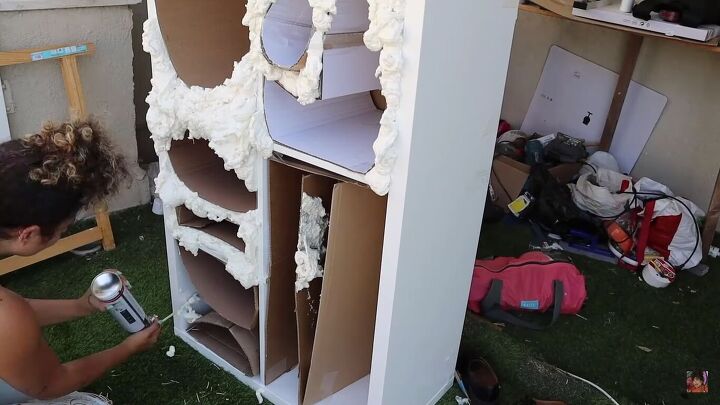
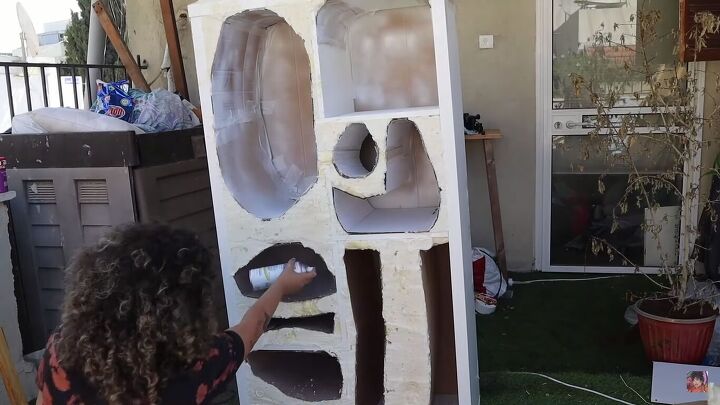
3. Spray foam in the gaps
Now, take your spray foam and fill in the gaps between the shapes.
Tip
Hold the spray foam upside down; the foam comes out way smoother and is much easier to control. Of course, also keep in mind that the foam expands.
4. Cut off the excess foam
Three hours later, the foam should be dry and you can cut off the excess with a saw or knife.
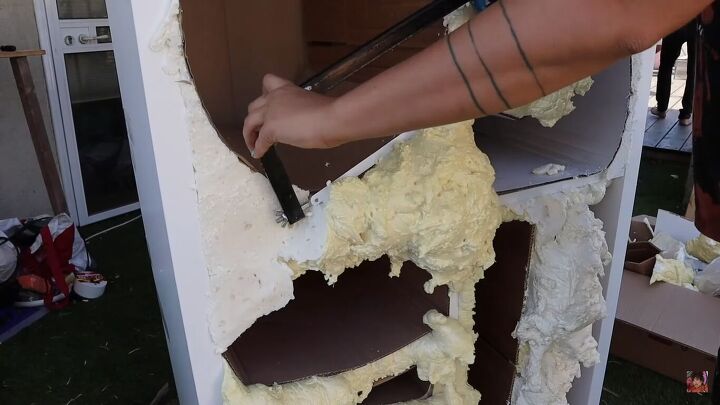
This is looking so awesome! You can totally see the shape already.
5. Spray-paint the cardboard white
Next up, we’re going to spray-paint the brown cardboard white. This step might look a bit useless, but I promise it makes the following step a lot easier.
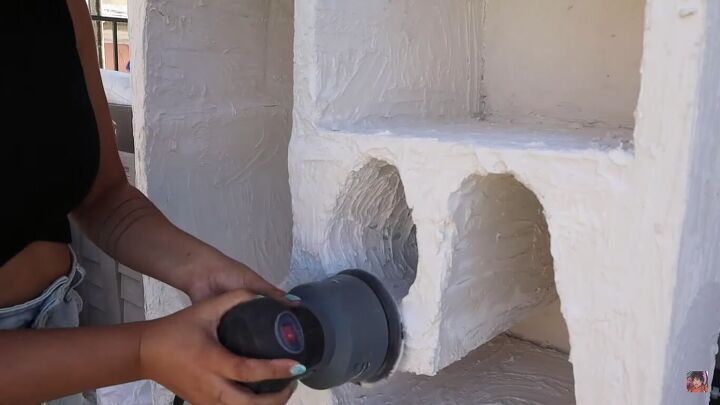
6. Cover the surface with spackling
Next, we’re going to cover everything with hole filler, joint compound, or something similar. I’m using a white lightweight spackling. The coverage is much better now we have the white surface underneath. This also provides the kind of texture that we’re going for.

7. Sand
Once dry, sand down the surface for a cleaner finish. I quite like the “undone” look, so I kept a lot of the texture as it was. It’s up to you.
Tip
This created a lot of dust, so remember to use a mask and some goggles or sunglasses or something to protect your eyes.
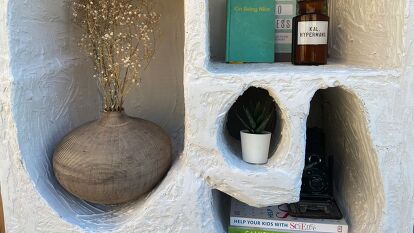
DIY Isobel bookshelf

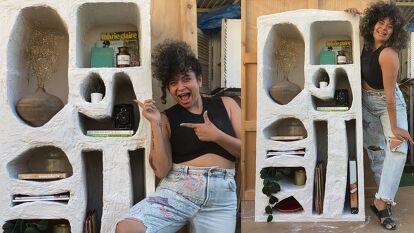
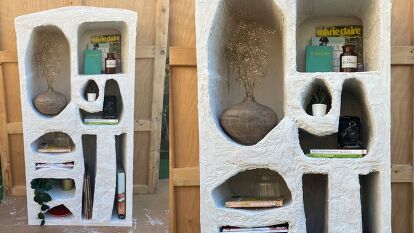
DIY Isobel bookshelf dupe
Here’s our final Isobel bookshelf dupe! What do you think about this DIY bookshelf? This was such a simple and effective IKEA hack. I absolutely love the results and I can't wait to see the comments and see what you guys think about it. See you next time!
Comments
Join the conversation
-
Your creativity is inspiring!
-
why bother doing all this when you can buy it identical at alcoving. https://alcoving.com/products/athens-nordic-white-bookshelf


Frequently asked questions
Have a question about this project?