


How to Make DIY Concrete Bathroom Countertops, Step By Step

I recently embarked on an exciting journey to create a DIY concrete bathroom countertop, complete with a custom sink and faucet holes. I'm thrilled with how it turned out, imperfections and all. If you're eager to dive into the world of DIY concrete countertops, join me as I walk you through the process step by step. Let's get started on how I created my concrete bathroom vanity top.
Tools and materials
- Melamine board (for the form)
- Sink templates (for custom sink shape)
- Insulation board (for sink knockouts)
- PVC pipes (for faucet holes)
- Silicone adhesive
- Concrete mix
- Flow control additive
- Titanium dioxide (optional, for color)
- Fiberglass-reinforced mesh
- Mixing containers and tools
- Trowel
- Sandpaper (various grits)
- Concrete sealer (food-safe)
DIY concrete bathroom countertops
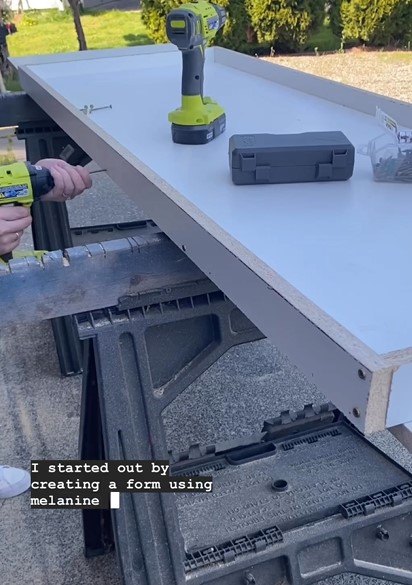
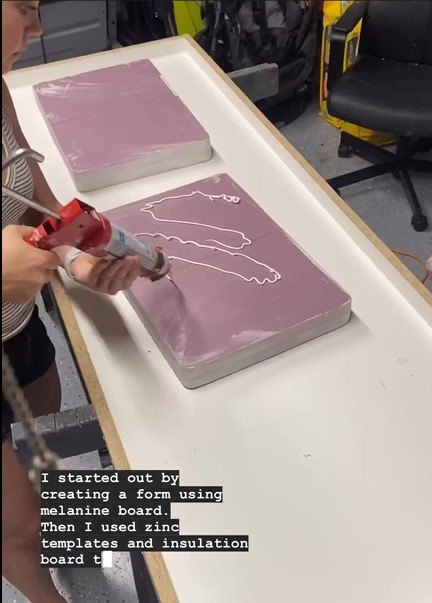
1. Create the form
I kicked off my project by crafting a form using a melamine board. This gave me the precise shape and dimensions I wanted for my countertop. I cut the melamine board to size and assembled it, ensuring it was well-supported and level.
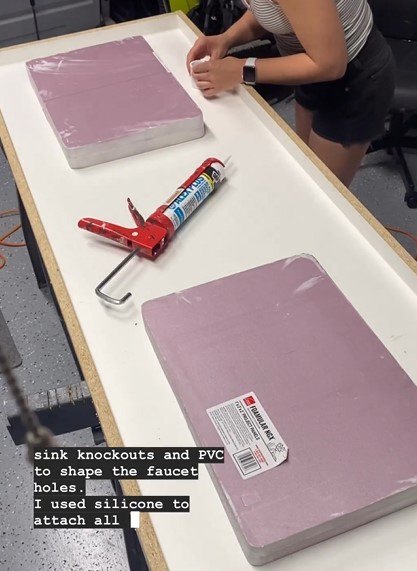
2. Design the sink and faucet holes
To incorporate a sink and faucet, I used sink templates to outline the desired sink shape on an insulation board. I then carefully cut out the shape, creating a knockout for the sink. For the faucet holes, I measured and marked the locations on the form, then shaped PVC pipes to match the faucet's dimensions.
3. Attach sink knockouts and faucet holes
Using silicone adhesive, I secured the insulation board with the sink knockout onto the form. I also attached the shaped PVC pipes for the faucet holes, ensuring they were firmly in place.
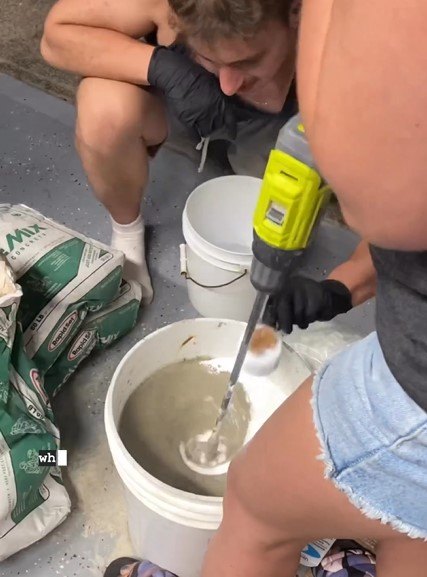
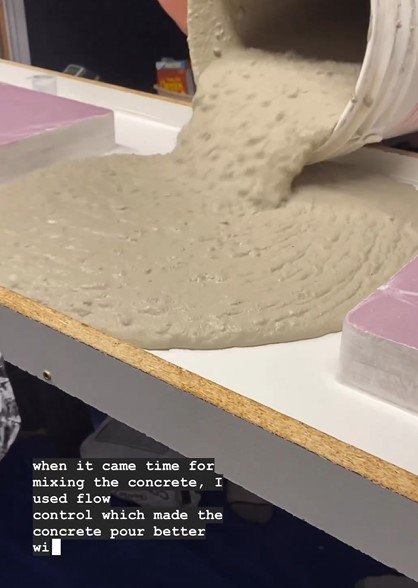
4. Mix the concrete
This step is crucial for achieving a strong and durable countertop. I added a flow control additive to the concrete mix, which enhanced its pourability without compromising strength. I also added titanium dioxide to lighten the concrete if desired.
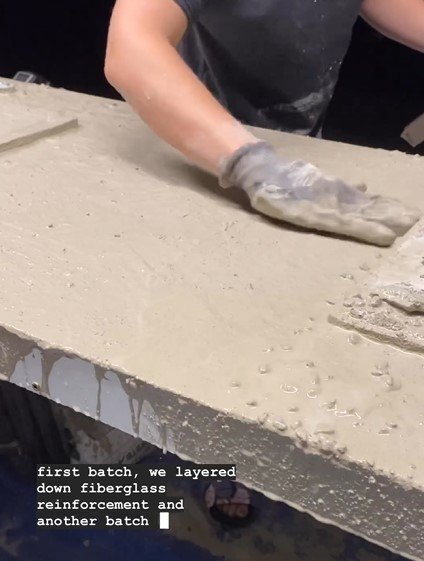
5. Pour the concrete
With the mix ready, I poured it directly into the form. After the first batch, I layered down a sheet of fiberglass-reinforced mesh for added reinforcement. Then, I poured another batch of concrete to cover the mesh and create a solid slab.

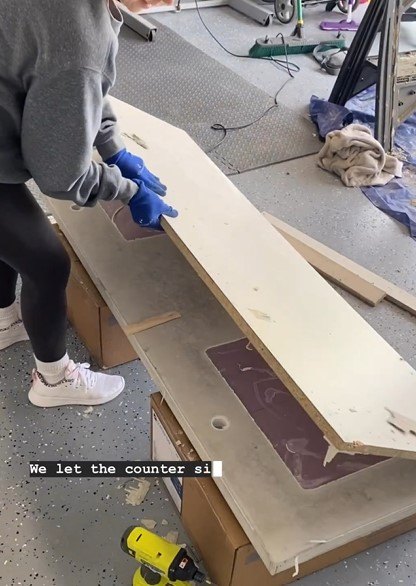
6. Allow curing time
Patience is key here! I let my countertop sit in the form for about a week to ensure that it cured properly and gained strength.
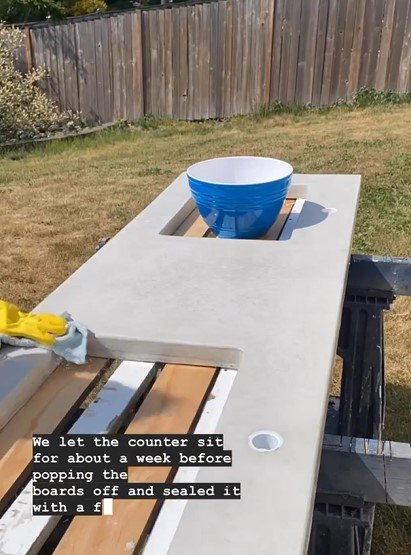
7. Release the form
After the curing period, I carefully removed the melamine form and revealed my concrete masterpiece. I embraced the imperfections, as they added a unique character to the countertop.
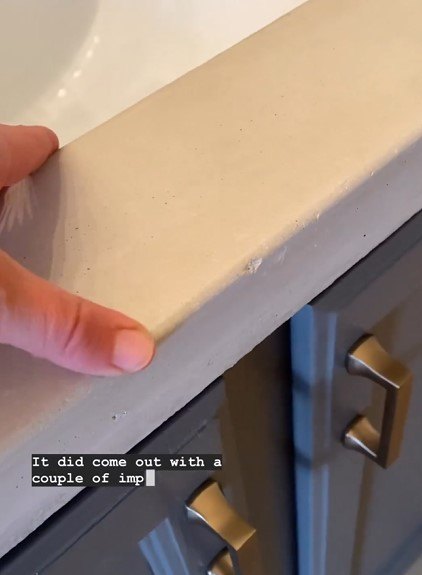
8. Sand out imperfections
To achieve a polished look, I sanded the countertop using various grits of sandpaper. This step helped smooth out any rough edges and surface imperfections.
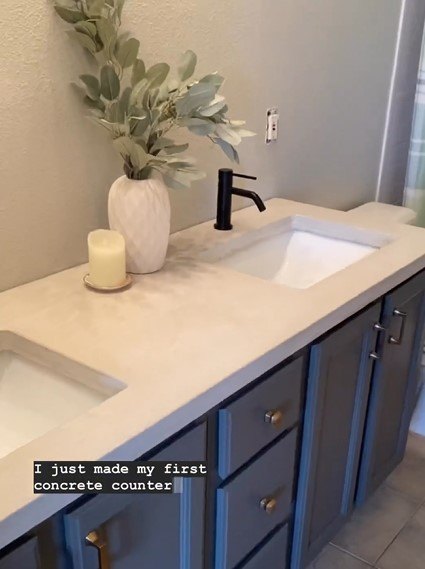
9. Seal the countertop
Lastly, I sealed the countertop with a food-safe concrete sealer. This protective layer not only enhances the appearance but also ensures the countertop is easy to clean and maintain.
DIY concrete bathroom countertop
That's how I created my stunning concrete bathroom countertop with a custom sink and faucet holes. It's a labor of love, and the imperfections only add to its charm. Now it's your turn–would you take on the challenge of adding concrete bathroom countertops to your space? Let me know your thoughts and share your own experiences in the comments!
Follow @gatheratthebooths on Instagram for more DIY ideas.
Comments
Join the conversation
-
Thanks for sharing these detailed steps for DIY concrete bathroom countertops! Having a clear list of tools and materials, along with a step-by-step guide, makes the process seem much more manageable.


Frequently asked questions
Have a question about this project?