


Can You Put Furniture Over Floor Vents? Yes, And Here's How...
Can you put furniture over floor vents? I encountered this challenge and found a solution that worked wonders. In this tutorial, I'll walk you through the steps I took to build beautiful built-ins while seamlessly incorporating a floor vent.
By following this guide, you'll be able to create a functional and aesthetically pleasing addition to your room without sacrificing ventilation. Let's get started!
Tools and materials
- 2x6 lumber
- 2x4 lumber
- Quarter inch plywood
- Vent cover
- Circular saw or jigsaw
- Measuring tape
- Pencil
- Screws
- Screwdriver or drill
- Duct tape
- Caulk
- Paint or finish (optional)
- Sandpaper
How to install built-ins over a floor vent
1. Planning and Measuring
Begin by assessing the area where you plan to install the built-ins. Measure the dimensions of the space, taking into account the location of the floor vent. Make a detailed sketch or plan to visualize how the built-ins will fit around the vent.
2. Building the Base
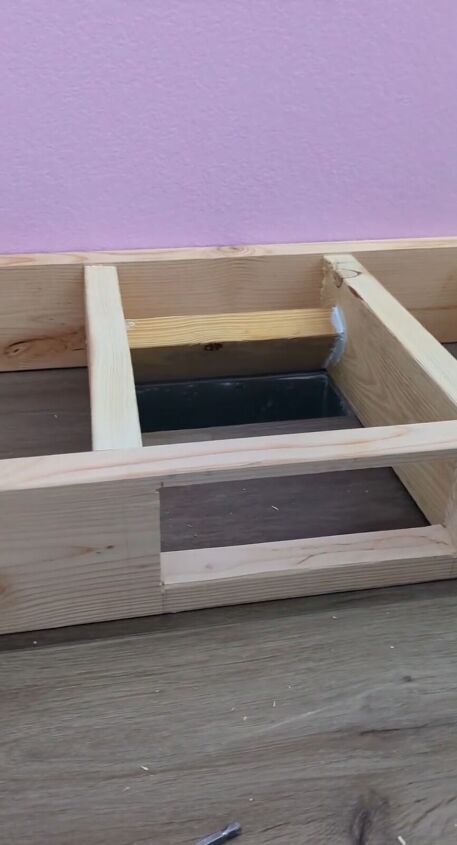
Using 2x6 lumber, construct the base of your vent extension. Cut the lumber to the appropriate lengths based on your measurements. Assemble the pieces to create a sturdy base frame. Secure the corners with screws to ensure stability.
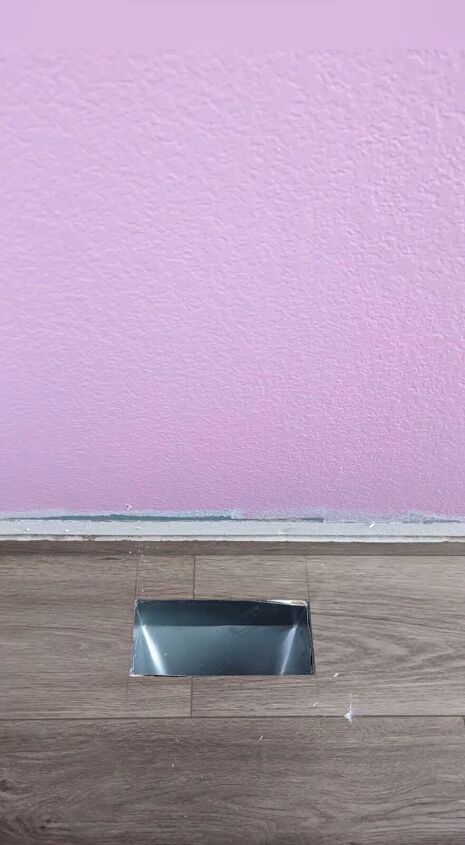
3. Cutting the Vent Hole
Identify the location of the floor vent within the base frame of the built-in. Use a measuring tape and pencil to mark the exact position of the vent. With a circular saw or jigsaw, carefully cut out the marked area to accommodate the vent cover. Take your time and ensure precise cuts.
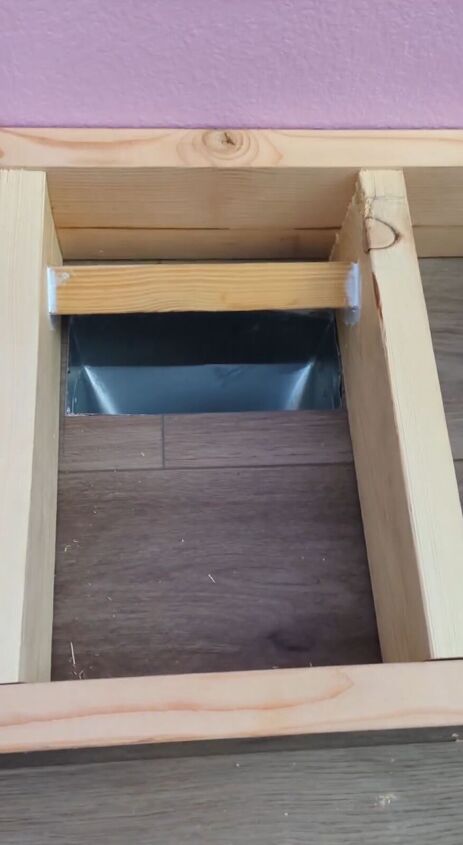
4. Adding Support and Angled Back
To provide additional support and ensure proper ventilation, attach a 2x4 piece of lumber at an angle along the back of the base frame. This angled piece will allow air to flow freely through the vent while maintaining the structural integrity of the built-ins.
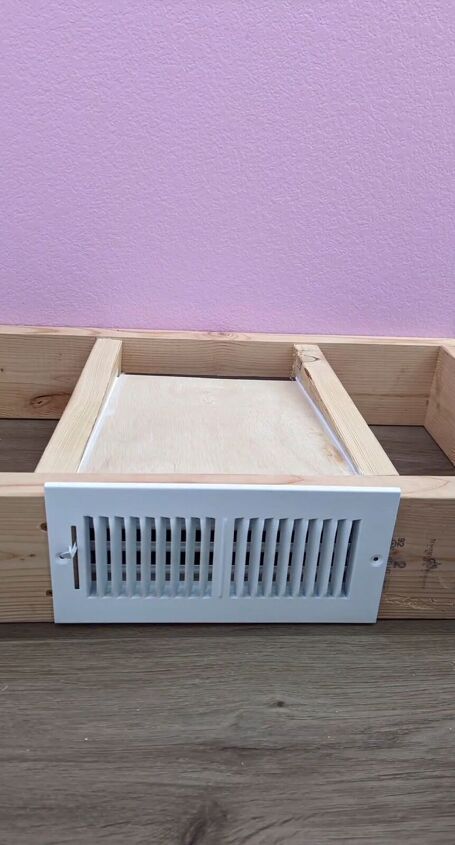
5. Installing the Vent Cover
Place the vent cover over the hole you've cut in the base frame. Ensure that it fits snugly and aligns properly with the surrounding materials. Secure the vent cover in place using screws or other appropriate fasteners.

6. Covering with Plywood
Cut a piece of quarter-inch plywood to the size of the base frame. Lay the plywood over the frame, making sure it covers the vent hole and fits flush with the edges. Attach the plywood to the frame using screws, creating a seamless surface.
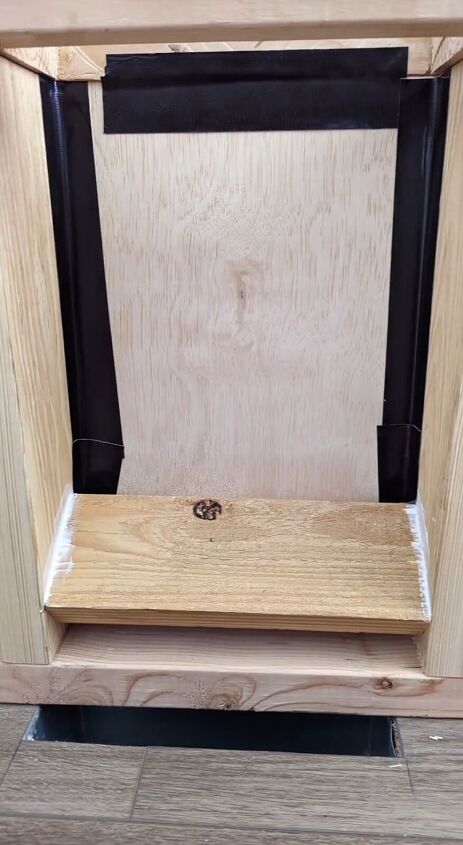
7. Duct Taping and Caulking
Use duct tape to seal any gaps or joints between the plywood and the vent cover. This will prevent air leakage and help maintain the effectiveness of the floor vent. Next, apply a bead of caulk around the edges of the plywood to create a smooth and polished appearance.
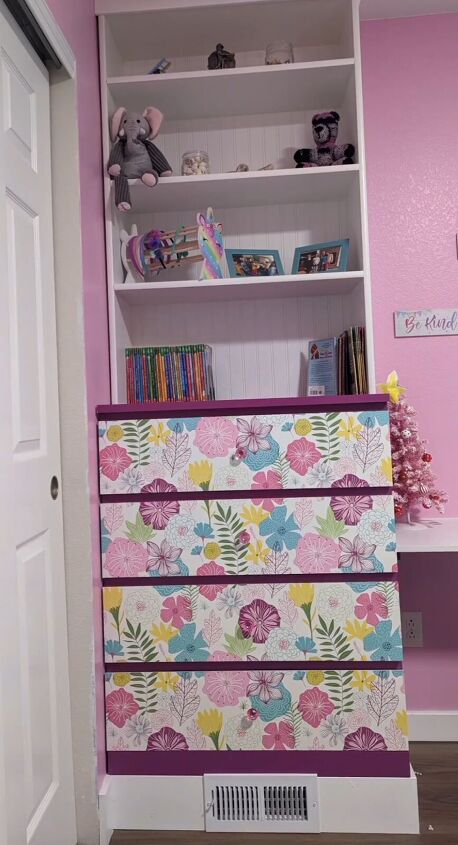
8. Finishing Touches
If desired, sand the plywood surface to ensure a smooth finish. You can also apply paint or a finish of your choice to match the style of your room. This step is optional but can enhance the overall look of your built-ins.
Can you put furniture over floor vents?
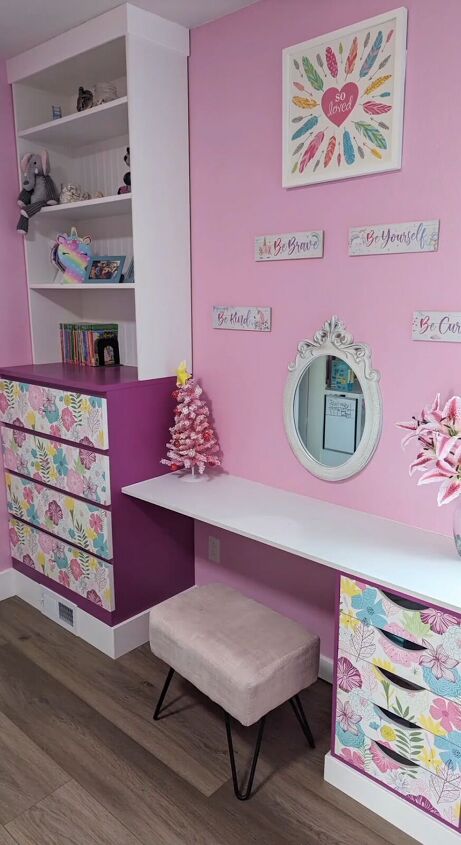
Yes, you can! You've successfully transformed a challenging floor vent obstacle into a stylish feature with your custom-built-ins. By following these step-by-step instructions and utilizing basic supplies, you've created a functional and visually appealing addition to your space.
Now you can enjoy the benefits of built-ins without compromising on ventilation. Feel free to customize this project further to suit your preferences and make it uniquely yours. Enjoy your beautifully integrated built-ins and the improved aesthetics of your room!
What do you think of this DIY project? Let me know your feedback in the comments.
Follow @diywitherinb on Instagram for more DIY ideas.
Comments
Join the conversation
-
Good solution. This would be one way but there are other ways that may be simpler.
-
I did this in our kitchen when we extended our cabinets along the wall but I cheated and bought an extension that covered the vent with and extended forward to the base of the cabinet. Pretty much the same process but a bit easier for me. Love your results--where there's a will--there is a way!


Frequently asked questions
Have a question about this project?