


How to Update Your Bathroom for Under $50!

by
Tracey
I’m excited to be working on a series of posts focused on getting your house updated, organized, and ready to sell (or ready to enjoy yourselves!). Staging, de-cluttering, and updating are key to getting your house sold quickly for the price you want. First, I’d love to share a couple of ideas on how you can update a Plain Jane, builder grade bathroom.
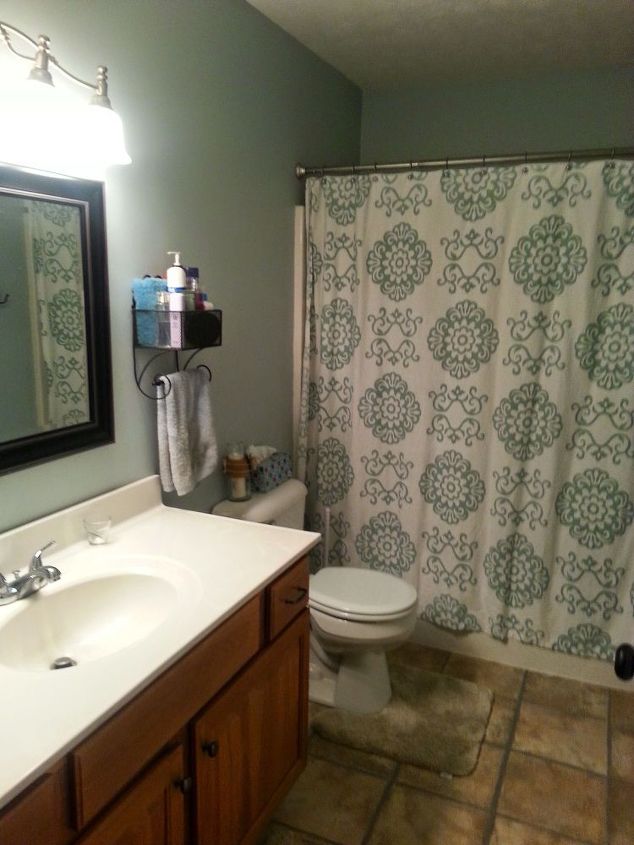
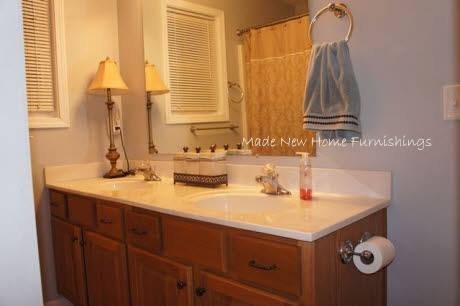
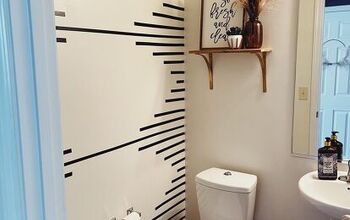
A pretty typical hum-drum bathroom!
There are no windows in the hall bathroom and it was dark. When we moved in, we knew we needed to update the light fixture. It still needed something more though. The room felt very plain and “builder grade”. I had two ideas to really give the room an upgraded feel. First, to lengthen the shower curtain in order to visually add height to the room and remove the shadow above the curtain which made the room feel dark. Second, to paint the vanity cabinet. Look at the difference!
I had hoped that lengthening the curtain would have a great visual affect, and it really does make the room feel taller and larger.
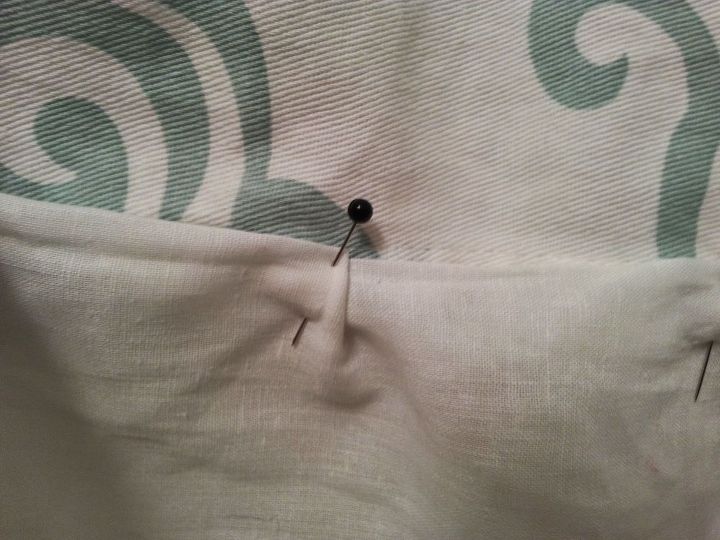
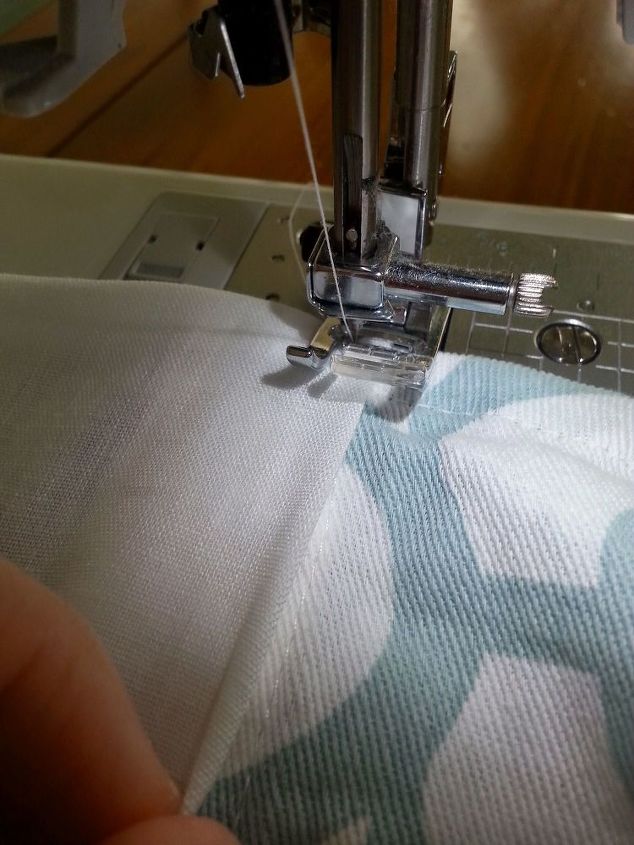
Small pleats to add a bit of a ruffle
The shower curtain I purchased last year at Target measures 70″ wide. I knew I wanted to add a band of white linen at the bottom of the curtain. The linen I bought had a 42″ selvedge, meaning a yard would be 36″ x 42″. Because I didn’t want to be piecing fabric together I went ahead and bought 2 yards. I cut the entire 2 yd long piece down to 15 inches by 72 inches. That length left me enough room for the double hem around the sides and for a few small pleats to give the bottom a ruffle type flow. Adding about 14 inches of length to the curtain gave enough height that the liner on the inside still keeps the water in the tub. I’ve considered adding another layer, maybe 10-11 inches to create more of a double layered ruffle look. We’ll see! What do you think?
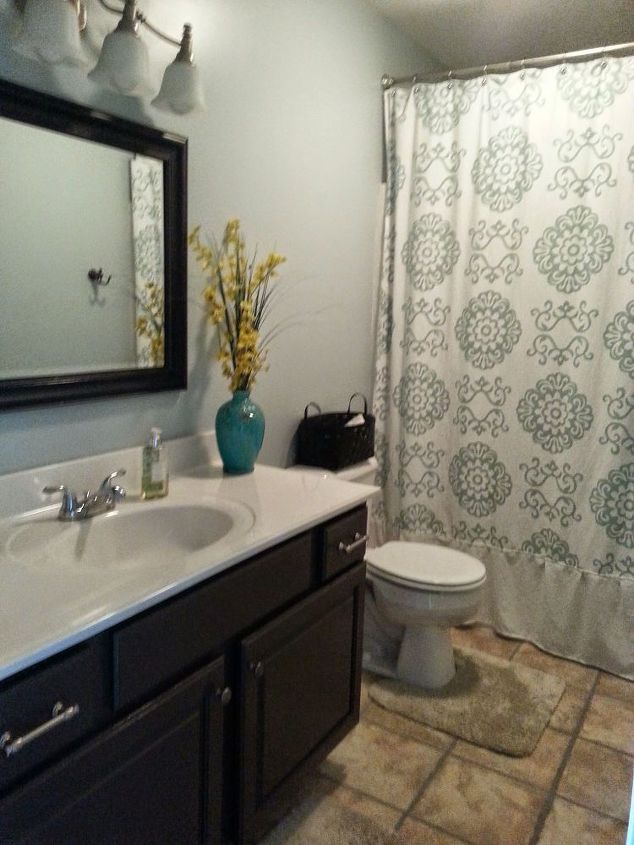
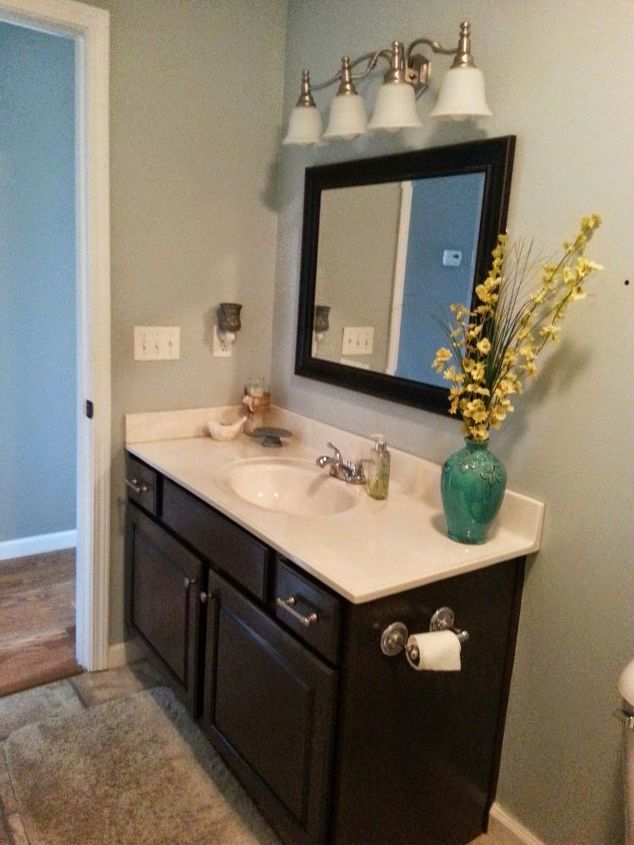
For years I’ve really wanted to upgrade the oak, standard, builder grade cabinet. I hate we didn’t do it sooner because I love how it turned out!
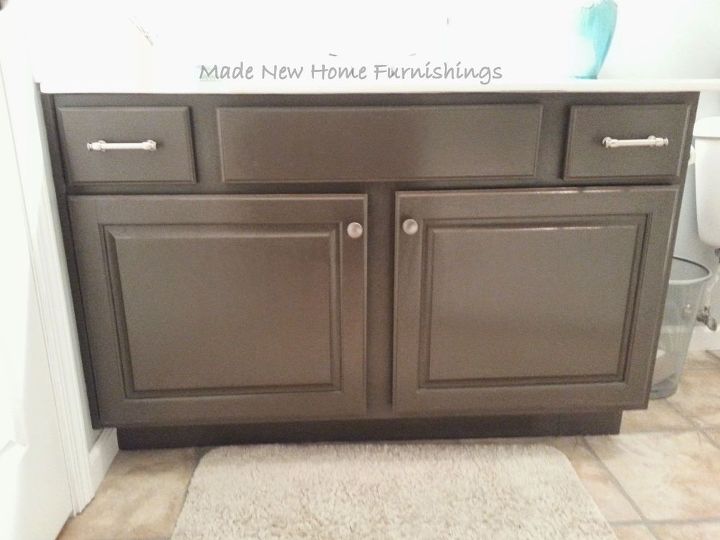
Finished painted vanity and new hardware.
The cabinet doors were wood but the frame of the vanity was not real wood- it was a dense composite. Because there would be no sanding, I used Zinnser Bonding Primer as a base coat. We took the doors and hardware off and primed the inside of the doors first, flipped and then primed the front. I left the drawers in but pulled them out so that I could paint the drawer front and carefully painted the cabinet frame around them with my 2″ angled Wooster brush (my favorite!). Then, I did the same with the brown. With a gloss finish, make sure you get paint flowing freely from your brush. You want it wet and you want to use uniform strokes in the same direction. No deep brush marks! If you do get some deep strokes, re-dip your brush and go over it again lightly. Some strokes really will look fine. If you are concerned consider using a small foam cabinet roller on the flat areas.The brown had great coverage with the first coat but it did require a second coat. It cured to a nice, seemingly durable finish.
I hope this inspires you! Small changes can make a big impact! Go for it, change up that bathroom with a new curtain and rug. De-clutter and search Pinterest for creative storage solutions, if you need it. Choose clean, calming colors, and work in some earth tones for the perfect update. Here are a few pictures of a similar update I did in the master bath a while ago.
The "before" picture of the master bath.
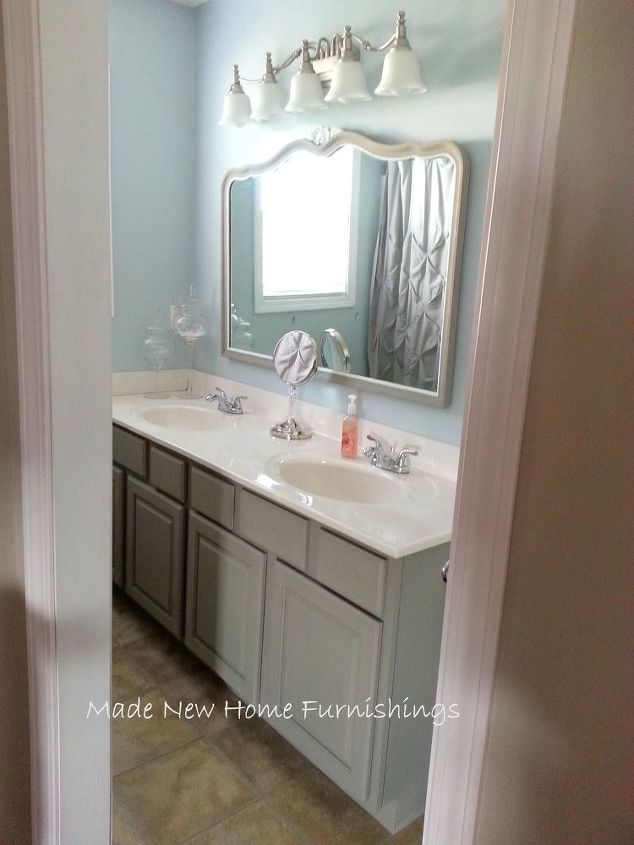
The master bath "Made New" again!
The master bath "Made New" again!
Want more details about this and other DIY projects? Check out my blog post!
Comments
Join the conversation
3 of 69 comments
-
it must be dark in the shower in the hall bathroom?? I s there a light in the shower area?
-
Very nice indeed. The lighting makes such a difference. I like the basket over the cistern and am going to borrow the idea immediately. Thank you.


Frequently asked questions
Have a question about this project?