


How to Layer a Thanksgiving Centerpiece
How to Layer a Thanksgiving Centerpiece
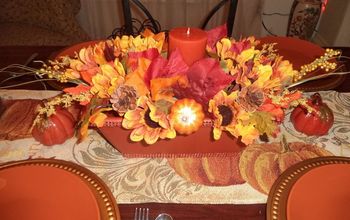
Here’s an easy Thanksgiving centerpiece that only requires one stop to pick up all the items. I gathered mine up after class one day at our local farmers market. I love one stop shopping, it saves so much time, and time is something I don’t have a lot of these days. While I was getting it all around I thought you might like to see my plan for layering everything.
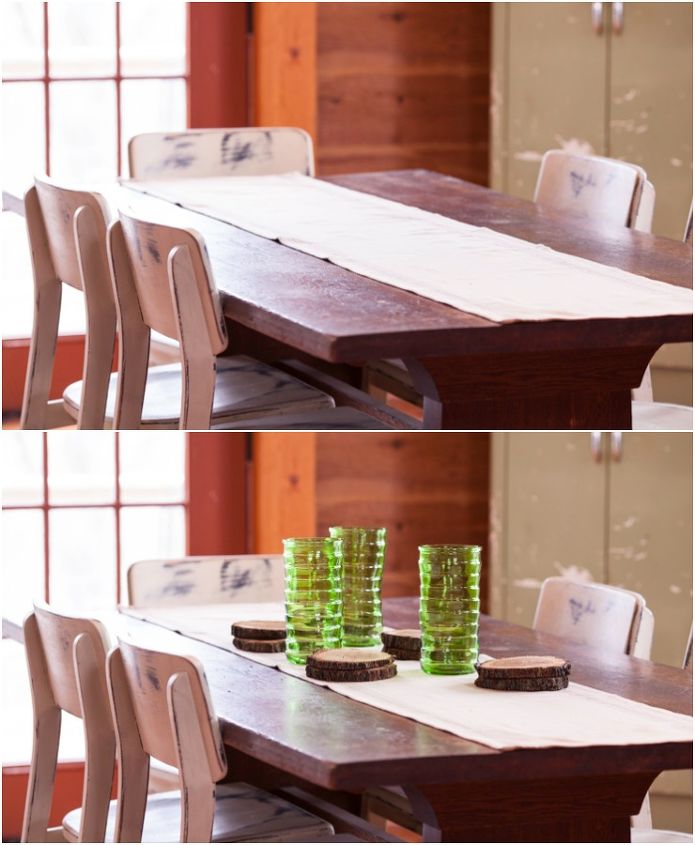
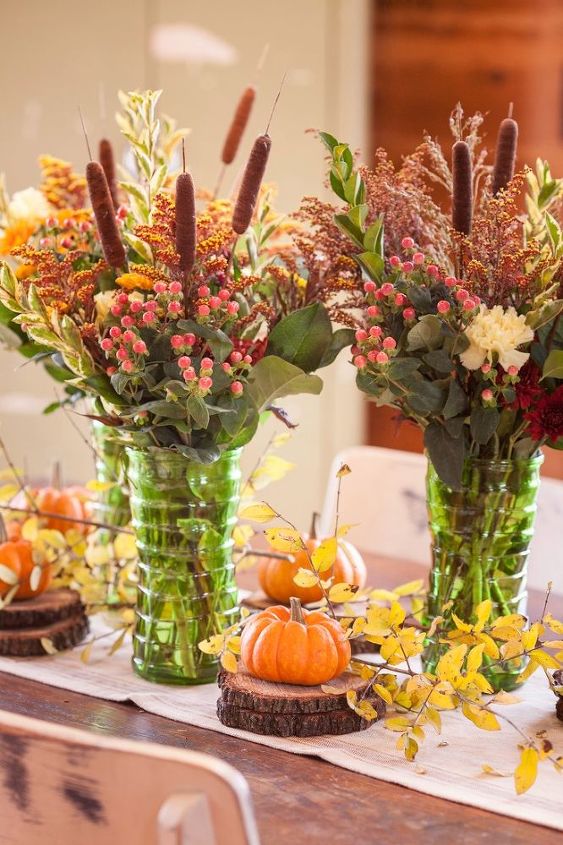
First I removed the Fall arrangement that was currently in place, and started by adding a brown and tan grainsack runner. Next came the wood slices and the green glass vases. Make sure you add things in odd numbers it will be more pleasing to the eye. For instance there are 3 vases, and 5 wood slices.
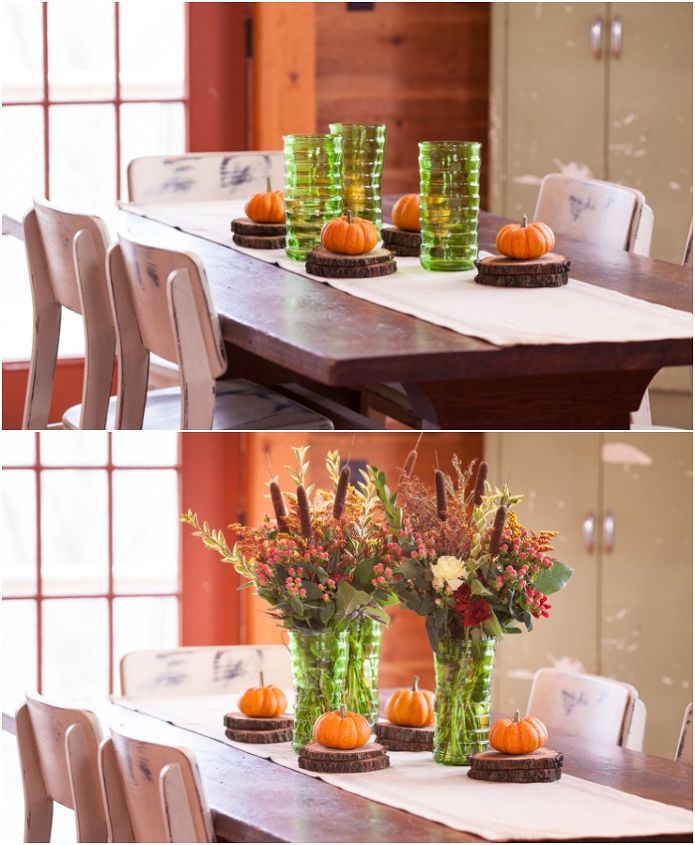
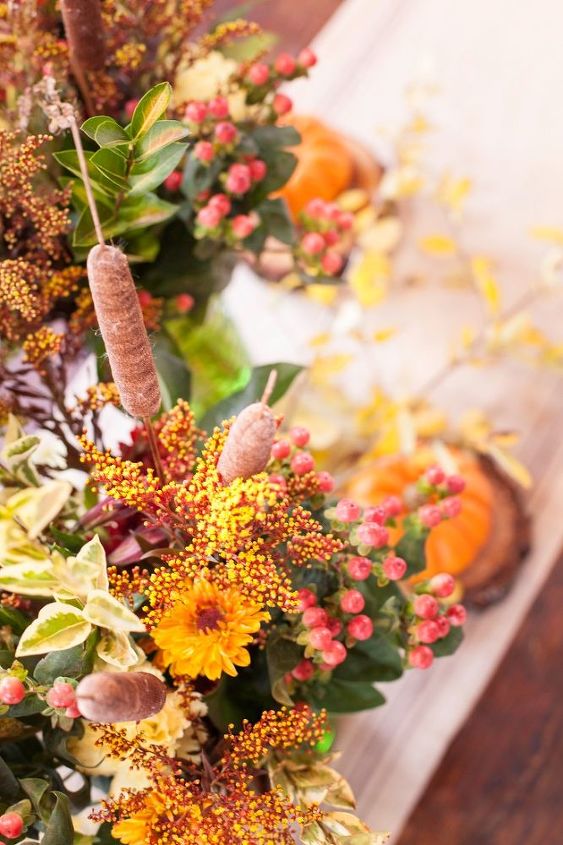
Then I topped each wood slice with a mini pumpkin and started adding flowers to the vases. I did stop along the roadside and cut the cattails I thought they would add some good texture and height to the arrangement.
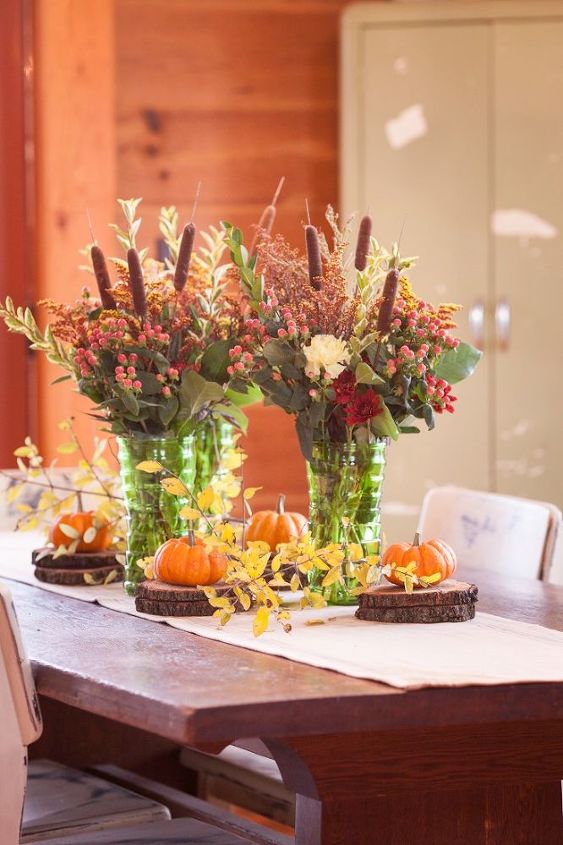
Next I added some branches from a shrub, the bright yellow pop of color was needed and it also filled in the mid range for height. I’m hoping to get several days of enjoyment from the flowers, and my cat seems to like them too.
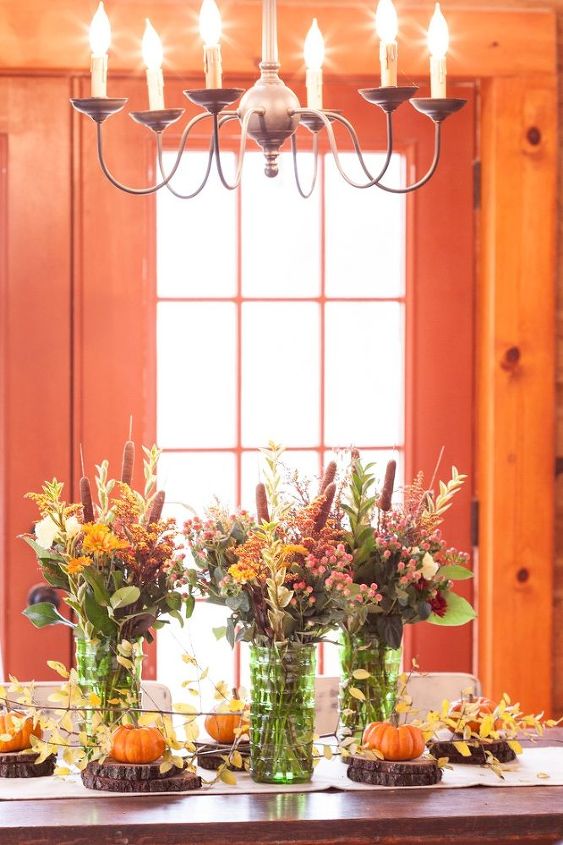
We won’t be having a large crowd for Thanksgiving this year so a simple arrangement like this will work out perfectly.
Are you making Thanksgiving plans yet?

Want more details about this and other DIY projects? Check out my blog post!
Comments
Join the conversation
2 of 6 comments
-
Beautiful and nice for a buffet but too tall for a sit down dinner. You'd have to remove the vases when you sit down to eat. Otherwise it's lovely!
-
I agree with@Karen


Frequently asked questions
Have a question about this project?