


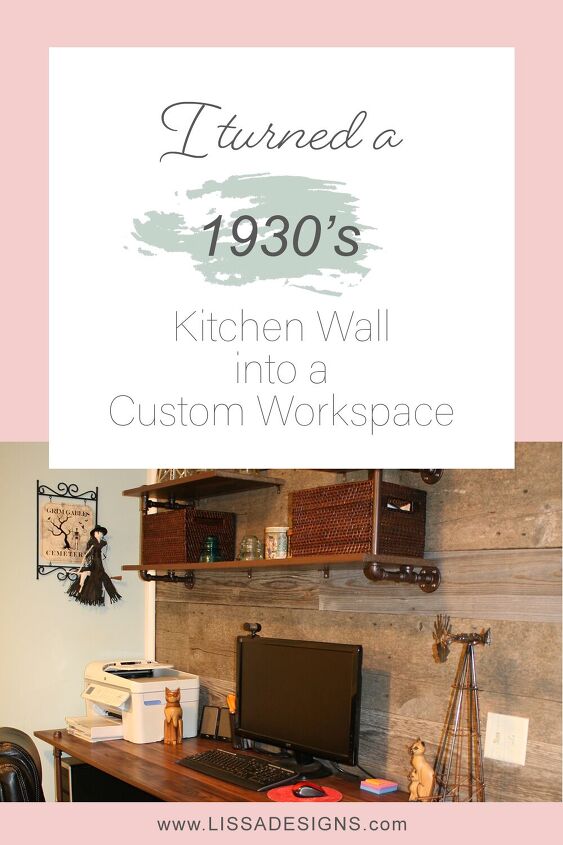
I Turned a 1930's Kitchen Wall Into a Custom Workspace

When I first saw the interior of the house, I kept wondering where I was going to put an office workspace. I work from home and need a space that would accommodate an office work area. I had already created an art studio out of the old closet at the top of the stairs. The kitchen was long and on the interior wall was the back side of the stairwell.
The house sat on a little over an acre of land and also included a smaller house that needed the roof patched. It had a long open building that turned out to be perfect for storing an RV. This 80-year-old homestead wouldn’t be complete without a chicken coop. It also had an old, detached garage that someone had used as a workshop.
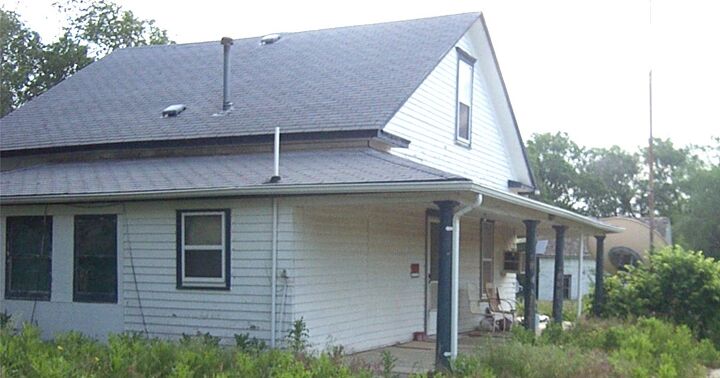
The only downside about this property was that it was located inside city limits. At the highest population it may have been around 70 residents. Unfortunately, small towns have a tendency to have nosey neighbors and for someone wanting a private peaceful life away from the city, it wasn't the best outcome.
I could have used this space for a dining room table, but it was extremely small, and the laundry room bi-fold doors would have opened up into the table. Not the best dining experience I wanted.
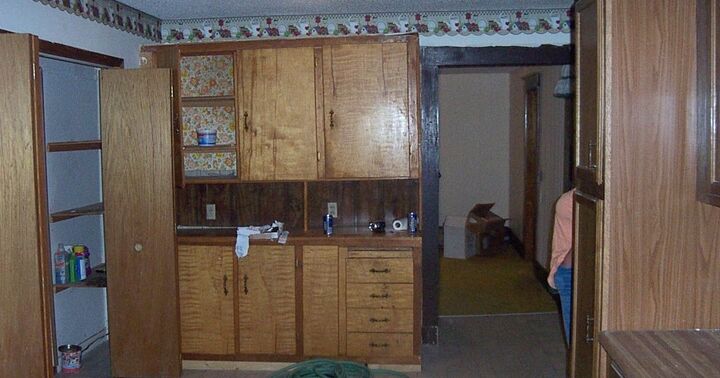
Here is kitchen wall before the demo. About 15 years ago they completed a handicap accessible addition. They extended the kitchen and turned the main floor bedroom into a primary bathroom. This new addition added a larger primary bedroom just to the east of the kitchen. They also added a door to the bedroom that opened up into the kitchen. The primary bathroom also opened up into the primary bedroom and the living room. This was fun for the dogs and cats to chase each other around in circles when all the doors were open.
Inside the bi-fold doors you can see shelving. The original chimney, next to the shelves, had been closed off. You could see where there had been a pipe that would have attached to a wood oven. After the addition, they built a closet for a washing machine and dryer. The opening on the right side leads into the parlor or seating area.
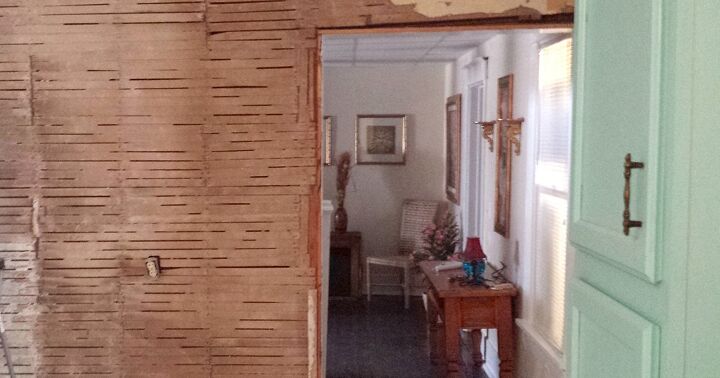
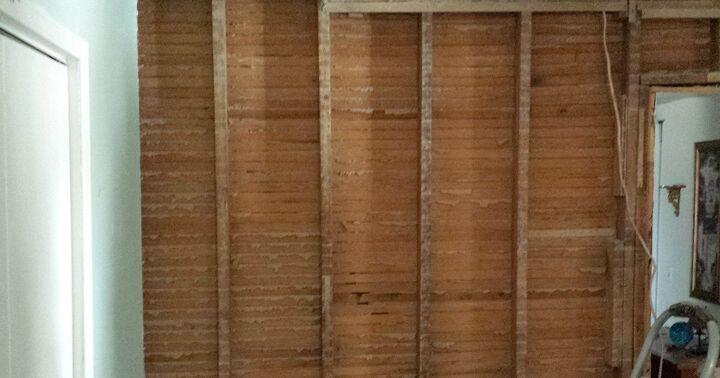
Once I broke down the original cabinet and removed it, it revealed a four-inch drop down to the original floor height. This wall still had the original lath and plaster. This was a messy and dusty demo. It also had some very scary electrical work that was hanging out of the wall.
Here is what the wall looked like after removing all the lath and plaster on the kitchen side of the wall. After cleaning up the floor and hauling all the material out to the truck, I finished up the day by cleaning up all the dust and smaller debris.
After shutting off the power, we installed a new breaker box off the porch so that it would accommodate the new electrical. Once the old electrical had been removed, I installed all new wiring. A few new outlets were added to make it more efficient as a workspace.
There originally wasn't a stairwell light, so wiring was routed up this wall to the top of the stairs. Having the lath and plaster removed made it an easy task. A light switch at the top of the stairs and one at the bottom was also added. Wiring was added for a light fixture that would be mounted above the workspace.
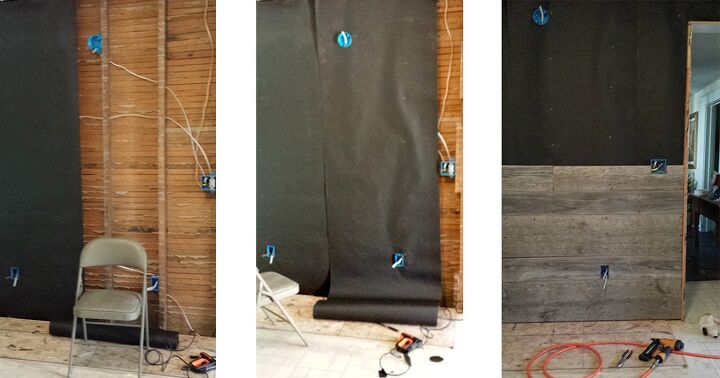
I installed roofing tar to the original wall framing so that you wouldn’t be able to see the inside of the wall. This would also prevent any shadows. Remember that four-inch drop on the floor? I added several layers of plywood to fill the drop and bring it level with the current kitchen floor.
What to put on the wall? Here is where that 80-year-old chicken coop would come in handy. I removed some of the boards from the chicken coop in varying heights and lengths. Using an electric planer, I was able to clean off all the icky stuff from the back of the boards. I measured and cut the boards to stagger up the wall. I know you’ve seen all those barn wood walls that cost a fortune on HGTV! This wall was built with very little investment, and I used recycled materials!
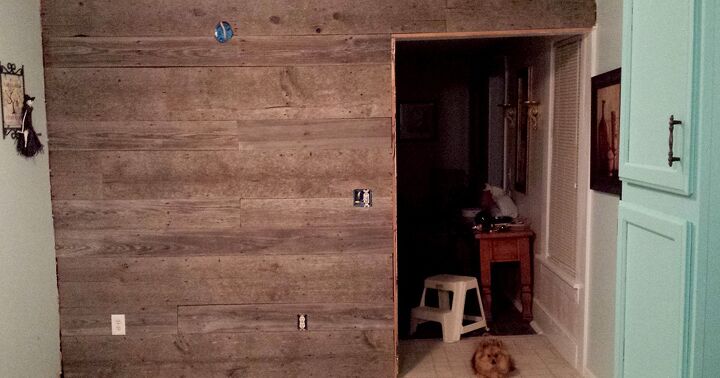
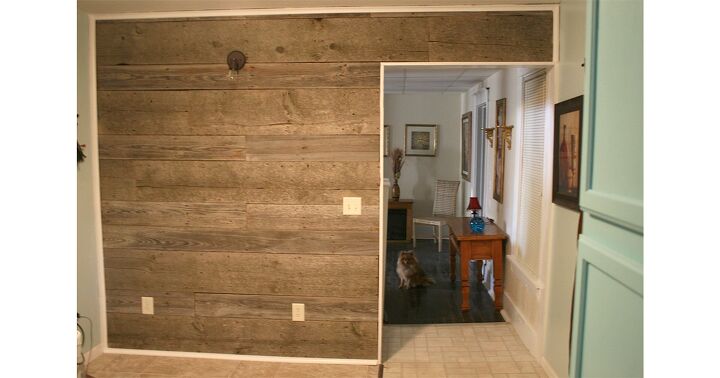
After the planed wood was installed, I finished up the electrical outlet covers, light switch cover and prepped for the lighting fixture to be installed. I also used some old trim pieces that I had lying around and cut them to fit the wall, painted them white and installed them. The wall coming along beautifully.
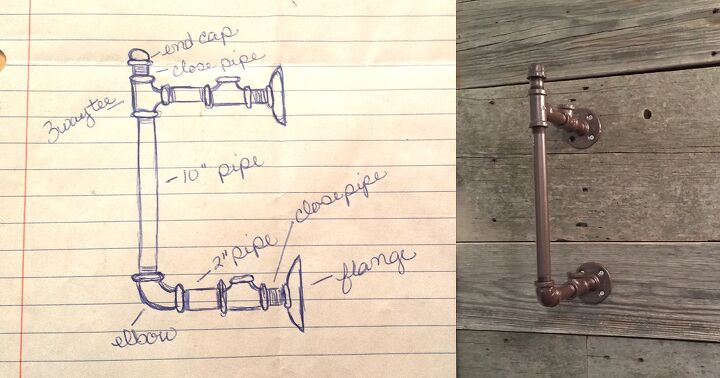
Envisioning a rustic industrial style desk for this space was the easy part! After hours and hours of searching for the perfect desk, I gave up! This is where my DIY skills came into play. Drawing up plans using water pipes would help me pick out supplies while at the hardware store. Plus, I decided to paint them bronze to match the wall fixture that I had found. I wanted a desk that was mounted to the wall and floor to minimize the footprint and to add stability.

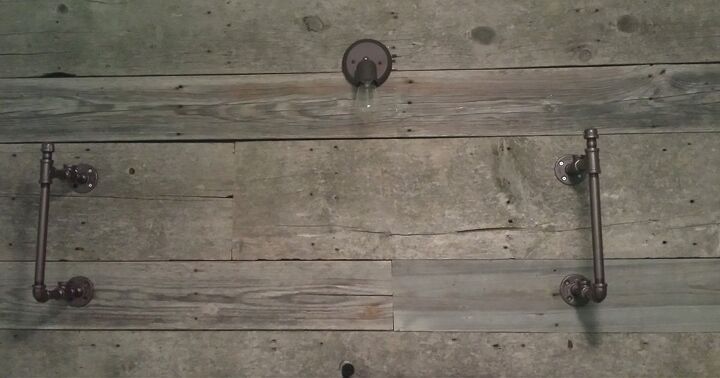
I also wanted a shelf on the wall just below the light fixture. Below is the shelving design that would be made from the varying water pipe pieces. I added flanges that were used to mount the shelf to the wall. I also added 3-way tees on the wall mounted section to use as support for the boards.
After I put the shelf pieces together, I spray painted them with Rust-Oleum Metallic Flat Burnished Amber. This color matched the lighting fixture perfectly.
Once I had the shelving frame mounted to the wall, I needed to figure out how I wanted the shelf to sit. I wanted it to be stable, so I drilled holes on the front corners and then placed the 10" pipe through those holes. This allowed the shelf to rest comfortably on the elbow and the 3-way tee pieces. I also installed an Edison light bulb to keep with the rustic theme.
After installing the bottom board, I realized that the lighting fixture was too close to the top board. I cut the long board into two separate pieces for shelving. I used end caps and four L brackets to hold them into place. After finishing the shelves, I wished had mounted it in the center of the wall. Plus, the top shelves were different lengths.
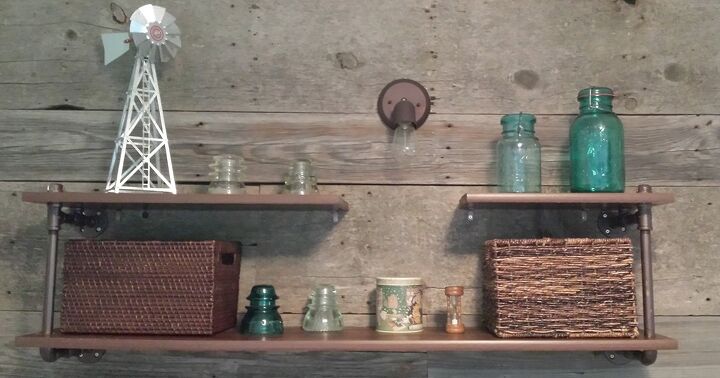
Check out that awesome galvanized steel windmill that I picked up from an estate auction! I found the antique ball jars and insulators at a different auction. They added a little color to the shelf and fit with the rustic theme. I also added baskets to provide hidden storage.
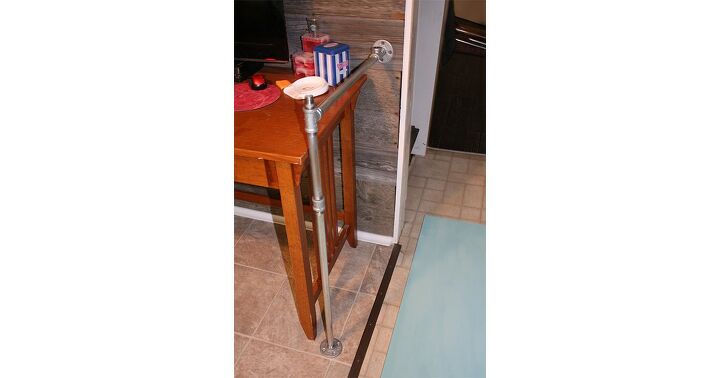
I wanted a desk that would be taller than a normal desk. Being tall, I tend to hunch forward when sitting at a desk that is too low. I wanted the design to be like the bookshelf so that everything would be consistent. Flanges were added to mount the desk to the floor and wall. This allowed for support and a clean design. I used 3-way tees again to level the board for the desk and a close pipe piece with an end cap to secure the board.
This photo shows the variation in height from a standard desk. I installed vinyl flooring over the plywood and used bronze colored carpet trim to separate the two styles of flooring. I spray painted both pieces of the desk frame using the same Rust-Oleum Metallic Flat Burnished Amber.
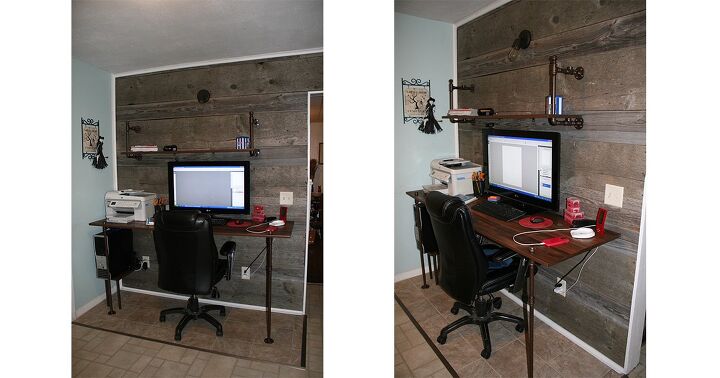
Using a small piece of wood left over from the top shelf, I built a stand for my computer tower. I used industrial strength brackets to mount the stand to the wall and used PVC pipe for the legs. I spray painted them with the same Rust-Oleum color used for the water pipes. The variation in flooring and the carpet trim piece separates it from the rest of the kitchen space.
Suffering from mild OCD, the mismatched baskets in the earlier photo was driving me nuts! I found the matching basket and added it to the shelving unit. I also added another windmill that was handmade out of copper tubing, brass, and bolts. What a beautiful addition to the space.
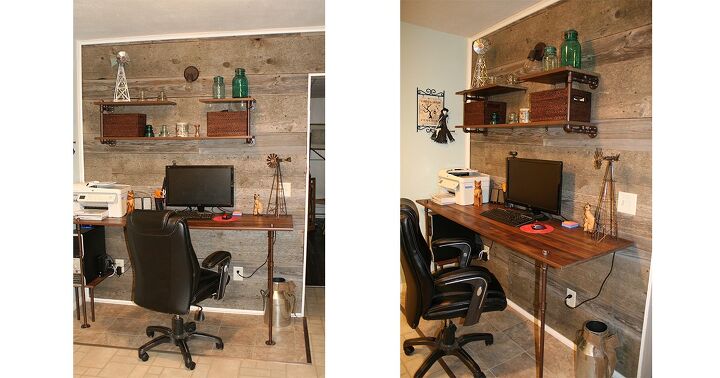
Here is the completed workspace. I love how it turned out!
Comments
Join the conversation
-
Love the barn wood wall!
-
Love it!


Frequently asked questions
Have a question about this project?