


DIY Abstract Spackle Wall Art

I have been looking for an easy and inexpensive way to make a large and impactful piece of wall art. I really like the look of plastered wall art and I thought it would be easy to replicate. With this easy tutorial I will show you step-by-step how to create a unique one-of-a-kind piece of abstract art with little to no skill, time, and tools needed!

{The following photos and tutorials may include affiliate links. Click the photo or links to be taken directly to a product page or to my LIKEtoKNOW.it page where you can shop these looks!}
What you’ll need!
The best thing about this project is you’ll only need three things to get you started!

- A blank canvas of any size. You can even repurpose a piece that you no longer want or get one inexpensively at a thrift store or flea market. A framed piece would be best or you can easily make your own frame!
- Spackle– Spackle can be found at any hardware store and is pretty inexpensive for a large amount. For three frames I used one 32 oz container of DAP DryDex with a dry time time indicator.
- Spackle Knife– You will need something to spread the Spackle out, so I used a straight edge putty knife and to add texture I wanted to be creative by using different serrated edges. For this step, you don’t need any fancy tools. You can use anything you have on hand, heck, you can even use your hands.
Here are a few super simple steps to make your own unique piece of art:
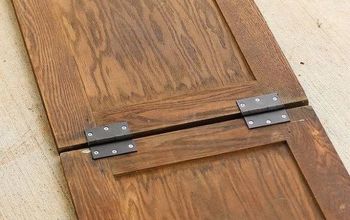
Step One- A Blank Canvas
Start with a blank canvas. This canvas can be a plain stretched canvas frame or you can repurpose an old canvas and frame. I chose to up cycle and use an old framed canvas that I had laying around.

If your canvas is not framed check out my super simple tutorial on how to frame a canvas.
I didn’t prep my canvas, but you can prime it if your under layer is a darker color. You can also tape the edges of your frame to protect it. I wanted to keep this as simple as possible so I took the risk and skipped this step.
Step Two- The Icing
It’s just like icing a cake!
Smear and spread a thick layer of Spackle on to your canvas. I found that a thicker application makes it easier to create texture later on. For this step I use a flat edge spackle or putty knife or you can use anything you have on hand that has a straight edge.

Cover the entire canvas with the Spackle. Don’t worry about being perfect, this is an imperfect art project! If you get it on the frame, it wipes right off.
Don’t worry it won’t stay pink the entire time, lol.
Step Three- Add the Texture
This is the fun part!
In this step we want to add the texture before the Spackle dries. This is why I love using DAP DryDex with the dry time indicator. The Spackle will stay pink until it dries.

To add texture, you can use almost anything you have on hand, quite literally. Using your fingers can add some great texture. For this project I used a plastic knife that I had leftover from a birthday party and my secret weapon is to use a cake decorating icing smoother comb.
The decorating comb has different serrated edges that you can play around with. Small ones, sharp ones, squared ones, and rounded ones. Don’t worry if you mess up, you can smooth it over, and try again!
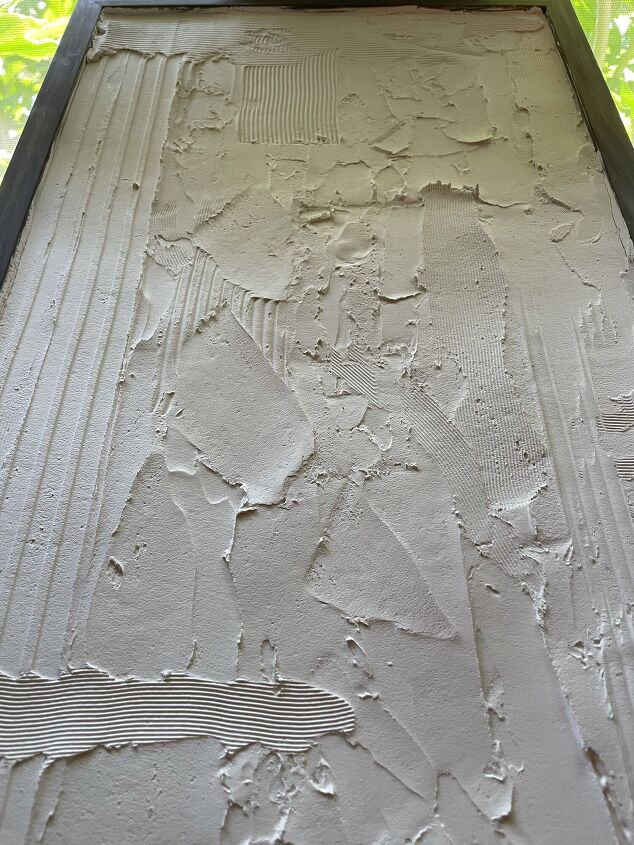
There is no real technique for this part. Try to use organic swiping motions and mixing it with a more rigid straight section to give a better variation.
Once you are happy with your texture, let it dry, and watch the piece come to life!
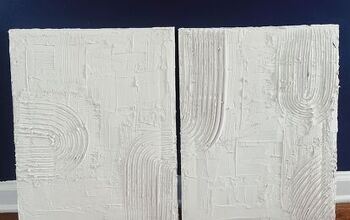
The Final Product
From start to finish this project takes maybe 15-20 minutes, not including dry time. What I love about this project is that you can make this piece as big or small as you would like and it makes such a big, yet subtle impact!

Check out my Instagram for more information!
Resources for this project:
See all materials


Comments
Join the conversation
-
Beautiful piece! And this is what I've been contemplating for a while (think really large ugly print). For some reason I knew there was something I was holding on to it for, think I found it 😃.
With Kentucky fall/winter weather I've been looking for indoor (utility room) ideas for all my 'to do later' stuff.
This is in my file and now all I have to do find the perfect spot when it's done.
Thank you 💞☺️.


Frequently asked questions
Have a question about this project?
Is it possible to paint on the dry spackle?