


Glass Gem Tree With Epoxy Resin

I had several wood rounds that were kicking around for awhile that I wanted to try a resin project on. Since it was a tree slice I thought I'd paint a tree with a sunset in the background peeking through the branches, nothing too difficult.
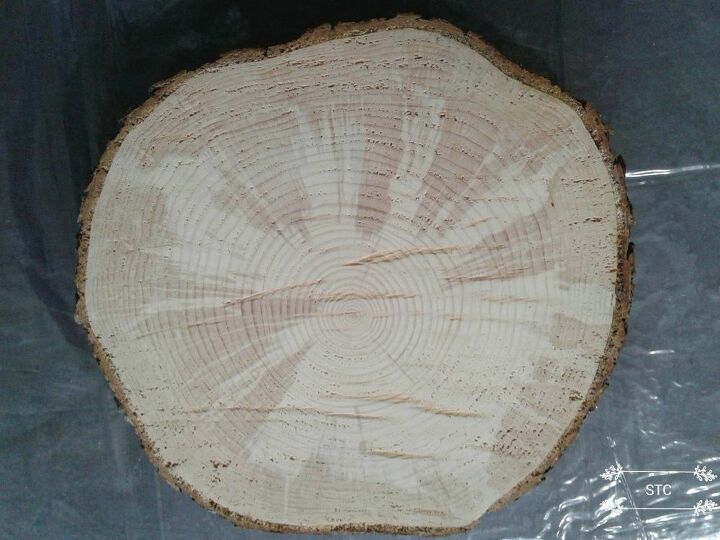
I gave it a low grit sanding with my sander because it was pretty rough in texture from being cut with a chainsaw. I didn't make it completely smooth because I still wanted it to be rustic and not perfect.
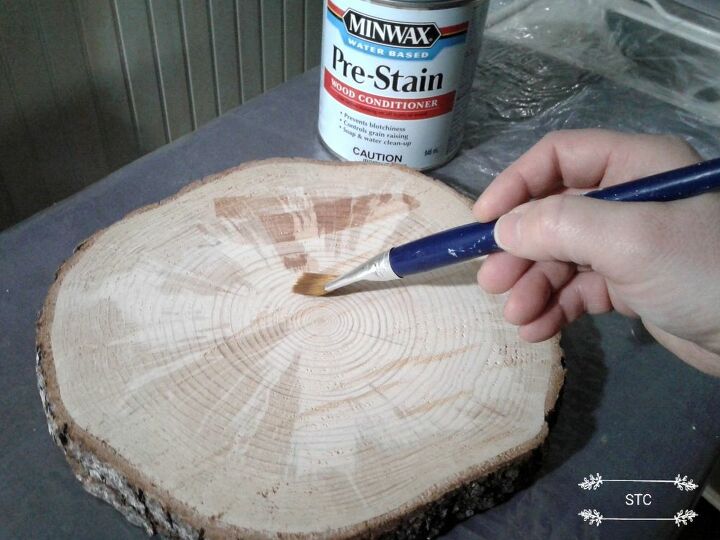
Because I had a fresh layerof wood now I chose to seal it with a water based conditioner before I started painting it.
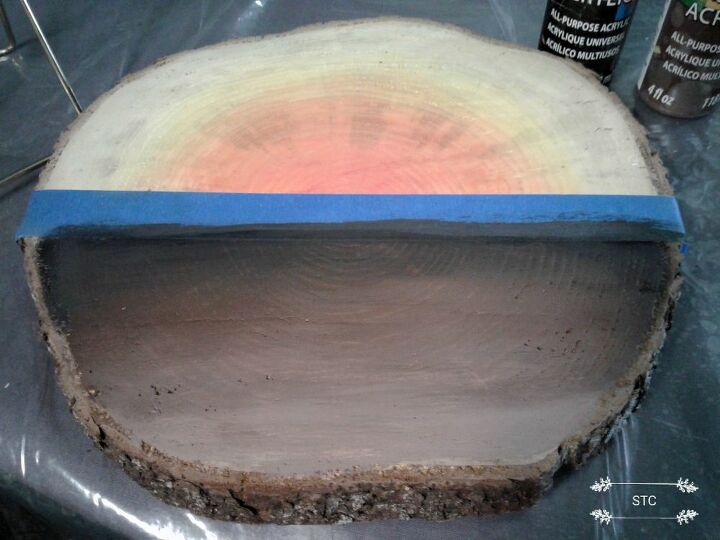
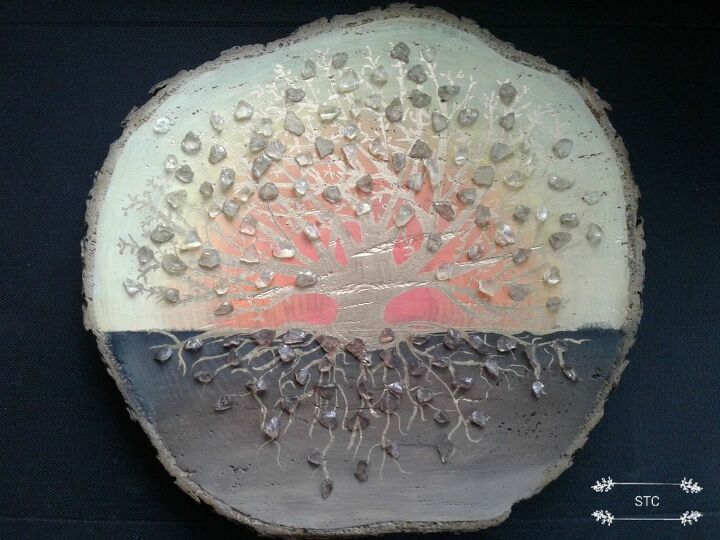
I divided the tree slice in half thinking I'd paint flowers or something in the bottom portion. The sunset I used orange and yellow craft paint in different intensities to create a fade out look, I kept my artists brush wet which allowed me time to do blending between the two colors. A little white was added to the yellow for the outside tone. The base I started dark and worked my way down to the bottom horizontally to taupe. I added black to my brown for the deepest color and a little white for the lightest color, again using a wet brush to blend.
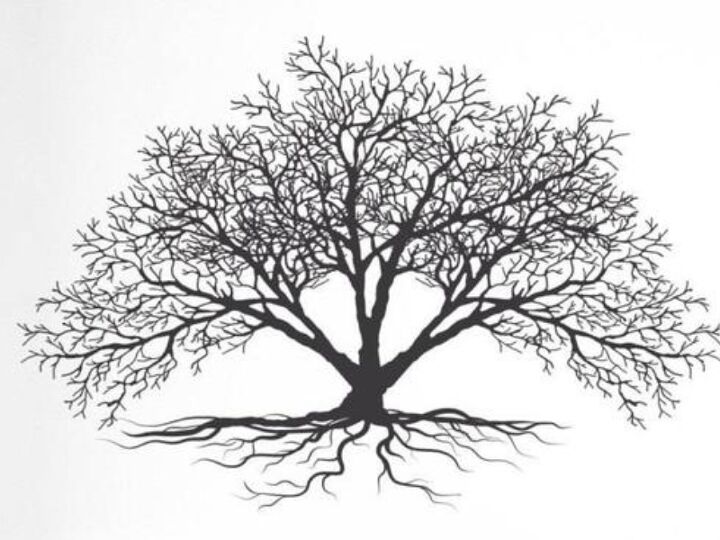
Then onward to do a random search for tree shapes, I wanted something full and rounded. I liked this one because it had a curve very similar to the wood round I was using. I'd use it to go by for my outline but then while I was searching I stumbled upon this!
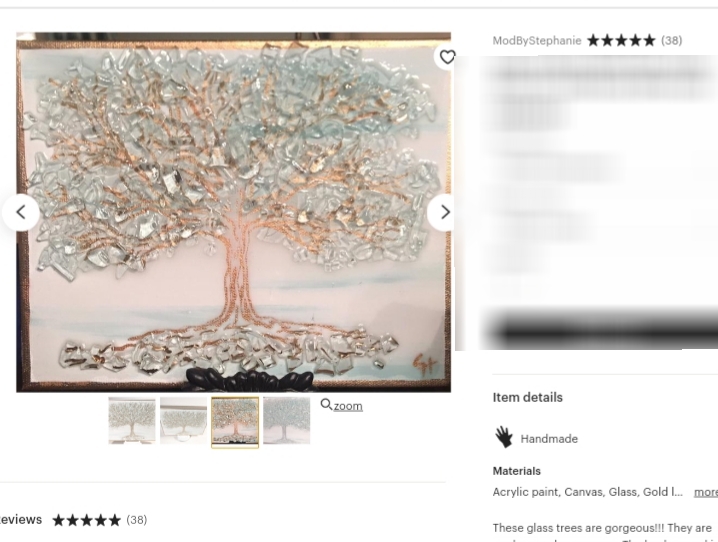
It was all shiny and gold and beautiful and it caught my eye so much so that I got to thinking, "I can do something like that on my tree slice". The wheels were moving now on the brain train!
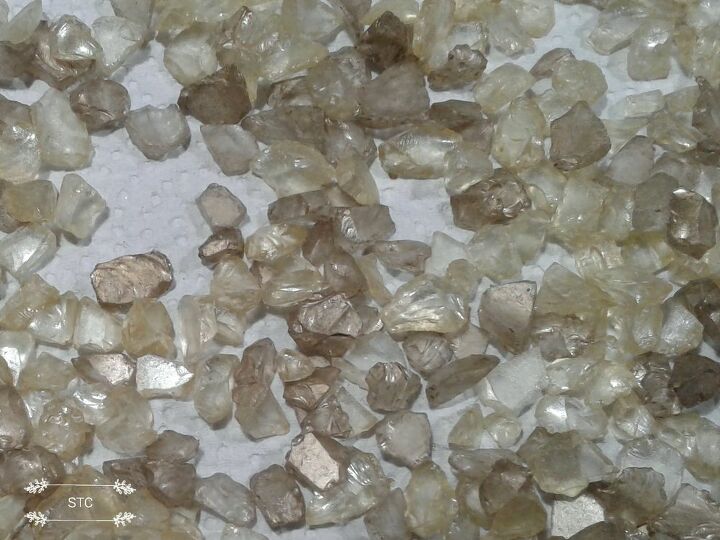
Well, well, well look what I had to use, glam shards that I bought at Michael's years ago for vase filler!
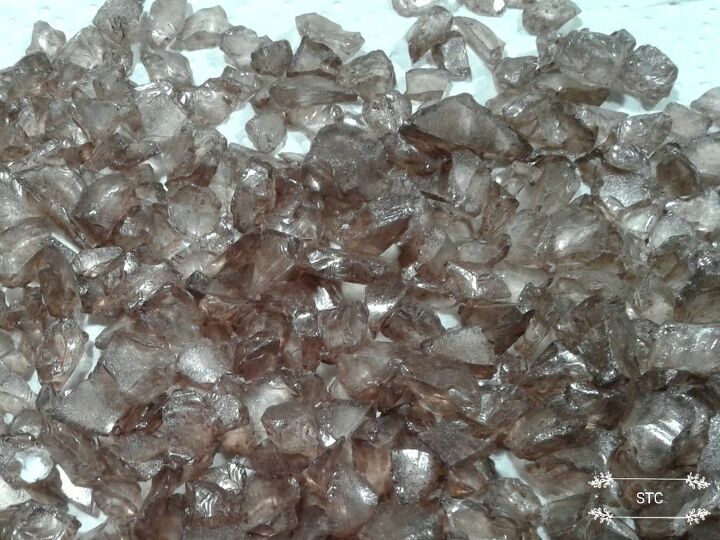
Best of all there were two different colors! I knew they'd come in handy for more than making a vase or candle look pretty!
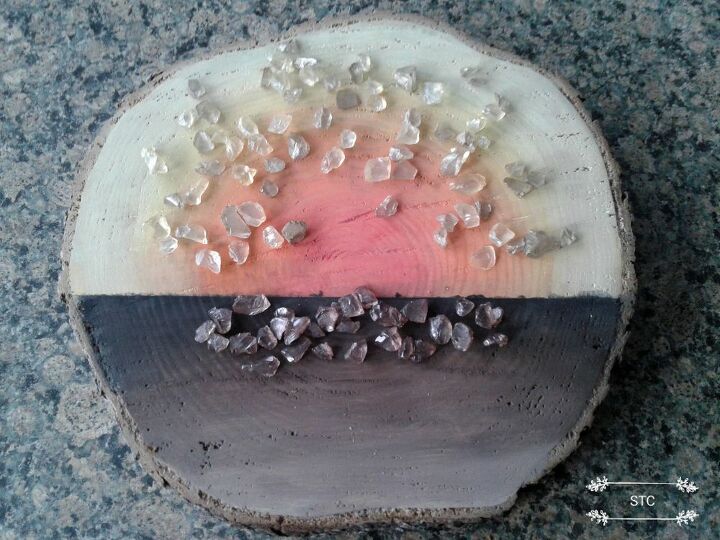
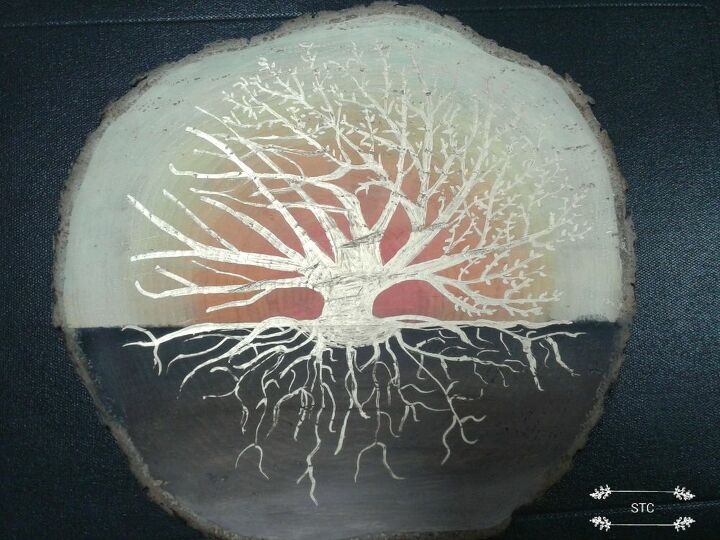
Can you picture it? Gold for the tree leaves and brown for the rocks and dirt! Now I could confidently go on to the next step which was the tree outline.
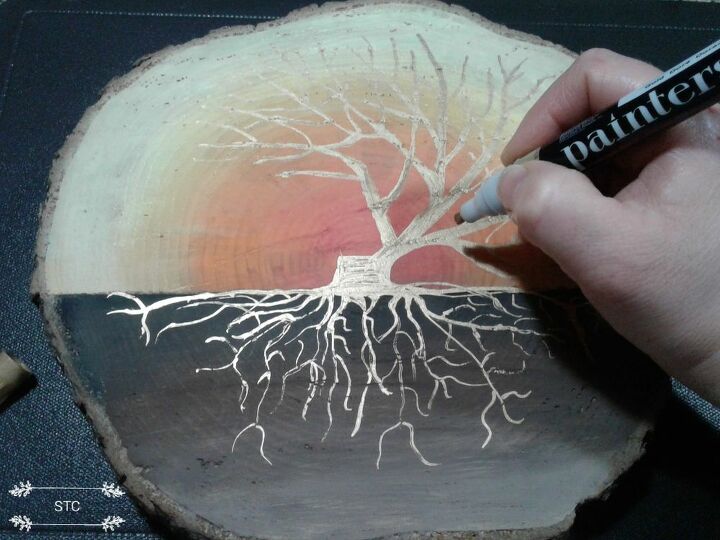
I used a gold paint marker, there's no right or wrong way to do this because afterall there are no two tree with limbs and branches alike! Your branches closest to the trunk will be a little thicker of course and the roots will be tinier than the branches. You can just follow an outline like I did or try a little practice on some paper first if you are unsure.
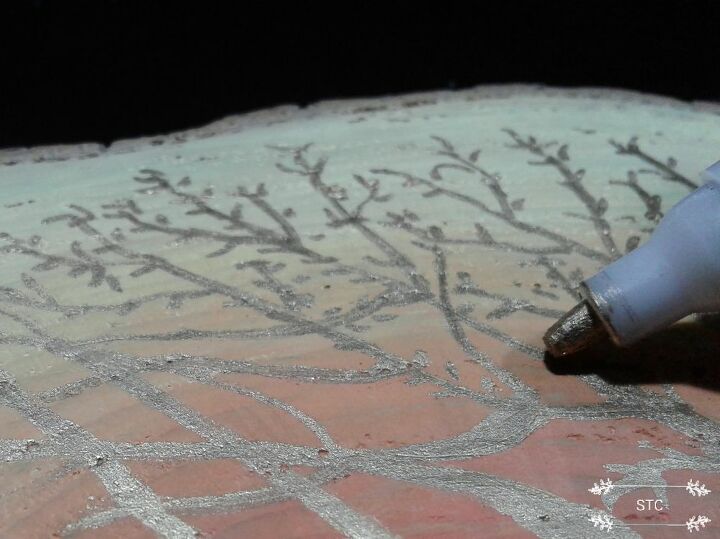
The leaves are just tiny dashes put in wherever there's branches, it's not hard.
Here's how the leaves look far off, now can you tell where I left out one or added in one extra? Exactly, I rest my case so don't fuss over it!
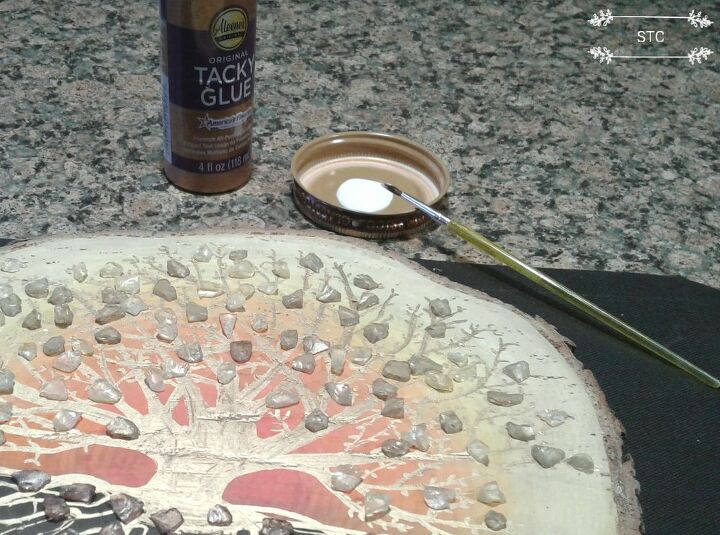
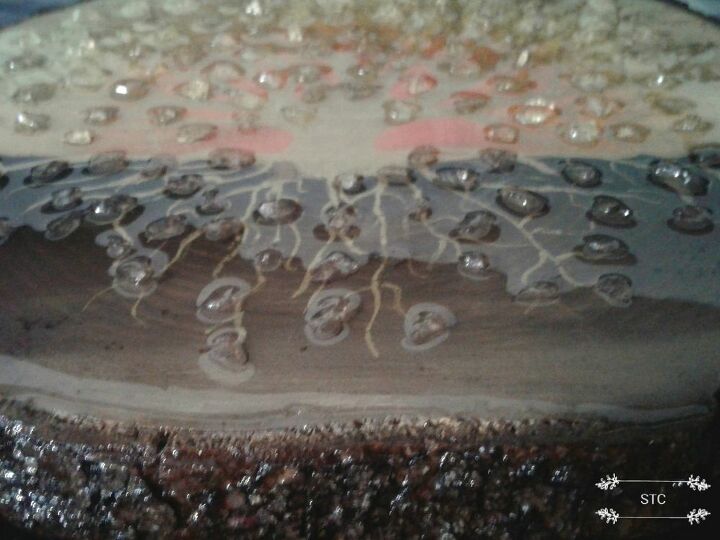
Next was adding the glass bits on, I used an artist's brush to put a tiny drop of Aleenes Tacky Glue to each piece.
Again don't fuss over the exact placement, just step back and see how it looks and you'll know what looks to be enough. Next is the exciting part....epoxy pour! I prepared a short video to show you how I prepped for it and this was only my second time using this product, so I'm still learning.
I realize now a lot of people suggest using a respirator when using epoxy, not necessarily because of the odour but because of the possible harmful chemicals in it. I can assure you that a respirator is on my to buy list for next time, safety first always!
Sneak peak, oh I can't wait to show you how good it looks!
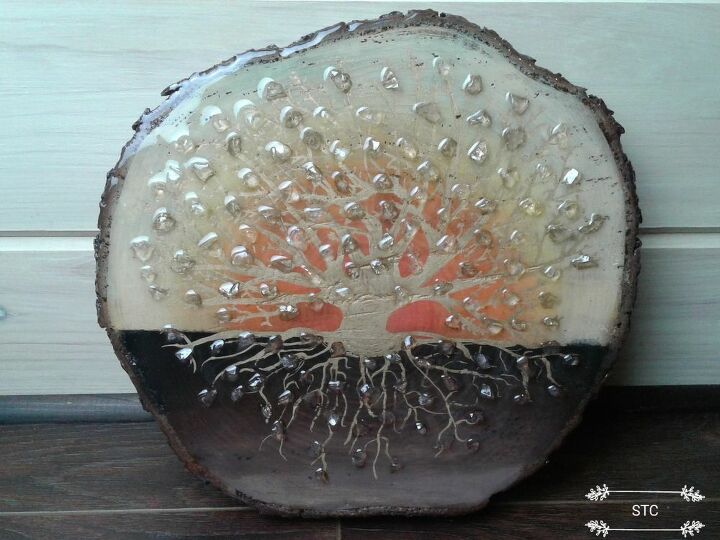
Now what do you think of my poor, little,old tree slice? Its not perfect but its pretty and I love it because it displays two of my loves...sunsets and trees!
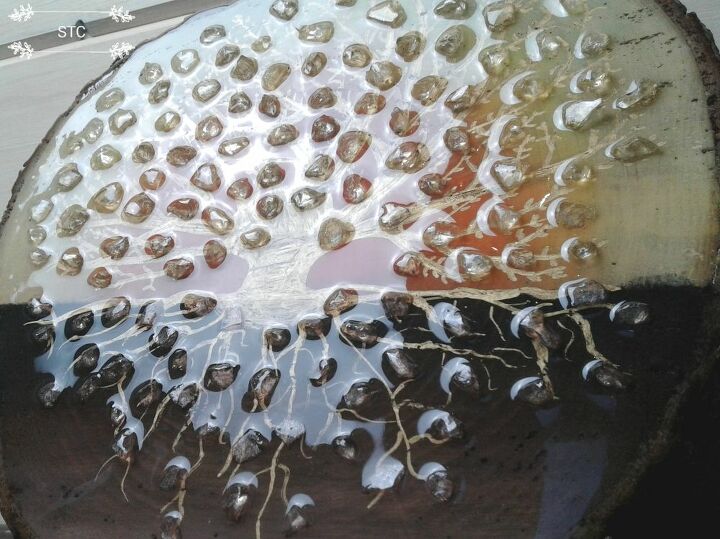
I found it hard to photograpgh and get a clear image because of the high gloss but the resin was very smooth and clear. The colors were altered a little but that's okay, they got intensified really.
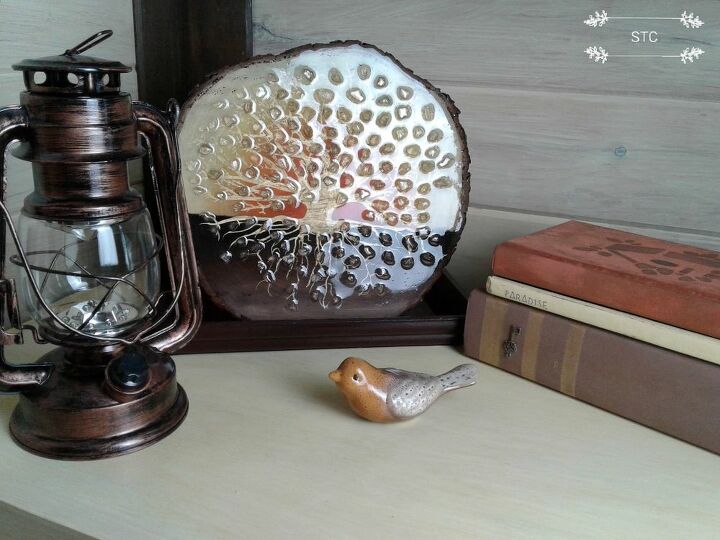
Can't have a tree without a little bird nearby waiting to perch in it!😁 I thought it really tied in well with the yellow and brown walls in our guest room. This bedroom has been featured in a previous Hometalk post if youd like to check it out follow the link [url=https://www.hometalk.com/diy/bedroom/bedroom-conversion-two-become-one-41696187
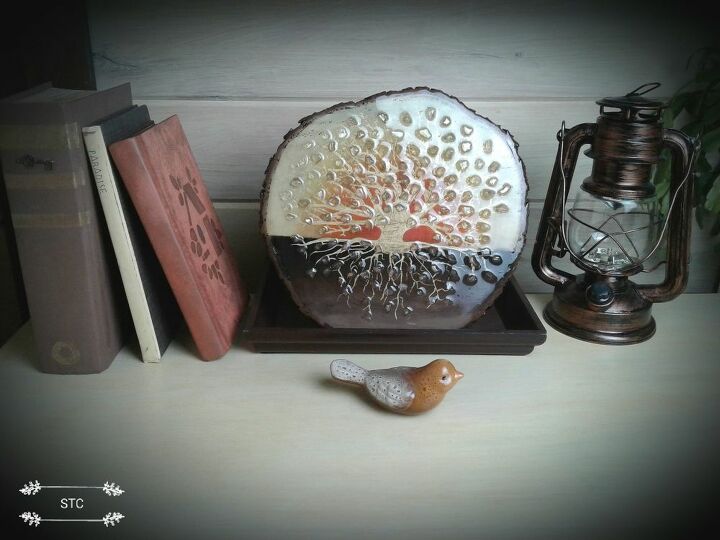
I hope you enjoyed my take on the glass epoxy tree and in my next post I'll share with you how I created the book stack seen here!
Resources for this project:
See all materials


Comments
Join the conversation
-
This is so cool and beautiful ... and agree, this project wouldn't be complete unless that little birdie was perched close by ... sweet!
Thank you for sharing AND inspiring!

-
Absolutely beautiful! Good job!


Frequently asked questions
Have a question about this project?
The tree on the Wood Slice is Beautiful, looking for ideas for my Daughters fall wedding, ..... hence the photo ?? The tree will be wonderful with them starting there own family tree!
Does the epoxy make it water resistant?
Love this and the tree is beautiful. Was that a stencil?