


How to Make a Decorative DIY Tray With Decoupage Flowers

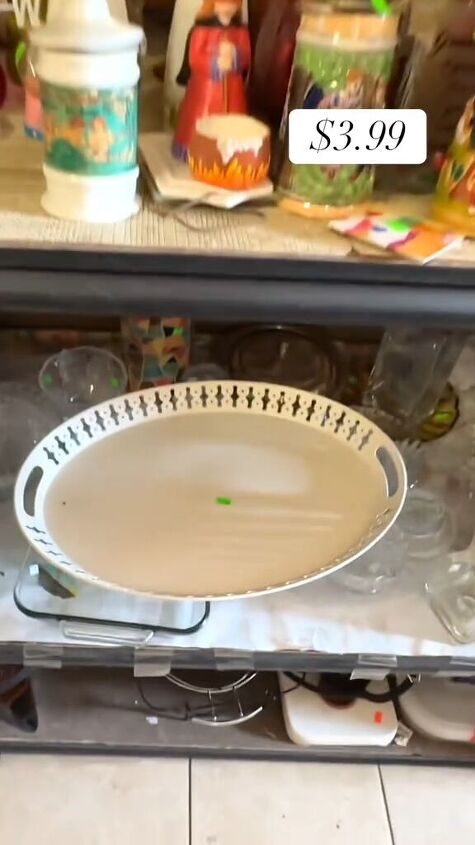
Looking for some decorative DIY tray ideas? Today, I'm excited to share a step-by-step tutorial on how I transformed a large white tray from my local thrift store into a stunning piece that reflects my style.
This project involves addressing rust spots, repainting, and adding a unique touch with beautiful blue and white roses. Let's dive into the details and create a one-of-a-kind masterpiece.
Tools and materials
- Large tray
- Fine grit sandpaper
- White paint
- Cardstock with flower pattern
- Mod Podge
- Sponge brush
- Scissors
- White spray paint/paint sprayer/paint brush
Table of contents
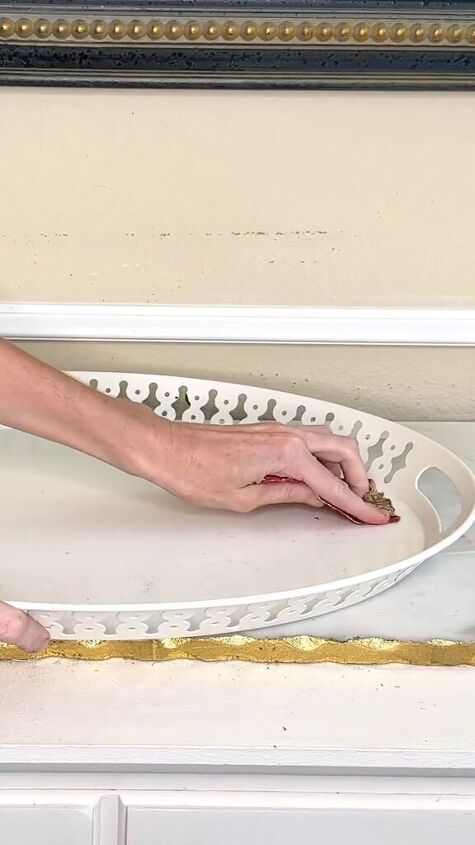
Step 1: Assess and Sand the Tray
Begin by examining your thrift store tray for any rust spots or imperfections. In my case, I identified rust areas that needed attention. Grab a fine-grit sandpaper and gently sand over the rust spots until they are smooth to the touch. This step ensures a clean and even surface for the upcoming paint job.
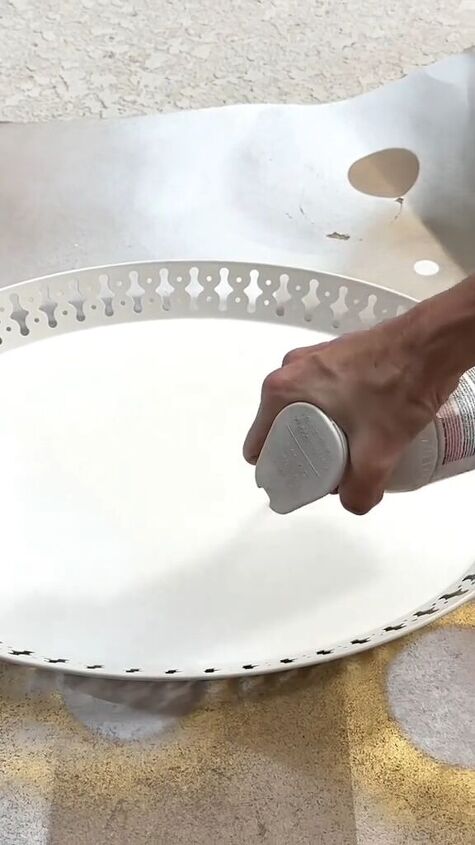
Step 2: Repaint the Tray
Now, it's time to breathe new life into your tray with a fresh coat of paint. Choose a white paint that suits your taste and apply it evenly over the entire tray. I opted for a clean white to maintain the tray's original charm. Allow the paint to dry completely before moving on to the next step.
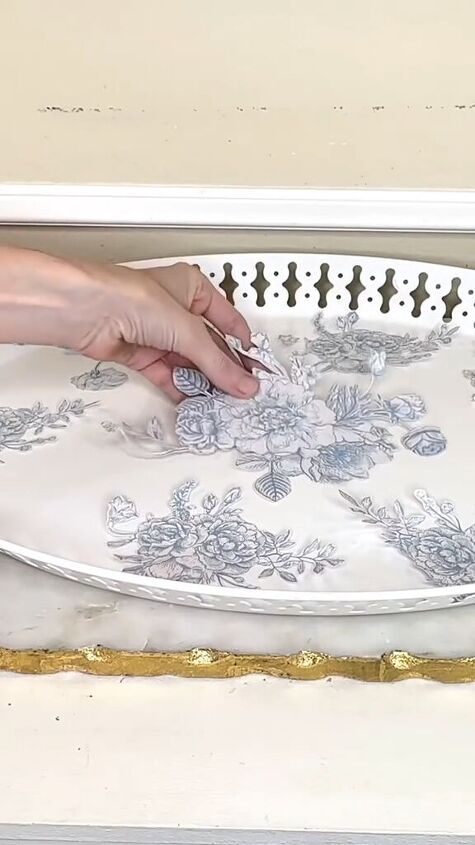
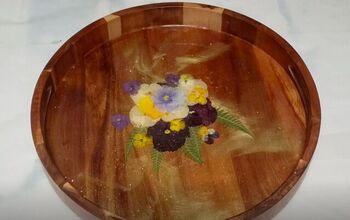
Step 3: Prepare the Cardstock Flowers
For a personalized touch, I decided to embellish my tray with blue and white roses cut from a cardstock pattern. Select a beautiful cardstock sheet from your collection, and carefully cut out the flowers. This adds a unique and artistic element to your tray.
Step 4: Apply Mod Podge and Attach Cardstock
Using a sponge brush, apply a layer of Mod Podge to the bottom of the tray. Carefully place the cut-out cardstock flowers over the Mod Podge, ensuring a secure fit.
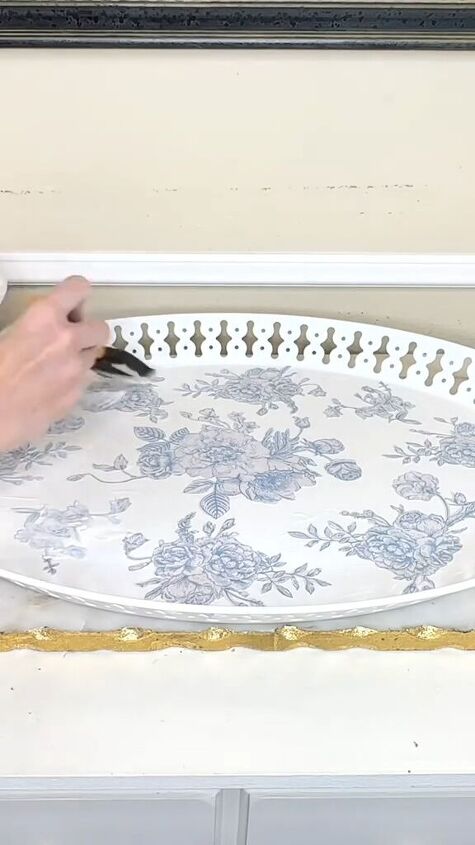
Once positioned, add another layer of Mod Podge over the flowers and the entire tray. This acts as a sealant, protecting your design and giving it a polished finish.
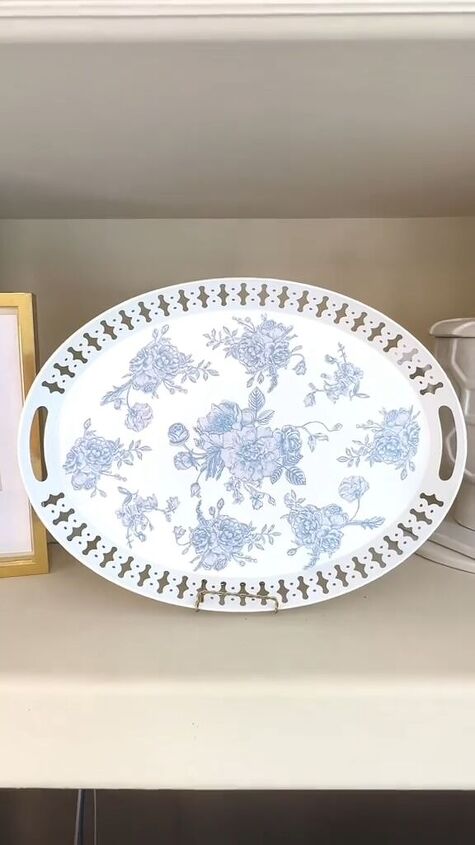
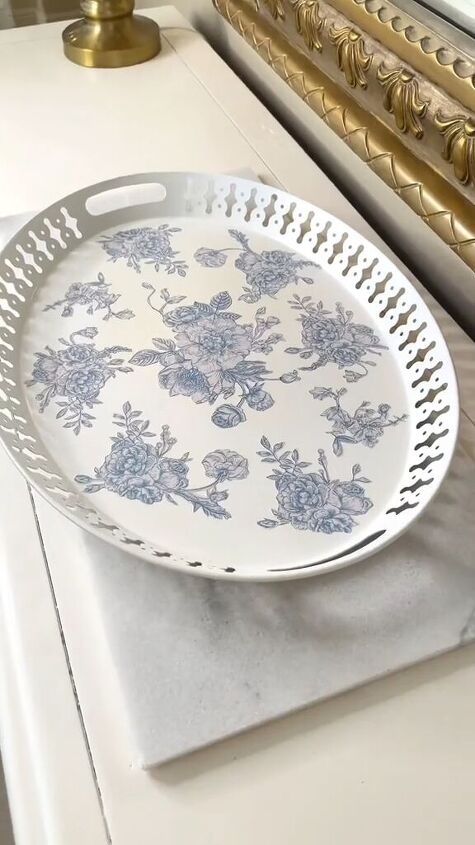
Step 5: Admire Your Customized Tray
Now that you've completed the transformation, take a step back and admire your gorgeous, customized tray. The combination of a refreshed base, elegant white paint, and the added flair of blue and white roses makes for a truly unique piece.

DIY tray makeover
Thrifting allows us to discover hidden treasures and unleash our creativity. By taking a simple tray and giving it a personalized makeover, we've turned an ordinary find into a decorative custom tray.
This project not only showcases our DIY skills but also emphasizes the beauty of making something uniquely ours. Leave me a comment to let me know how your decorative tray DIY project turned out.
Follow @lisa_burningham on TikTok for more DIY ideas.


Frequently asked questions
Have a question about this project?