


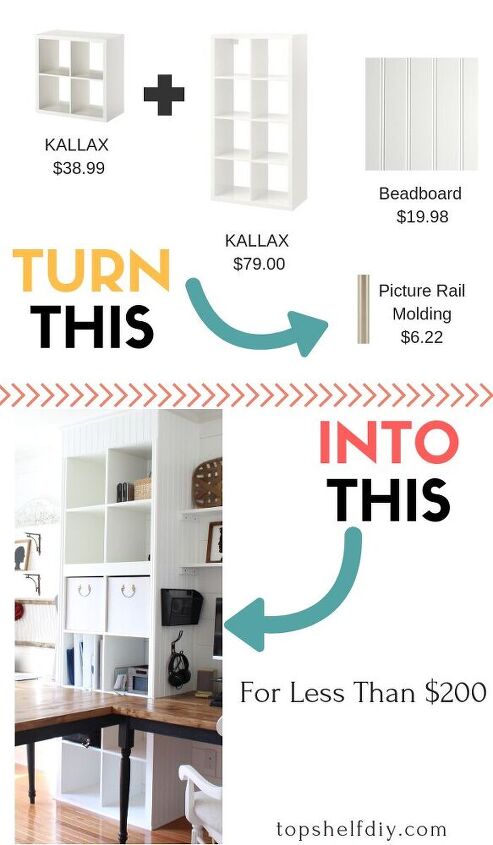
Trick Your Kallax: 8 Feet of Floor to Ceiling Storage
In the following steps I will show you how I took two blank slate Kallax units and turned them into a one-of-a-kind piece.
This project is perfect for getting comfortable using a table saw and for learning the ins and outs of custom trim!
Supplies Needed for Your Kallax System
- 1 Large Kallax Unit (8 cubbies)
- 1 Small Kallax Unit (4 cubbies)
- 1 set of LINNMON hardware (if you're adding a desk)
- One large sheet of Beadboard ripped to two sheets 15-3/8" wide by 8' tall. The excess beadboard will be used for your header. *If your ceiling is taller than 8 feet you may need a second sheet of beadboard.
- Wood glue
- Chair rail molding
- A scrap piece of 1x6 to span the width of your small Kallax
- Scrap 1/4" plywood to cover the front of your cubbies
- White paint (mine is Behr Ultra White in Semi-Gloss, which I use on pretty much everything).
- Spackle to cover nail holes
- Paintable Caulk (I like DAP!) + caulking gun
- Nail gun
- 1-1/4" Brad nails
- Crown molding of your choosing
- Miter saw
- Base cap shoe molding
- Accessories: cubby bins, hooks, wire baskets
Okay I know this list is intimidating but I promise it's easier than it looks.
Putting Your Kallax Together
- Start by assembling the large and small Kallax units according to the instructions. I'm actually one of the few people who finds their instructions amusing/helpful.
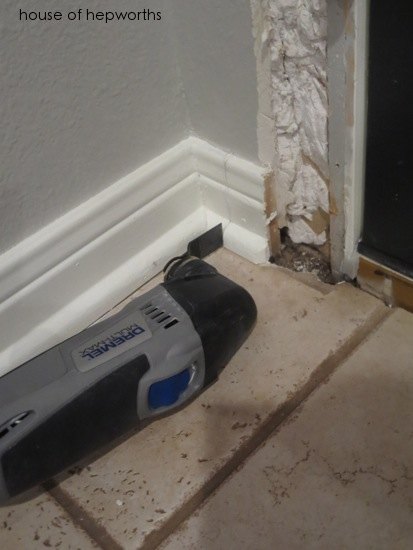
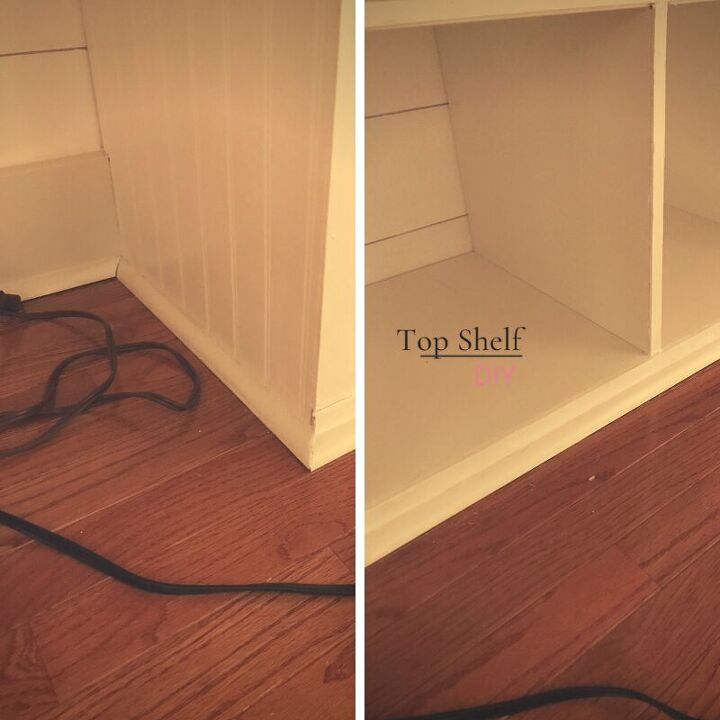
- Position your large Kallax where you want it in the room. I removed the entire baseboard prior to this step. If you only want to cut out a notch around where your Kallax unit will be going, I recommend an oscillating tool. See below.
3. Set your large Kallax unit in place. Stack your small Kallax on top of the large one like this.
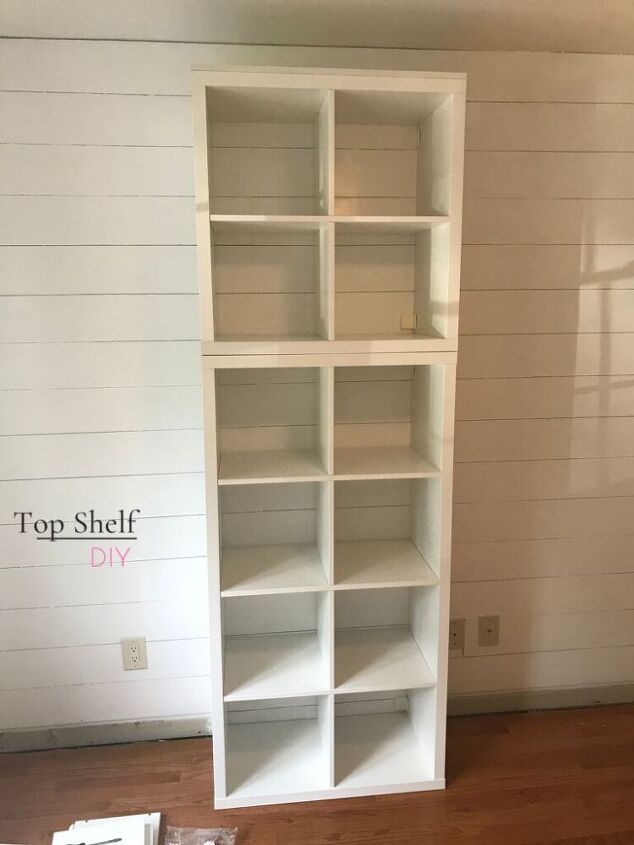
4. Once everything is positioned where you want it, anchor your Kallax units to the wall using the assembly pieces provided by Ikea.
5. Next, attach two long pieces of beadboard to the sides of your unit. If beadboard isn't your thing, you can wrap your Kallax in something else, like reclaimed wood or 1x6 boards.
I had the guys at the lumber mill rip down my boards to 15-3/8" wide since that is the depth of the Kallax. I kept my ripped boards 8 feet long (how it comes in a sheet) since my ceiling is 8 feet tall. I did have to trim it just a smidge because my ceiling isn't perfectly level (shocker!).
Attach beadboard to both sides of your Kallax with wood glue. Secure with brad nails.

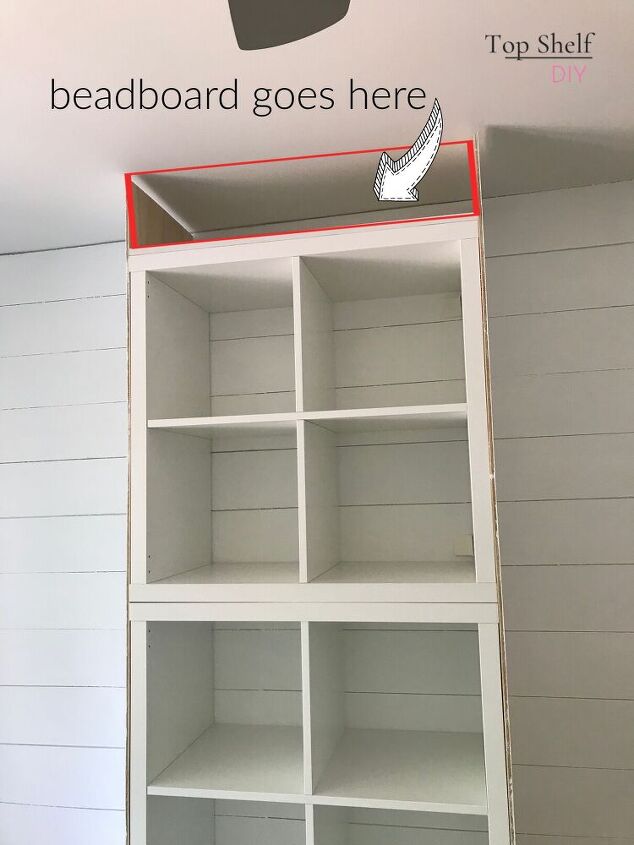
6. Before adding any special trim, I added small 2x4 supports inside the gap between the Kallax and the ceiling. Again, I wanted a good frame for the future crown molding. Not sure much how it helped, but it certainly didn't hurt!
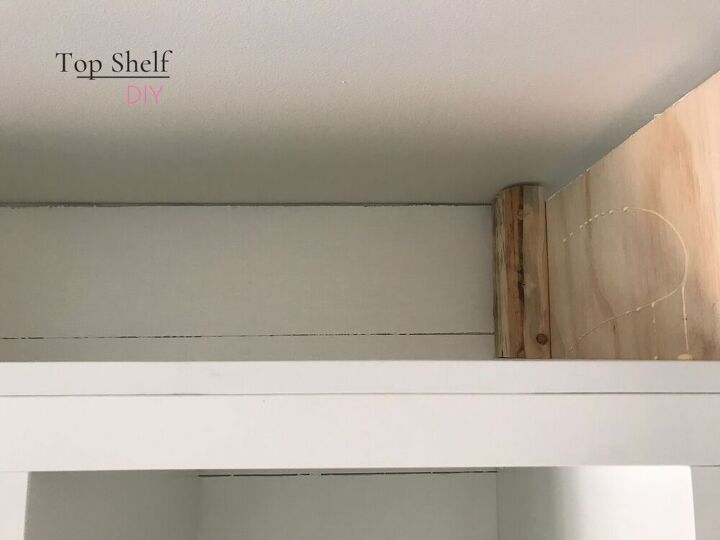
7. Next I added beadboard to the front of my Kallax to cover the gap below the ceiling. You're going to nail it into that small piece of 1x6 you added to the top of your small Kallax earlier. My piece was 30-3/4" across, but measure the width of your gap just to be sure.
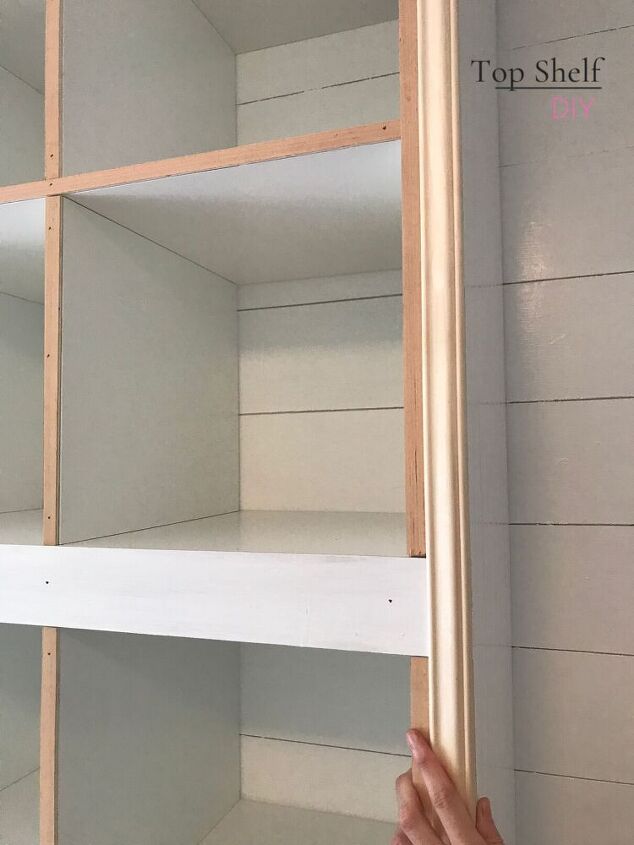
8. Now comes the fun part. After you've secured your top board, continue adding trim made from scrap plywood ripped down by your table saw. The pieces will look something like this (measure to verify):

9. After you've added all of the trim from Step 8 you're going to add the chair rail molding listed in the supplies list to just the sides of your front. Trim to length and secure with wood glue/brad nails. You can already tell how much better it's starting to look with all these layers of trim!
10. Now it's time to cap off the top and bottom of your unit. I added cove molding all around the top of the unit.
You can see here how Kallax The Great looked once the crown was added. Everything got a coat of paint as well which I will describe in the next few steps.

The last trim you're going to add is a small piece of shoe molding (also know as base cap) around the base of your Kallax. The easiest way to add base cap is to cope your inside corners and cut your outside corners at 45-degree angles with your miter saw.
11. Now that all your trim is in place, it's time to give everything a layer of frosting. Fill in all of your nail holes with spackle, and fill in all the gaps around your strips of trim with caulk. Just caulk, caulk, and caulk until everything is filled in.
12. Once your spackle has dried, sand down your surfaces so everything is smooth. Make sure the caulk is dry too. Now you can finally paint! Paint, paint, paint.
13. The next step is completely optional, but I really wanted a three part desk system and didn't like the plain looking desk suggested with the LINNMON hardware.
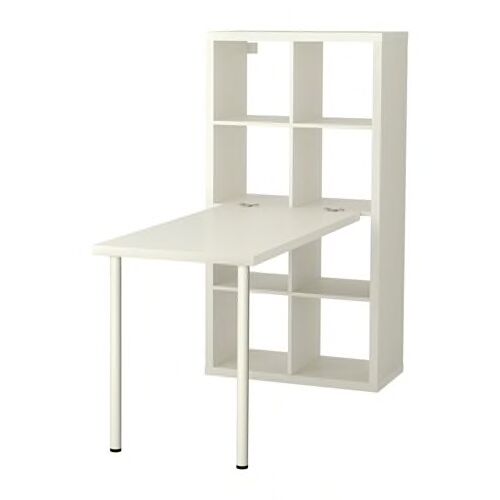
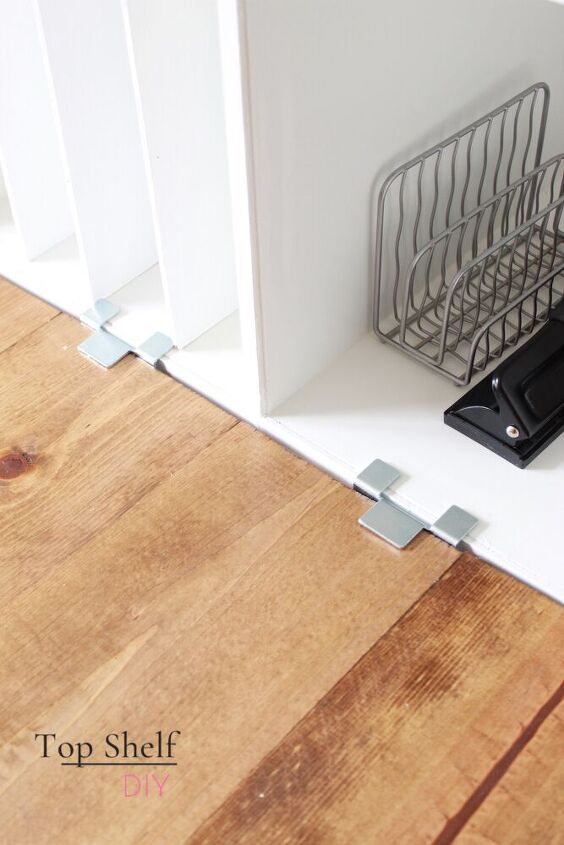
Lucky for me, the LINNMON hardware works with any kind of desk system. It screws right into your wood surface. Here's how it looks at the attachment points.
14. You've made it to the end! Give yourself a pat on the back, that was a lot of steps! This is the last part (and fun part) -- add bins, hooks, mail slots -- basically anything that's going to make your life easier.
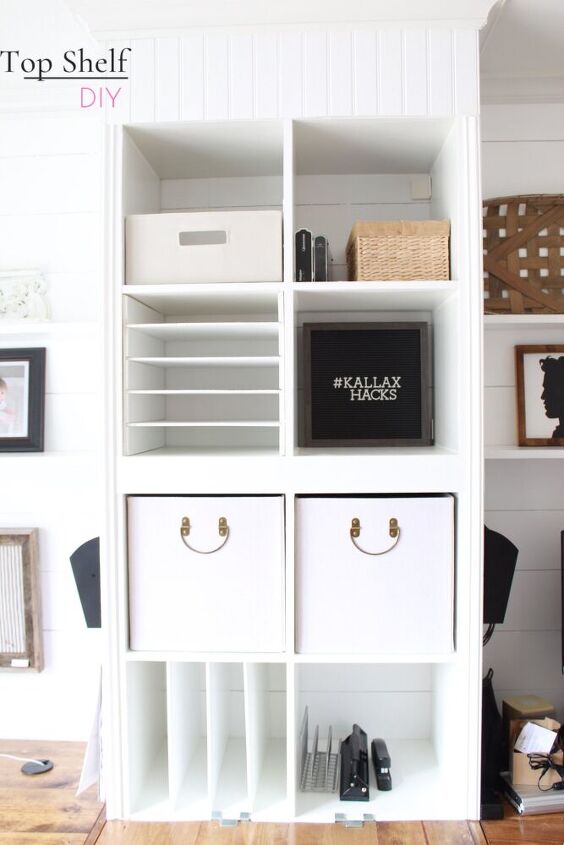
And yes, I had to empty out these slots for staging purposes. Normally they are STUFFED with important files, business cards, and the like. That's the point!
Cheers,
Erin

Comments
Join the conversation
-
I’m inspired to do something similar to this, but I think I’ll make a base to sit the cubbies on rather than having the empty space at the top. That way anything I store on the bottom shelves won’t be so close to the floor.
-
The file slots and paper storage units - is there a kit for this or did you make them yourself. I really need something like this, but at my age and physical limitations, I'm beyond woodworking anymore. Any ideas will help - thank you.


Frequently asked questions
Have a question about this project?
Great job!!! Thank you for sharing. Did you think to put stay open hinges where the empty space is to have a hidden place? I don't think you would need to add a top to it to do this.